
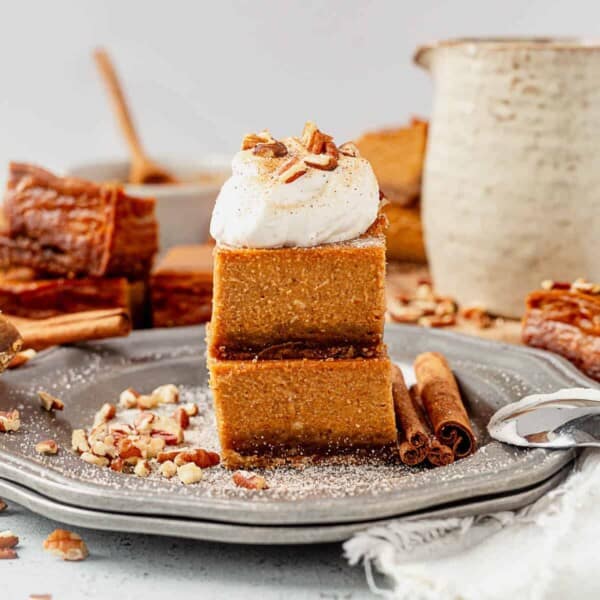

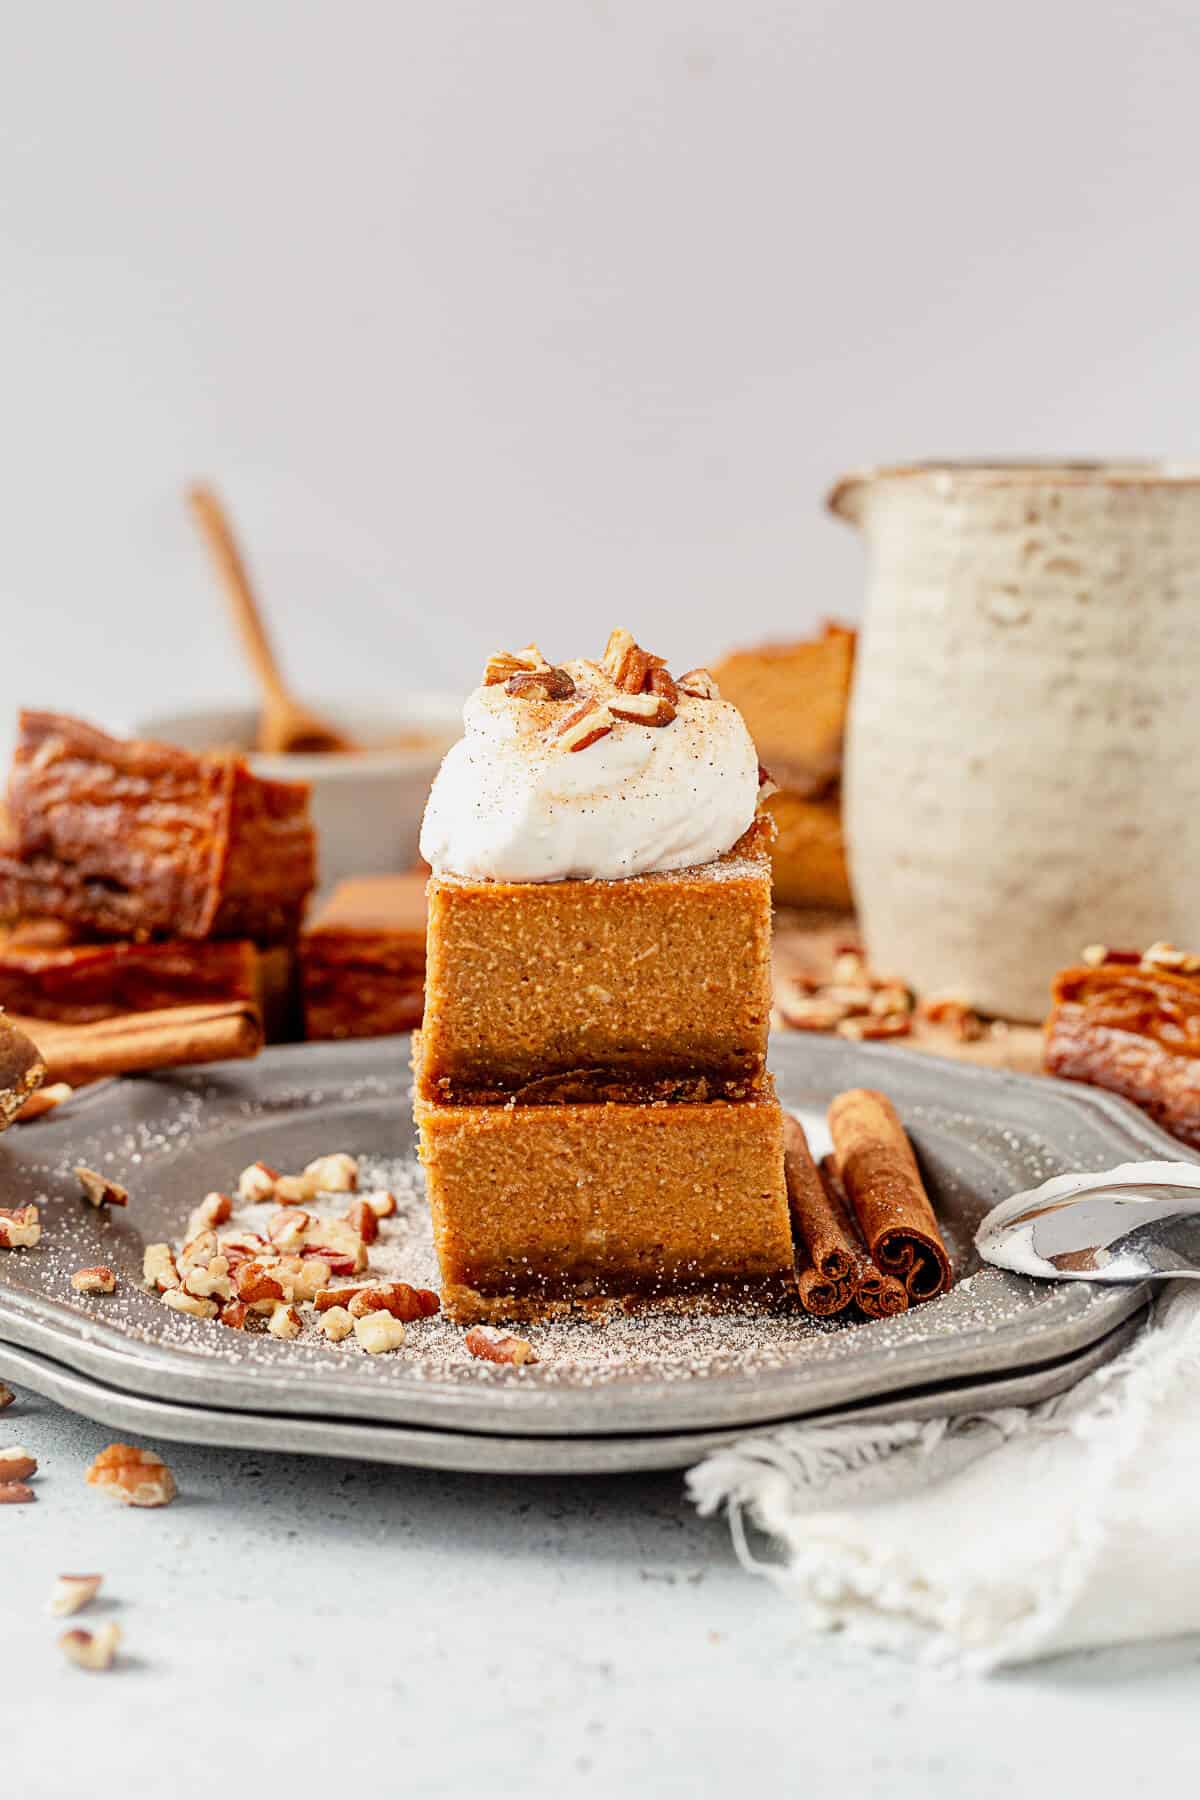
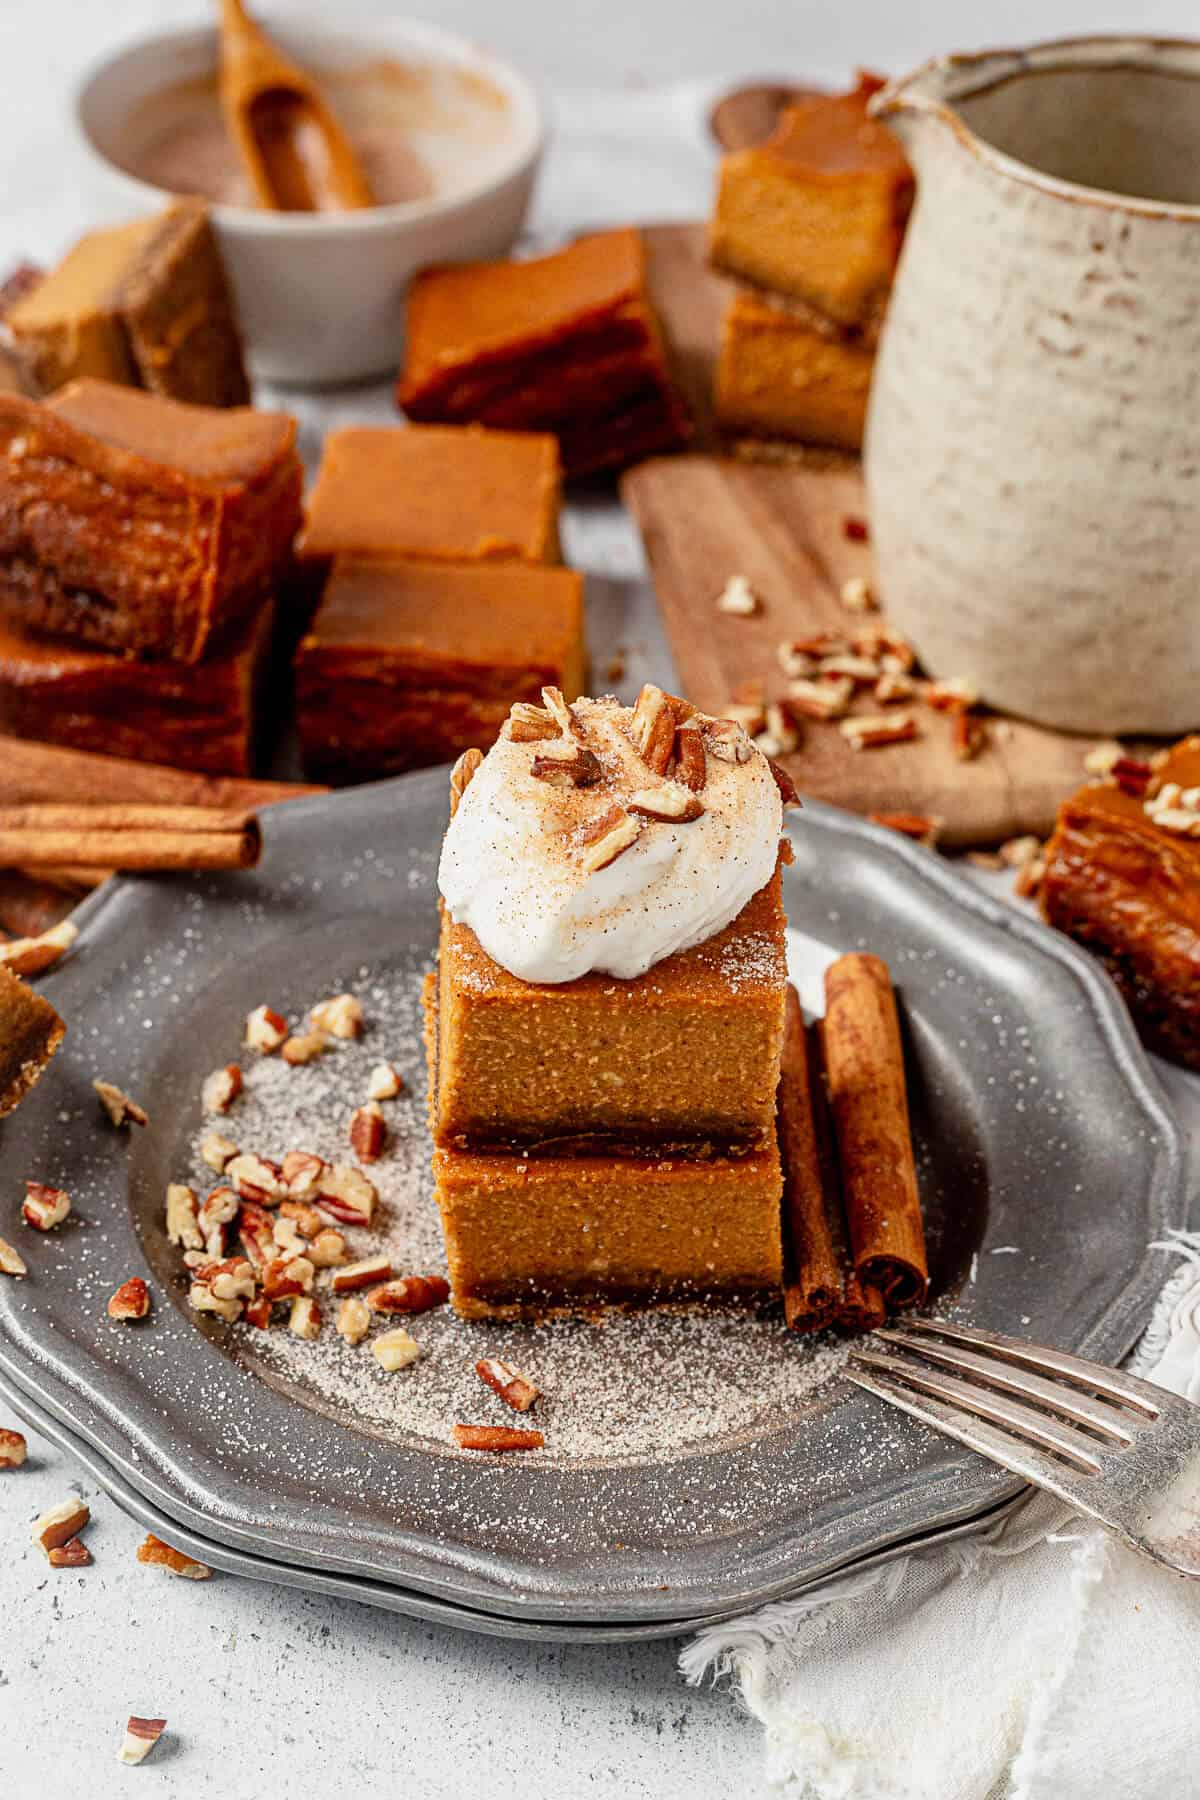
A Crowd-Pleasing Twist on Classic Pumpkin Pie!
If you’re craving pumpkin pie but don’t want the hassle of rolling out dough, these pumpkin pie bars are your new go-to. They deliver all the silky, spiced pumpkin flavor you love, with a bold gingersnap crust that always steals the show.
I actually prefer these over traditional pumpkin pie because they’re so easy to make for a crowd. Every time I serve them, someone asks for the recipe!
Here’s why you’ll love them too:

- No pie dough required: just pulse cookies for the crust.
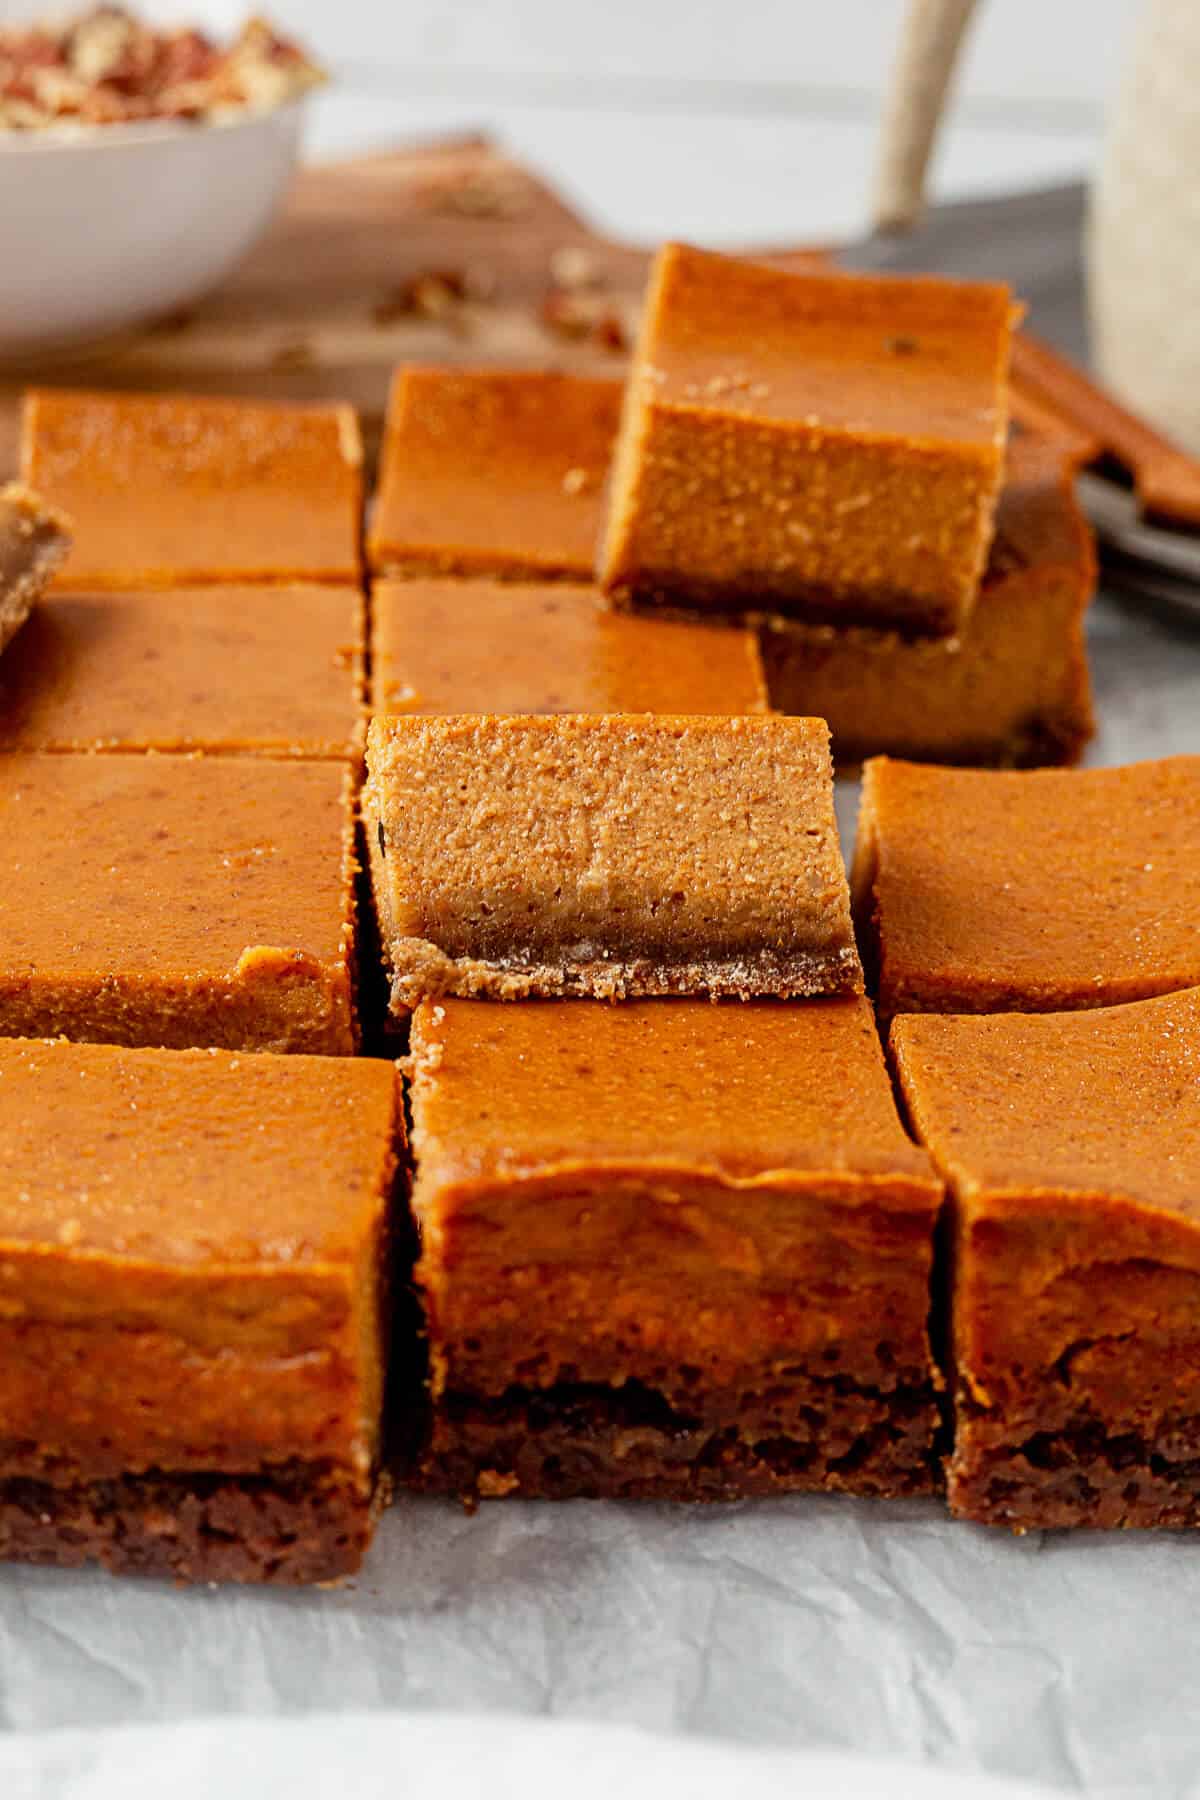
- Feeds a crowd: slice into 16 squares for easy serving.
- Rich + creamy filling: smooth pumpkin custard with warm spices.
- Make-ahead friendly: chill, slice, and serve when you’re ready.
Looking for more pie? Try chocolate chip pie recipe, pecan pie cobbler, or gluten-free dutch apple pie.
Reader Reviews
⭐️⭐️⭐️⭐️⭐️ “These were delicious! Everyone loved them at Thanksgiving this year. The crust was the game changer. Love!”
Ingredients You’ll Need
Here’s a quick look at the pantry staples you’ll need. Full amounts are listed in the recipe card below.
- Gingersnap cookies: the spicy-sweet crust is what sets these bars apart! (Use gluten-free gingersnaps if needed.)
- Butter: melted, to bind the crust.
- Flour + sugar: helps the crust hold together.
- Pumpkin puree: use 100% pumpkin, not pumpkin pie filling.
- Brown sugar: adds sweetness and depth.
- Pumpkin pie spice: store-bought or homemade.
- Eggs: for custard structure.
- Half-and-half or cream: creates that silky-smooth texture!
Optional toppings: homemade whipped cream, pecans, cinnamon sugar, or vanilla ice cream.
Do you have extra pumpkin pie spice? Use it in pumpkin pie overnight oats, gluten-free pumpkin muffins, or vegan pumpkin cheesecake bars.
How to Make Pumpkin Bars with Gingerbread Crust
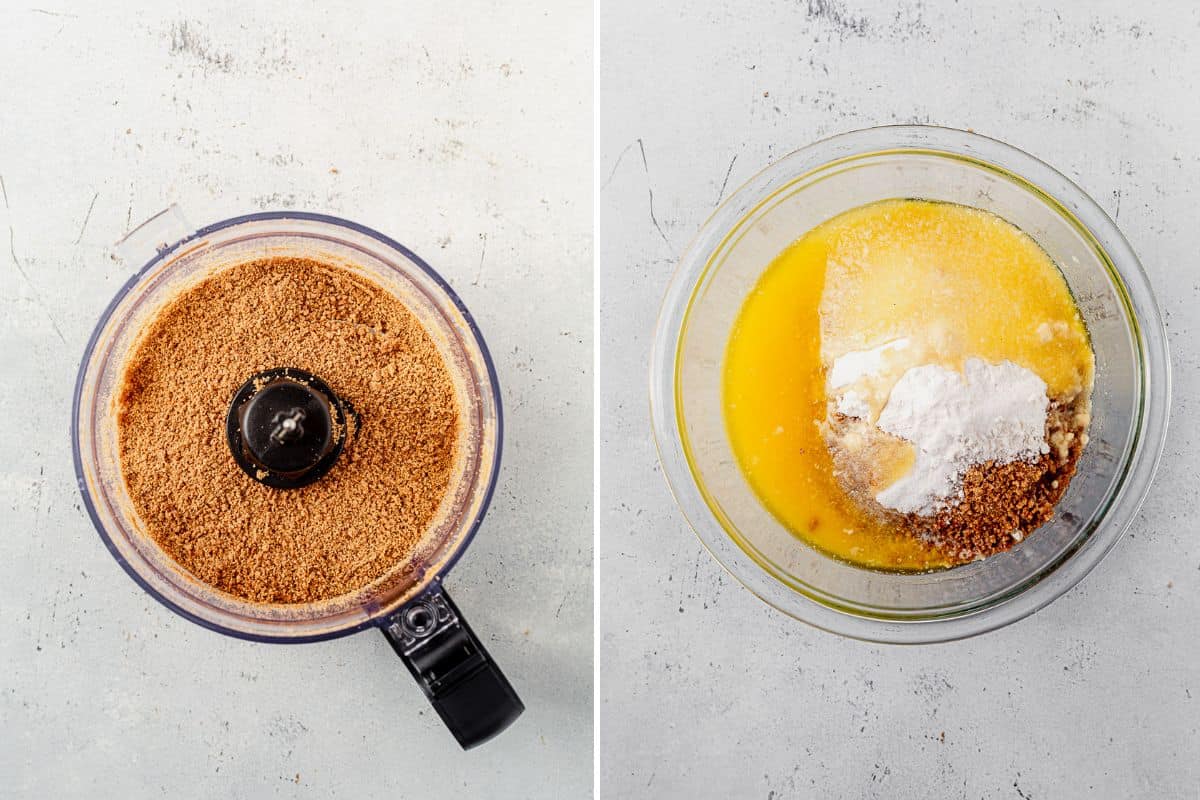
- Crush the gingersnaps finely in a food processor or high-speed blender. Add the crust ingredients to a bowl.
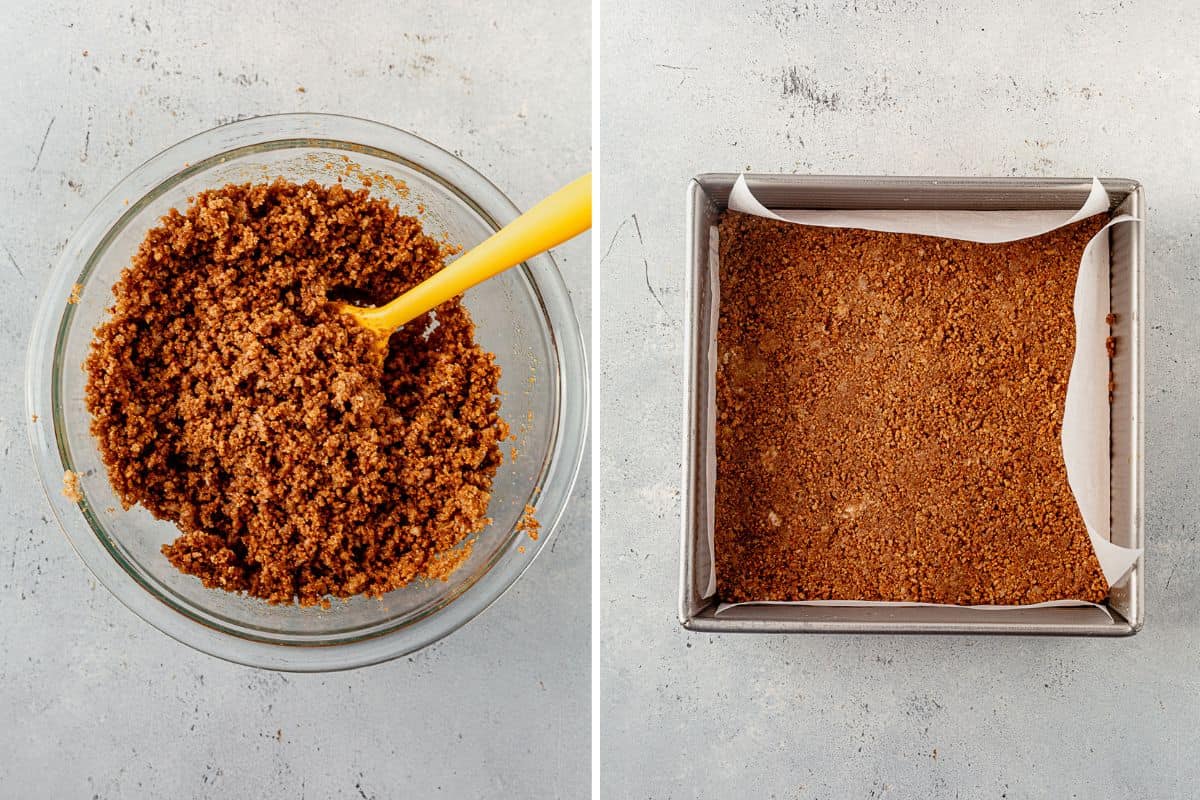
- Make the crust. Mix the ingredients well then transfer to a parchment-lined baking pan. Press the crust down firmly into an even layer in the bottom and along the edges of the pan. Bake for 12 minutes at 350°F.
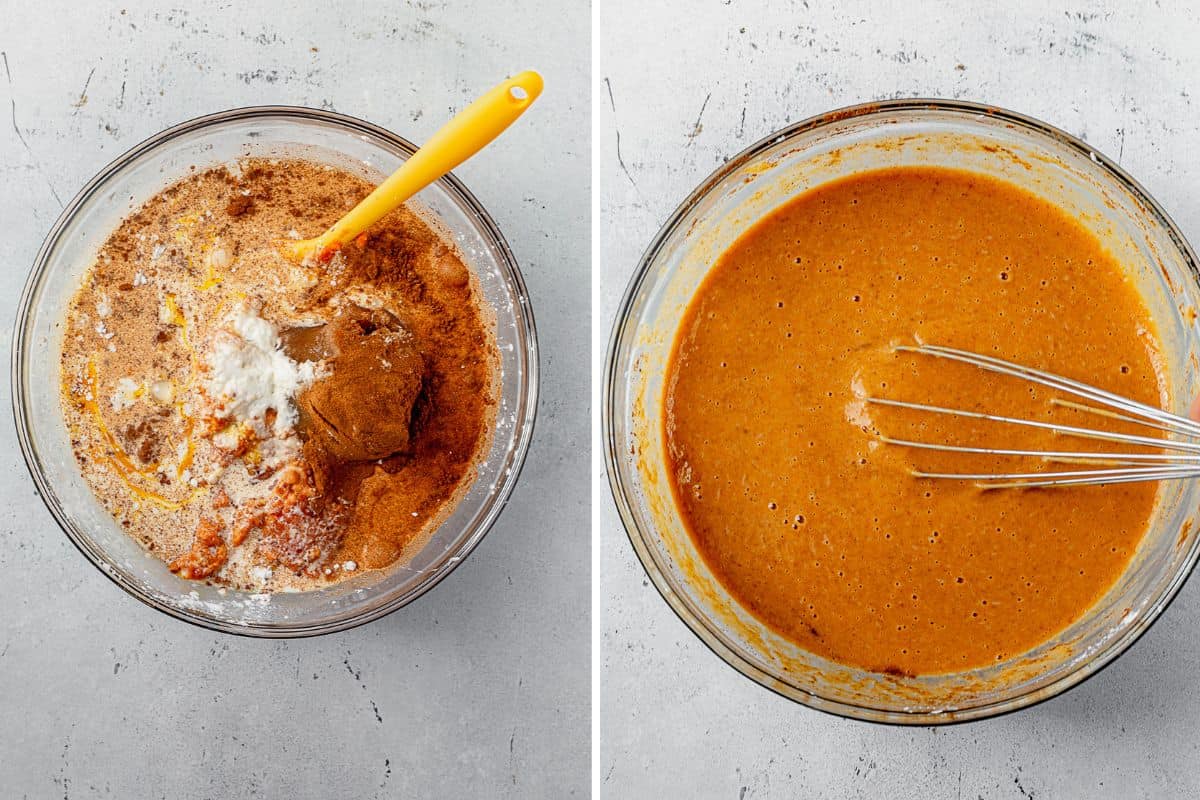
- Make the filling. Whisk the filling ingredients together until smooth.
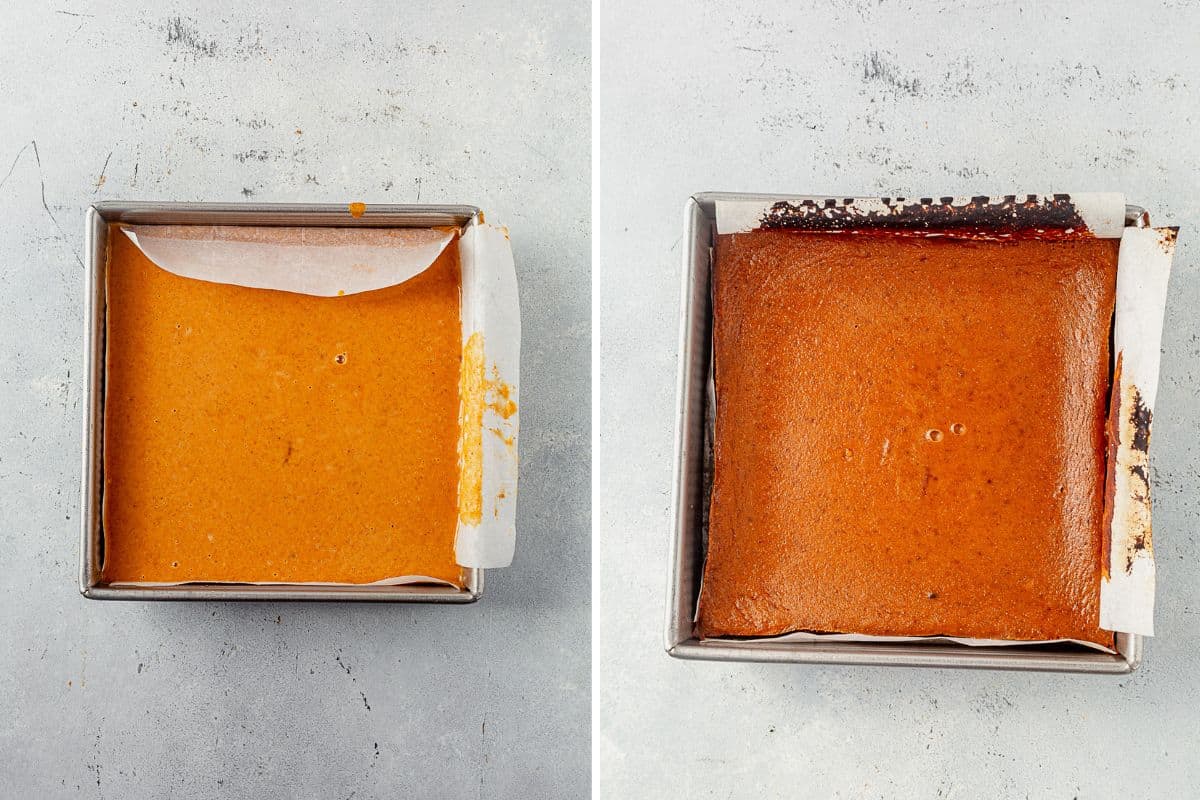
- Bake: Pour the filling overtop the crust and bake for another 50-55 minutes, until the center is set.
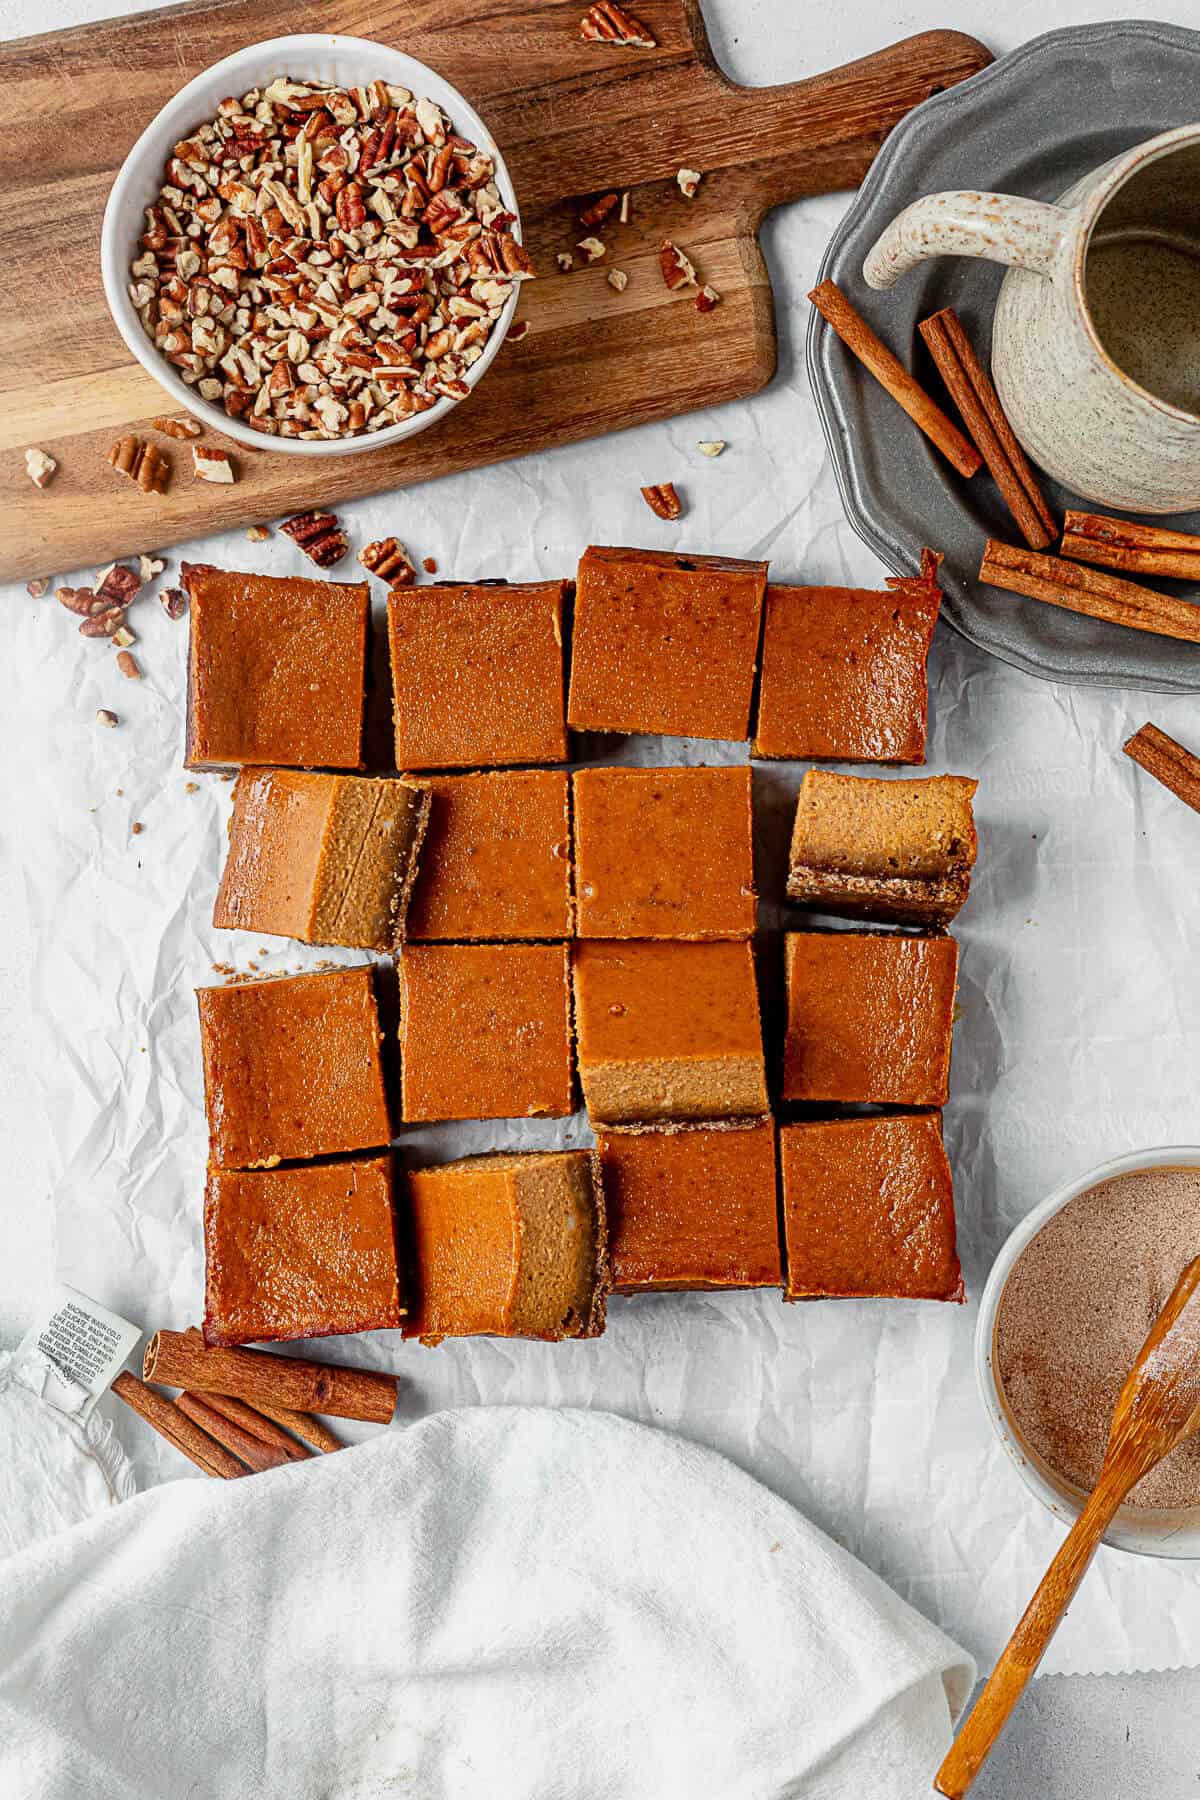
- Serve: Allow the bars to cool completely before removing them from the pan and slicing them into squares.
Tested Tips & Tricks
- Room temp eggs mix in more smoothly for a silky filling.
- Foil tent if the crust or edges are browning before the center is done.
- Chill before slicing and use a hot knife to slice for perfectly clean cuts.
Variations & Substitutions
Gluten-free pumpkin pie bars: We’ve tested this recipe with Bob’s Red Mill gluten-free baking flour and it was delicious. The filling is naturally gluten-free!
Dairy-free: Use vegan butter or coconut oil in the crust. Although I haven’t tried it, cashew cream should work in the filling instead of half and half.
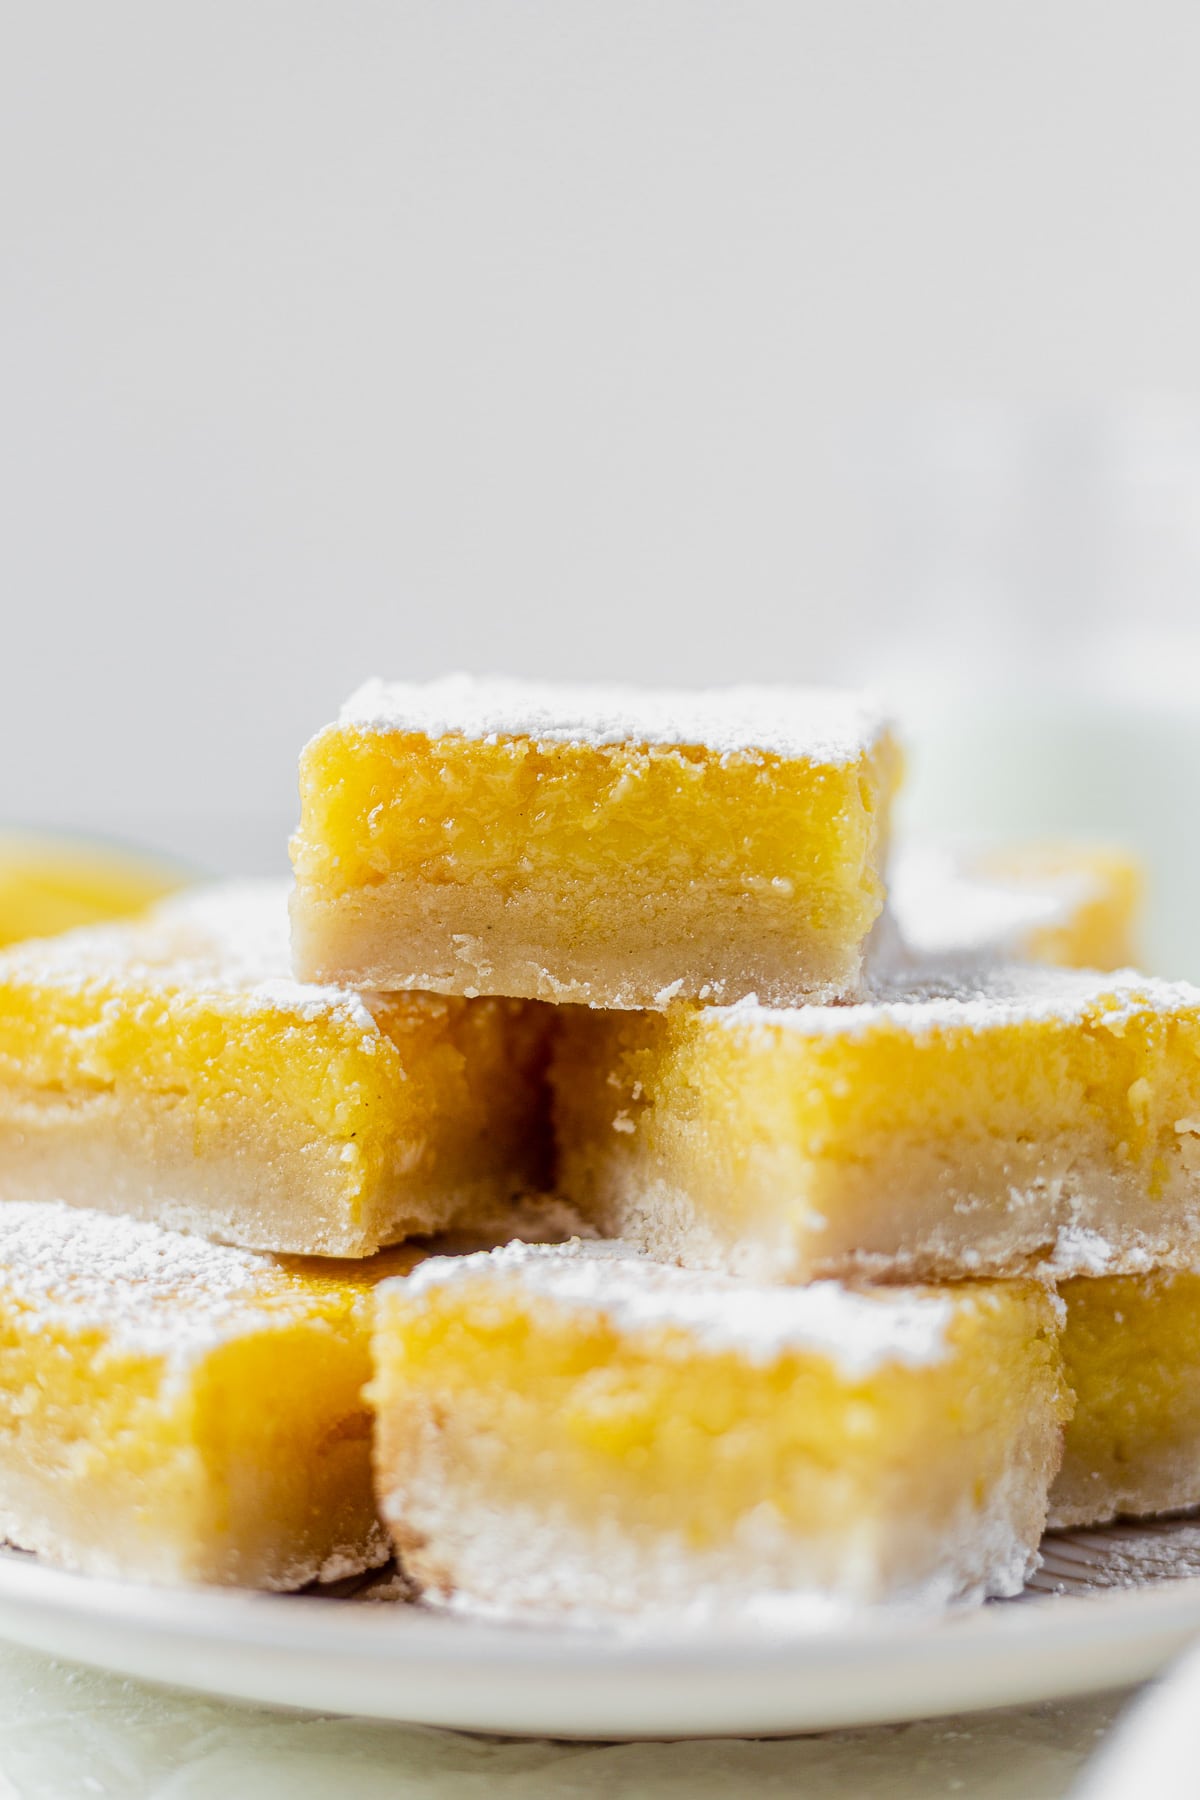
Shortbread crust: Use the shortbread crust in my gluten free lemon bars instead of gingersnaps
Graham cracker crust: Swap the gingersnaps for equal amount of graham cracker crumbs. Note that they won’t have the same ginger kick!
Pumpkin Bars with Gingersnap Crust
Save this Recipe!
Ingredients
Gingersnap Crust
- 10-12 ounces Gingersnap cookies (about 2 cups crushed)
- 1/4 cup granulated sugar
- 1/4 cup all-purpose flour gluten-free if needed
- 1/2 cup unsalted butter melted
Pumpkin Pie Filling
- 1 (15-oz) can pumpkin puree
- 1 cup light brown sugar packed
- 1/2 teaspoon salt
- 2 teaspoons pumpkin pie spice storebought or homemade
- 1 Tablespoon cornstarch
- 1 1/3 cups half and half heavy cream works too
- 3 eggs room temperature, lightly beaten
- To serve: Chopped pecans, homemade whipped cream, cinnamon sugar, and/or vanilla ice cream for serving
Instructions
- Preheat oven to 350°F. Line a 9×9 inch baking pan with parchment paper.
- Make crust (5 min): Add the gingersnaps to the bowl of a food processor or high-speed blender and pulse in 2-3 second increments to crush into fine crumbs. Stir in the sugar, flour, and butter.10-12 ounces Gingersnap cookies, 1/4 cup granulated sugar, 1/4 cup all-purpose flour, 1/2 cup unsalted butter
- Bake the crust (12 min): Press the gingersnap mixture firmly into the prepared pan using a rubber spatula or the bottom of a measuring cup. Bake for 12 minutes.
- Mix the filling (5 min): While the crust bakes, add all of the pumpkin filling ingredients to a large bowl and whisk well until combined and smooth.1 (15-oz) can pumpkin puree, 1 cup light brown sugar, 1/2 teaspoon salt, 2 teaspoons pumpkin pie spice, 1 Tablespoon cornstarch, 1 1/3 cups half and half, 3 eggs
- Bake the pumpkin bars (55 min): Pour the pumpkin filling over the partially baked crust. Bake for 50-55 minutes, or until the edges and middle are set and no longer jiggles when you nudge it. Tent the edges with foil as needed.
- Cool and slice (2 hrs): Allow the bars to cool completely then remove them from the pan and cut them into 16 squares using a sharp hot knife. Chill in the fridge to speed up the cooling processTo serve: Chopped pecans, homemade whipped cream, cinnamon sugar, and/or vanilla ice cream for serving
Notes
Nutrition
Nutrition information is automatically calculated, so should only be used as an approximation.
Make Ahead and Storage Tips
Make ahead: Make them up to one week ahead and store them in the fridge or follow the freezer directions above to make them up to 3 months in advance.
Store: Wrap the bars tightly in plastic wrap or close in an airtight container and store them in the fridge for up to 1 week.
Freeze: Cut he bars into squares and freeze until solid on a baking sheet. Transfer to a freezer-safe bag and store in the freezer for up to 3 months. Thaw overnight in he fridge and serve chilled or room temperature.
Recipe FAQs
Give the baking dish a shake at the end of baking. The center should be almost completely set, with a little jiggle. It needs more time if the center still looks wet.
Canned pumpkin, or pumpkin puree, is only the pumpkin, with nothing else. You use it for all pumpkin recipes. While canned pumpkin pie mix is pumpkin puree plus other ingredients, like sweeteners and thickeners, to make a quick pumpkin pie.
It’s harder to tell when pumpkin pie is overcooked, but an obvious sign is deep and visible crackers start to form on the top.
Yes, cover tightly and store in the fridge for up to 1 week.
Absolutely! Slice into bars, flash freeze on a baking sheet, and store in an air tight container for up to 3 months. Thaw overnight in the fridge before serving chilled or room temp.
This post may contain affiliate links. Read our disclosure policy.


#whatwemade
A new favorite for sure! Better than pie with that crust, yum! Even though my crust was too done. I think 8-9 minutes in my over would have been perfect. Followed the recipe and changed nothing. I topped them with whipped cream and a sprinkle of nutmeg on top! perfection!
Thank you so much!!
We tried these for Thanksgiving this year, and they were delicious! Even for non-pumpkin-pie lovers! The only issue I ran into was using an 8×8-inch pan instead of 9×9. Cooking time was WAY off with the smaller pan. I will invest in a 9×9 pan for next time. Great recipe!
These were delicious! Everyone loved them at Thanksgiving this year. The crust was the game changer. 🙂 Love!
Same question that someone else asked – you listed corn starch above the recipe, but when you scroll down to the actual recipe, no cornstarch is listed. Needed?
Hey there! It will still be ok without out but I would add 1 Tablespoon of cornstarch. Sorry about that!
I didn’t see cornstarch or vanilla in the filling recipe. Is this correct?