
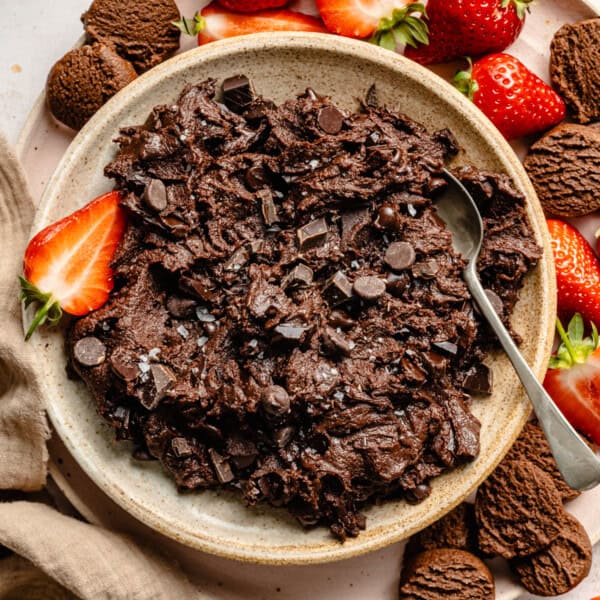
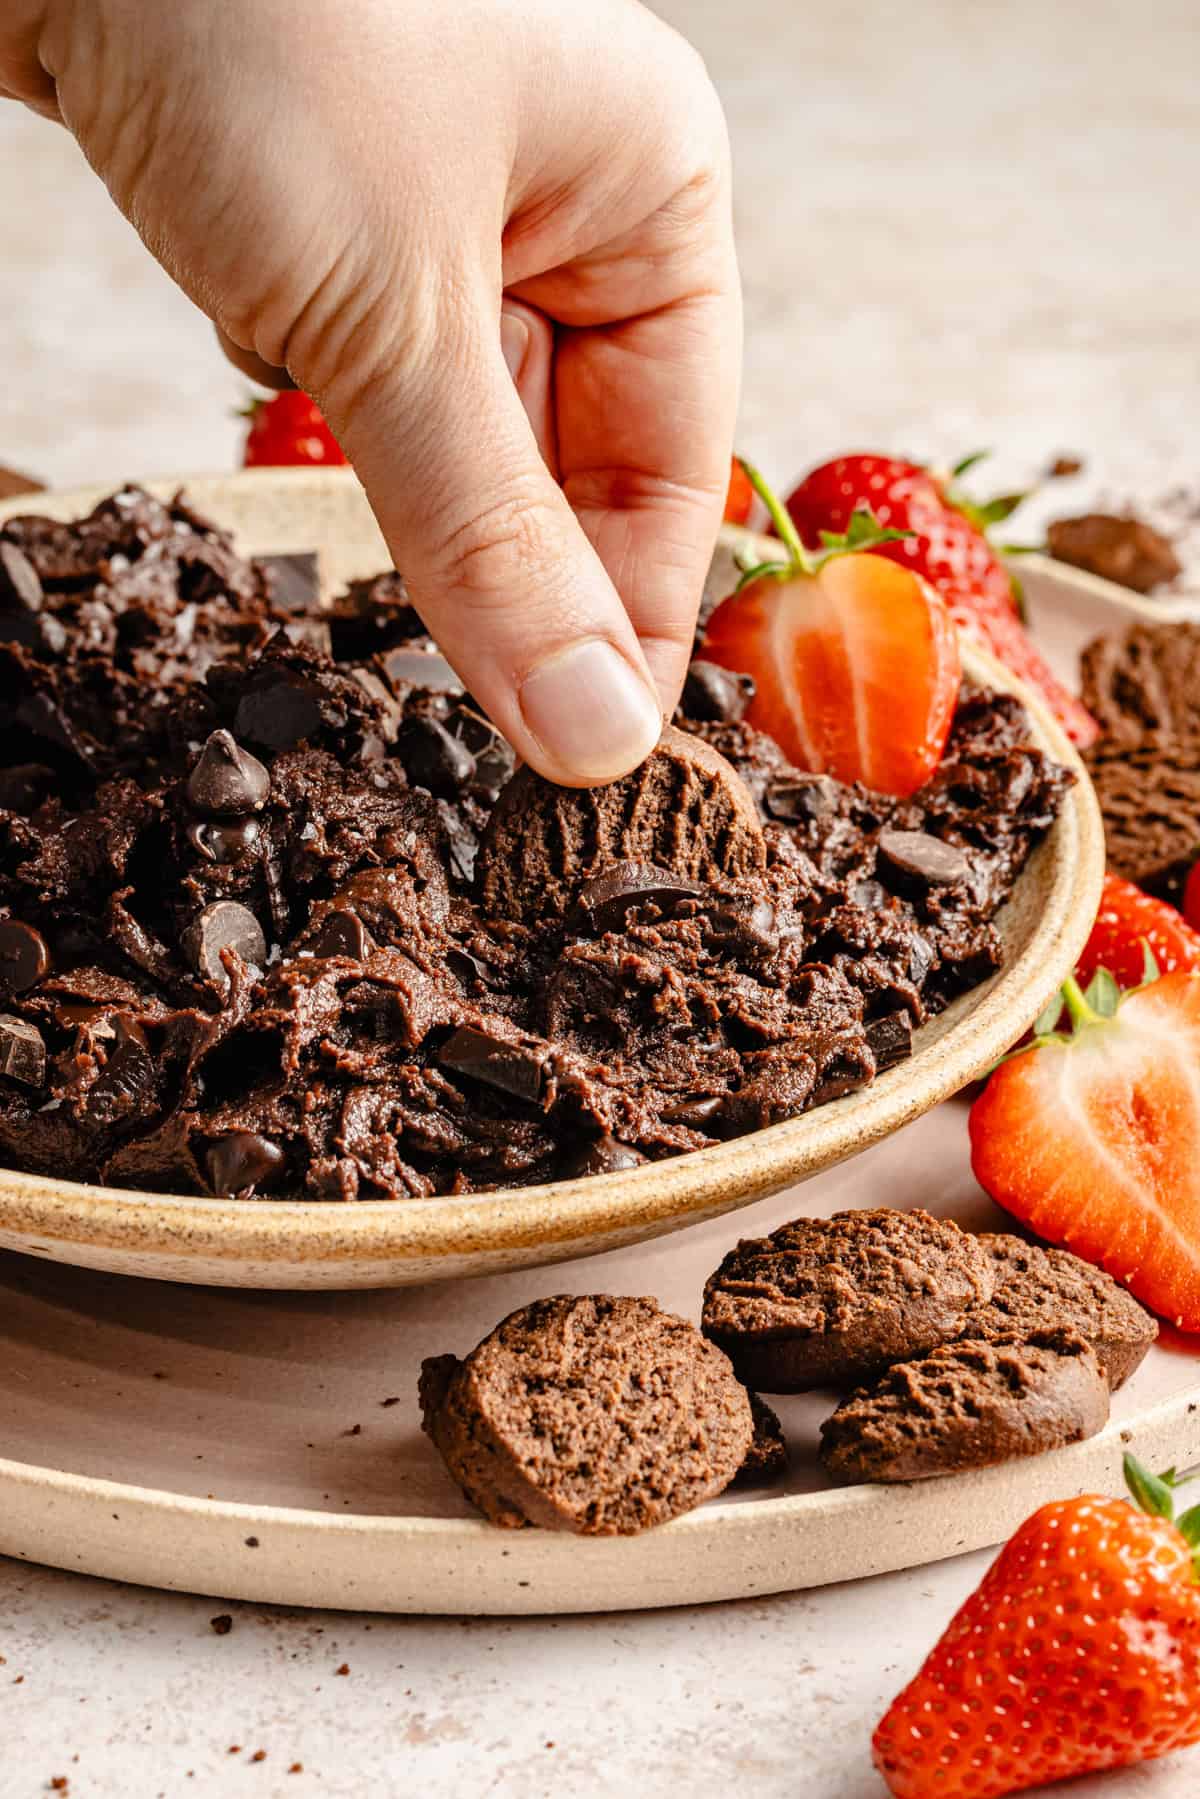
This edible brownie batter is everything a brownie should be: thick, fudgy, deeply chocolatey, and ready in 10 minutes, but designed to eat straight from the bowl. No baking. No raw eggs. Just heat-treated flour, melted butter, brown sugar, cocoa powder, and a generous handful of chocolate chips, mixed up and spoon-ready in minutes.
The full recipe makes a batch perfect for sharing (or storing all week in the fridge), but if you’re making edible brownie batter for 1, scroll down for our single-serving scaling notes so you get exactly the right amount without a leftover situation.
Why This Edible Brownie Batter Works (No Eggs, Safe to Eat)

Edible brownie batter is a no-bake dessert that tastes just like the real deal but is made without eggs or raw flour. It’s safe to eat straight from the bowl and comes together in under 10 minutes. Think of it as the fudgier, moodier cousin of this edible cookie dough.
- Totally safe to eat: No eggs + heat-treated flour = worry-free indulgence.
- Deep, rich chocolate flavor: Cocoa powder + two types of chocolate!
- Customize it: Easily make it gluten-free, dairy-free, or grain-free.
- Versatile: Eat it with a spoon or use it as a dip or filling.
Want to bake some brownies next? Try paleo brownies or Nutella brownies!
Ingredients You’ll Need
This recipe uses pantry staples, and there are easy swaps if you’re dairy-free or gluten-free:
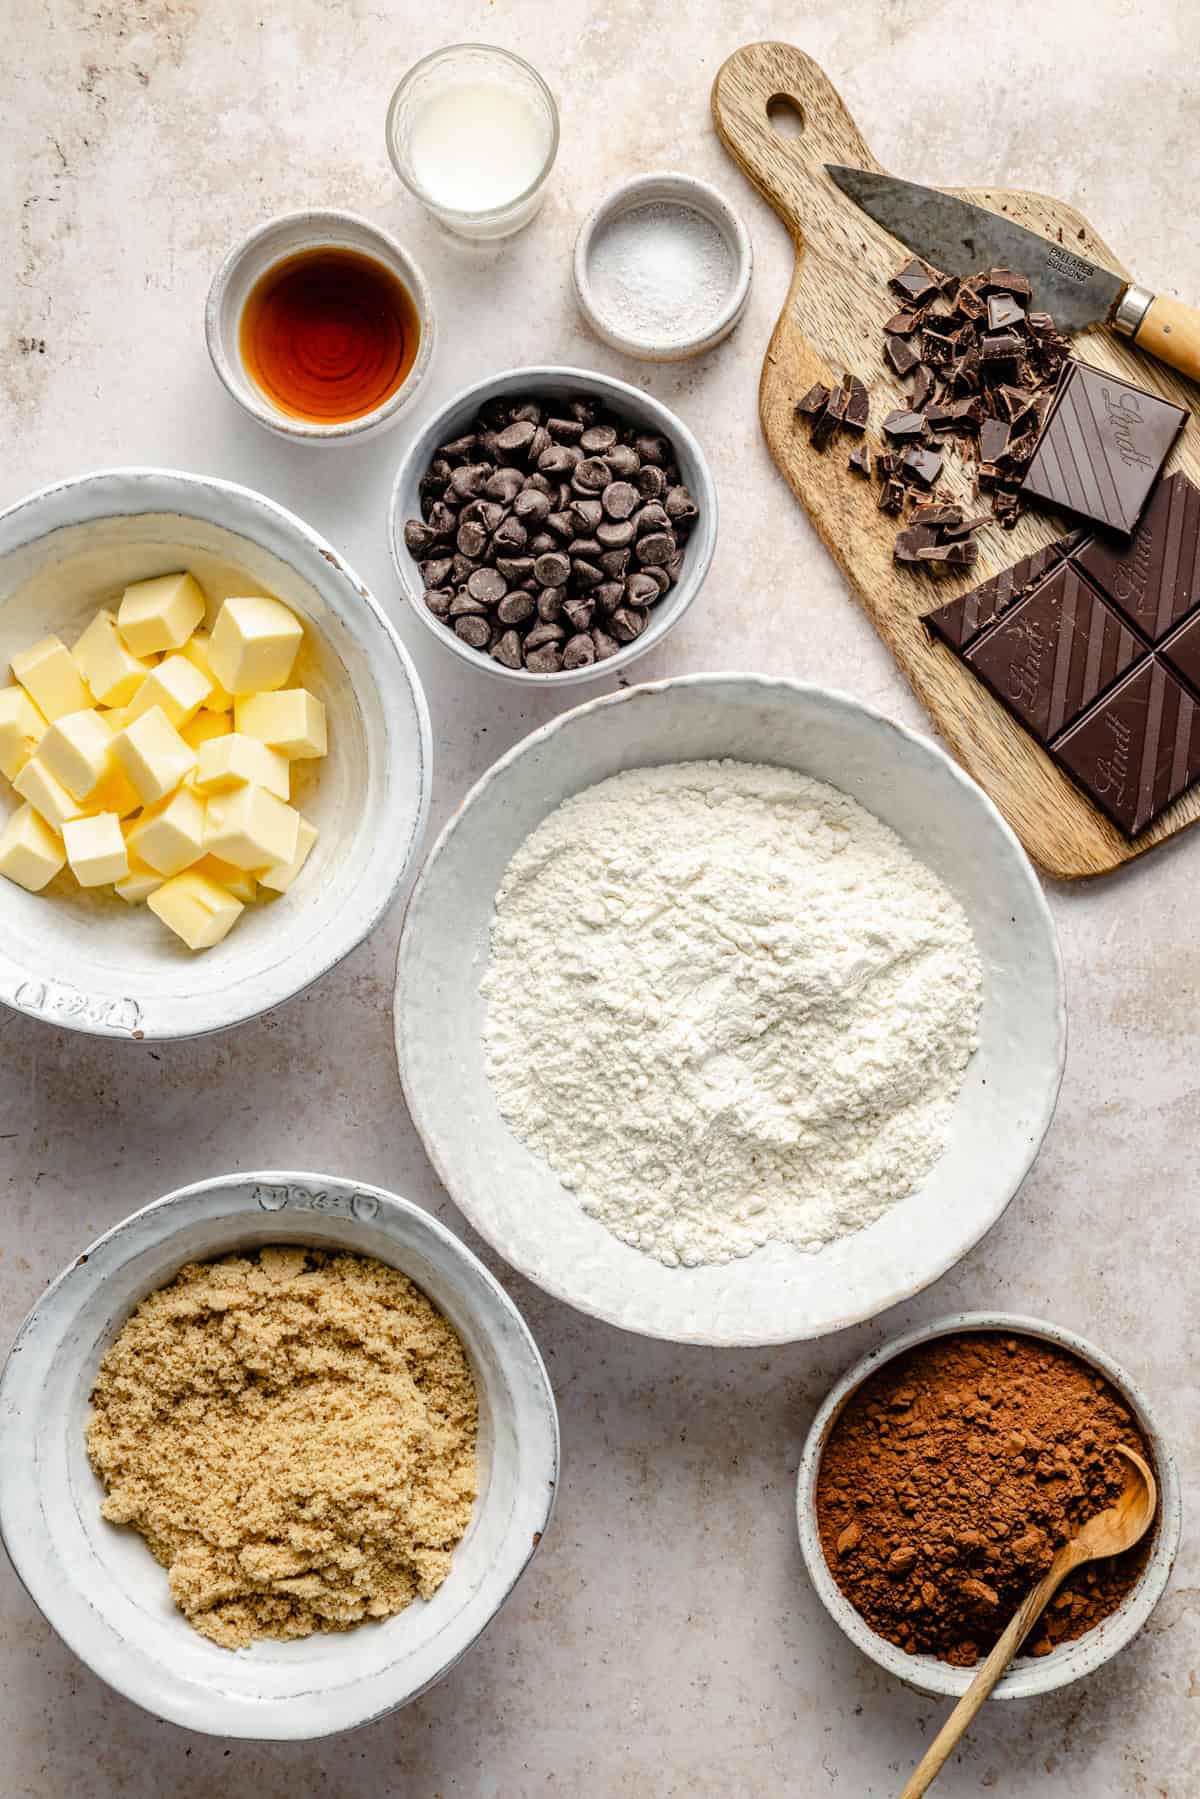
- All-purpose flour – Heat-treated for safety (see below)
- Unsalted butter – Melted and cooled (or use vegan butter)
- Light brown sugar – For that classic fudgy sweetness
- Milk – Any kind works (dairy or non-dairy)
- Vanilla extract – A flavor booster!
- Cocoa powder – Gives it that rich brownie flavor
- Salt – Balances the sweetness
- Chocolate chips + chopped chocolate – For pockets of melted goodness
Want it grain-free? Swap in almond + tapioca flour (details below).
How to Make Edible Brownie Batter
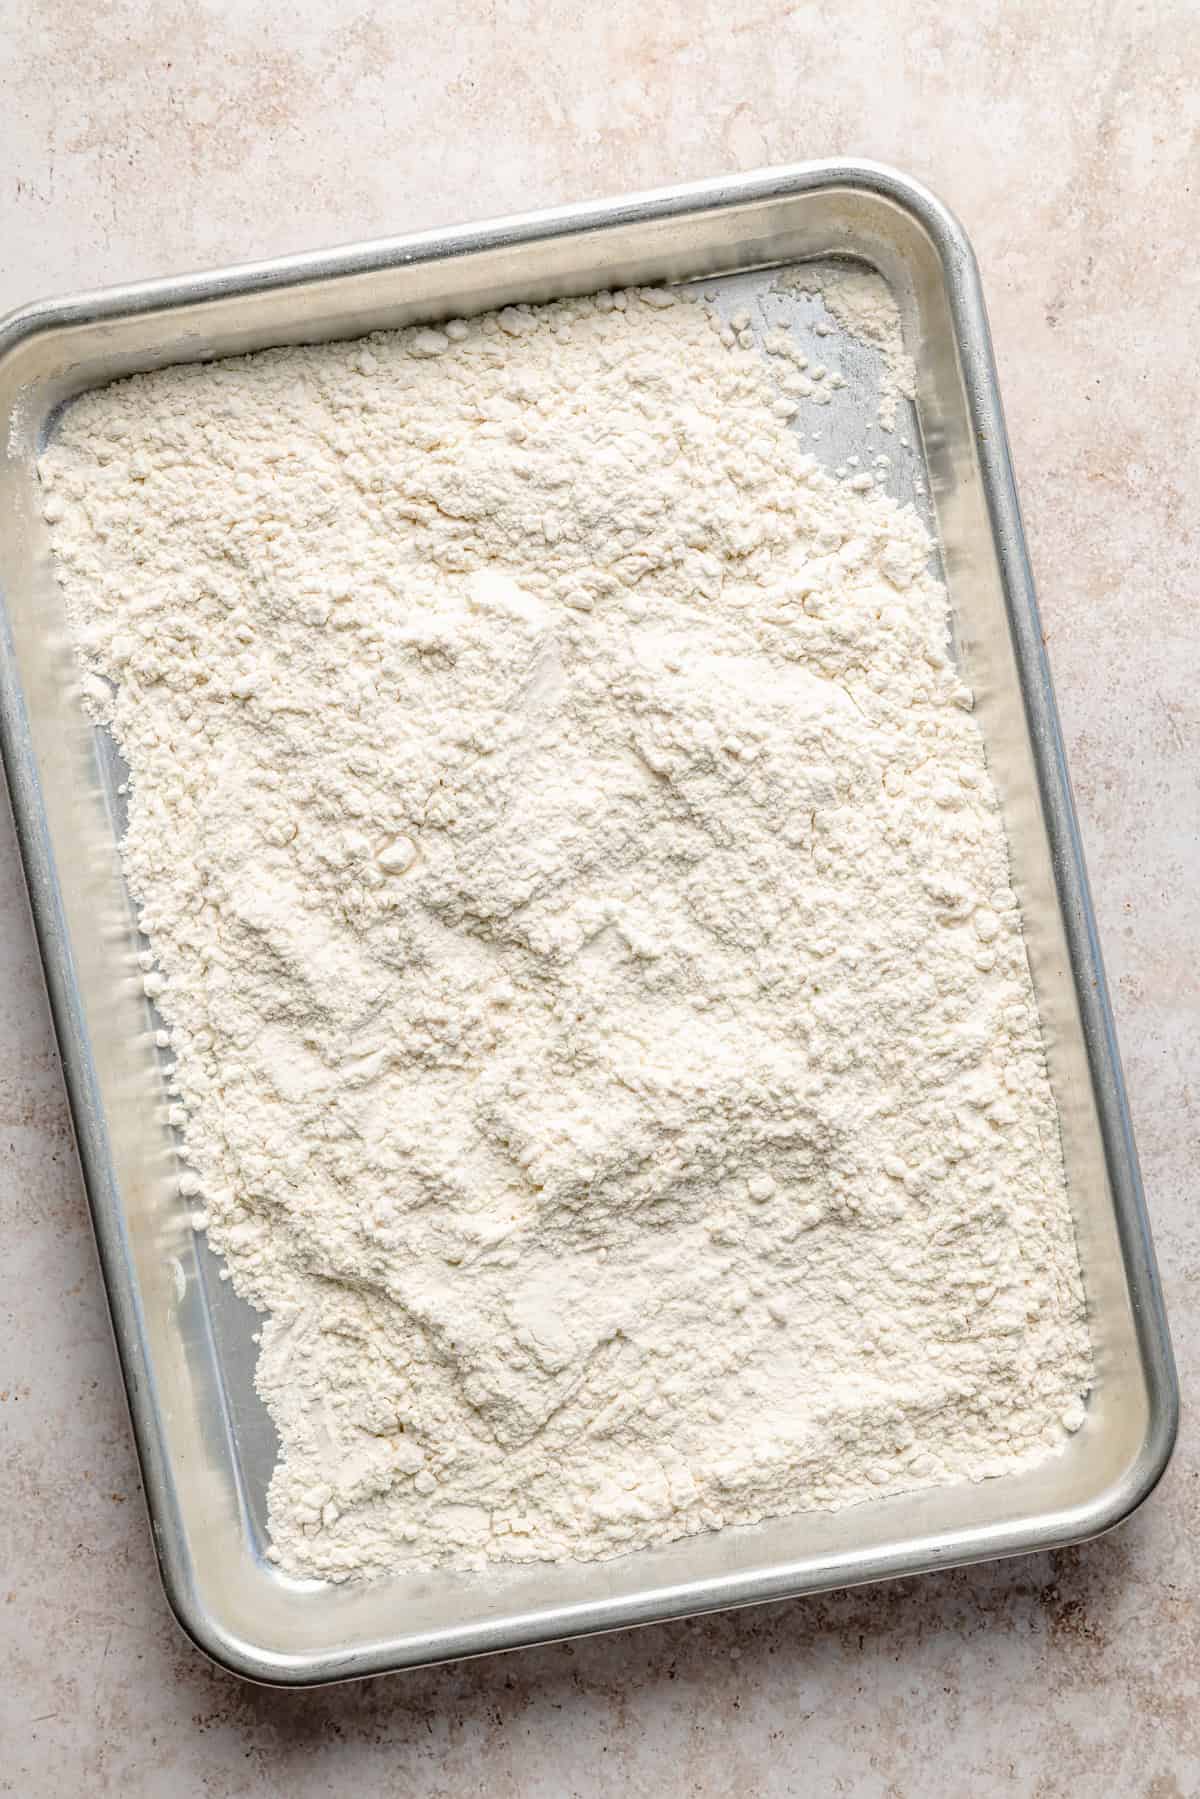
- Heat treat the flour. Microwave it in a bowl for 30–60 seconds to kill bacteria. Let it cool slightly.

- Mix wet ingredients. In a large bowl, whisk melted butter, brown sugar, milk, and vanilla.
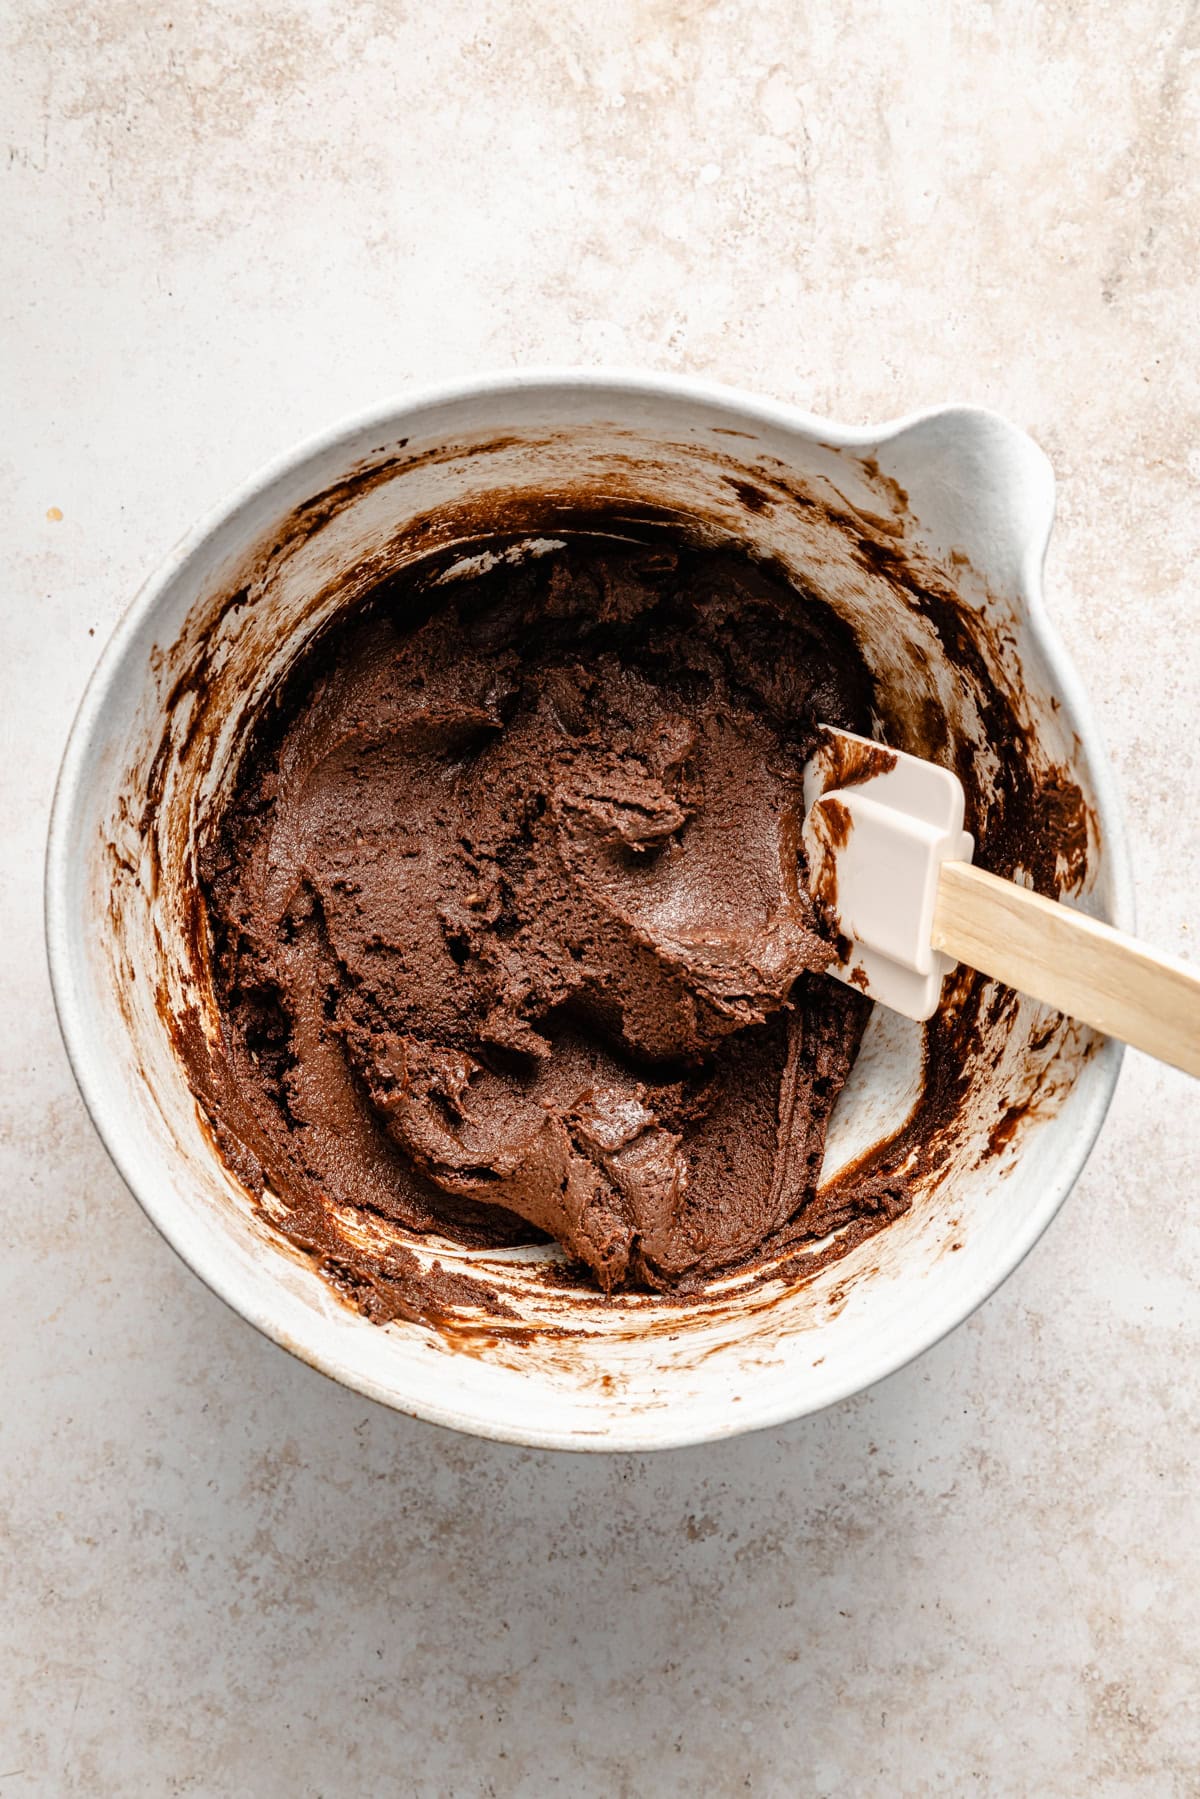
- Add dry ingredients. Fold in the flour, cocoa powder, and salt. Add milk 1 tablespoon at a time to reach your ideal texture.
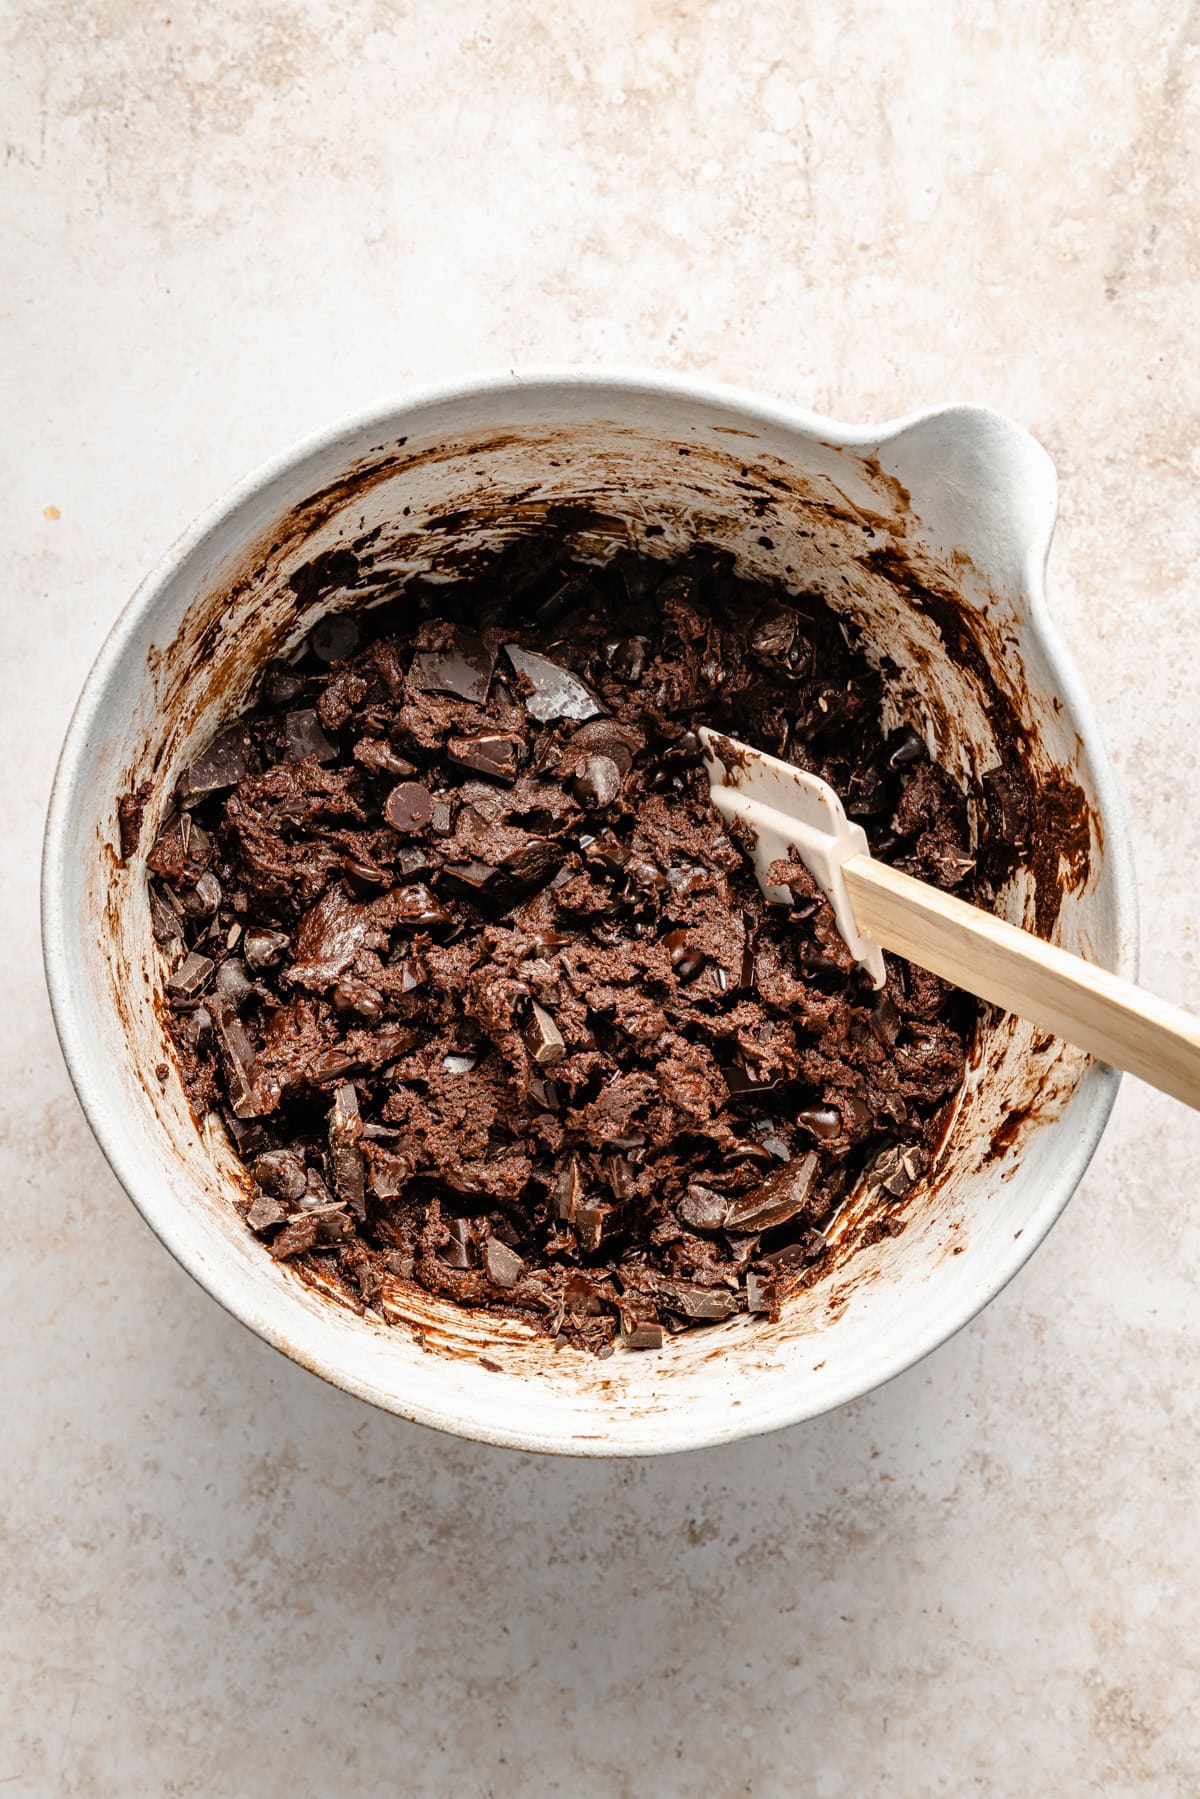
- Fold in chocolate. Stir in chocolate chips and chopped chocolate chunks. Enjoy right away or chill it for later. See storage tips below!
Edible Brownie Batter for 1: Single-Serving Scaling Notes
To make a single serving, scale the recipe down to these amounts:
- 3 tablespoons all-purpose flour (heat-treat the same way)
- 1 tablespoon unsalted butter, melted
- 1½ tablespoons light brown sugar
- ¼ teaspoon vanilla extract
- 1 tablespoon cocoa powder
- 2 teaspoons milk, plus more as needed to adjust consistency
- Small handful of chocolate chips and/or chocolate chunks
Mix together as directed in the full recipe. Makes about ⅛ cup of batter — one deeply satisfying serving.
Edible Brownie Batter
Save this Recipe!
Ingredients
- 1 1/2 cups all-purpose flour gluten-free if needed (Note 1 for grain-free)
- 1/2 cup unsalted butter or vegan butter melted
- 3/4 cup packed light brown sugar or coconut sugar
- 2 teaspoons vanilla extract
- 2 Tablespoons milk any kind plus more if needed
- 2/3 cup cocoa powder Natural or Dutch-processed
- 1/4 teaspoon salt
- 1/2 cup semi-sweet chocolate chips
- 4 ounces dark chocolate bar chopped
Instructions
- Heat treat the flour in the microwave by placing the flour in a bowl and heating on high for 30 seconds to 1 minute. Allow it to cool completely. Spread it out on a sheet pan to speed up the process. Adding warm flour to the batter can melt the butter, resulting in a greasy texture.1 1/2 cups all-purpose flour
- Whisk together the wet ingredients in a large bowl, including the melted butter, brown sugar, milk and vanilla extract until combined.1/2 cup unsalted butter or vegan butter, 3/4 cup packed light brown sugar or coconut sugar, 2 teaspoons vanilla extract, 2 Tablespoons milk any kind
- Add the heat-treated flour, salt, and cocoa powder and fold using a rubber spatula. Add more milk a tablespoon at a time as needed to reach your desired consistency. A thicker brownie batter is best served with a spoon, but you can make it slightly thinner to enjoy as a dip with fruit or cookies.2/3 cup cocoa powder, 1/4 teaspoon salt
- Stir in chocolate chips and chocolate chunks until well-distributed. Serve immediately or store in an airtight container in the fridge for up to 5 days. Brownie batter will freeze well for up to 3 months.1/2 cup semi-sweet chocolate chips, 4 ounces dark chocolate bar
Notes
- 3 tablespoons all-purpose flour (heat-treat the same way)
- 1 tablespoon unsalted butter, melted
- 1½ tablespoons light brown sugar
- ¼ teaspoon vanilla extract
- 1 tablespoon cocoa powder
- 2 teaspoons milk, plus more as needed to adjust consistency
- Small handful of chocolate chips and/or chocolate chunks
Video
Nutrition
Nutrition information is automatically calculated, so should only be used as an approximation.
Recipe FAQs
Yes, this recipe is specifically designed to be safe. We skip the eggs entirely (eliminating any salmonella risk) and heat-treat the flour in the microwave to kill any bacteria. As long as you follow both of those steps, this batter is completely safe to eat without baking.
Use this single-serving ratio: 3 tablespoons heat-treated flour, 1 tablespoon melted butter, 1½ tablespoons brown sugar, ¼ teaspoon vanilla, 1 tablespoon cocoa powder, and 2 teaspoons milk. See the single-serving scaling section above for full details.
Place the flour in a microwave-safe bowl and microwave on high for 30 seconds. Stir, then repeat two more times for a total of 90 seconds. The internal temperature should reach at least 165°F. Alternatively, spread flour on a baking sheet and bake at 350°F for 5 minutes.
Store in an airtight container in the refrigerator for up to 5 days. It will firm up when cold — let it sit at room temperature for 10–15 minutes before eating if you prefer a softer texture.
Yes — this batter freezes well for up to 3 months. Portion into tablespoon-sized scoops on a baking sheet, freeze until solid, then transfer to a zip-top bag. Thaw in the fridge overnight or at room temperature for 20–30 minutes.
Tips and Variations
Texture hack: For spoonable brownie batter, keep it thick. For a dip, add a little more milk.
Make it vegan: Use plant-based milk, vegan butter, and dairy-free chocolate.
Gluten-free? Use a GF flour blend with xanthan gum or go grain-free.
Dip ideas: Serve with strawberries, pretzels, graham crackers, or cookies.
Peanut butter brownie batter: Swirl in some melted peanut butter or drizzle it on top.
Holidays: Stir in sprinkles or festive candy to make it for a holiday—like crushed peppermint for Christmas, or rainbow sprinkles for a birthday.
Dietary Modifications
- Gluten-free: we tested this recipe with a mixture of tapioca flour and almond flour, like in our healthy cookie dough, and it worked really well. You could use all almond flour if you have that but note it may absorb more moisture so you may need to adjust the wet ingredients.
- Gluten-free and nut-free: try using oat flour 1:1 in this recipe. We aren’t baking it so it’s okay if the protein and gluten structures differ. Learn how to make oat flour at home.
- Dairy-free: use vegan butter (we like Myokos) and almond milk.
Pro tip: you don’t need to heat treat gluten-free flour like coconut flour, almond flour, or oat flour. All-purpose flour is the only one that poses a health risk, so keeping this gluten-free takes out that step!
Storage Tips
Store leftover brownie batter in an airtight container in the fridge for up to 5 days or in the freezer for up to three months. Thaw overnight in the fridge and enjoy cold or let it come to room temperature to enjoy as a dip.
Expert tip: You could even roll the dough into individual brownie bites and freeze them separately!
More Brownies and Edible Dough
This post may contain affiliate links. Read our disclosure policy.


I brought this camping and everyone loved it! We dipped Simple Mills chocolate sweet thins in it! Such a great dessert and so easy to make!
#whatwemade
Oh yum! That sounds amazing!
So easy and delicious! My 8 and 10 year old made it all on their own!