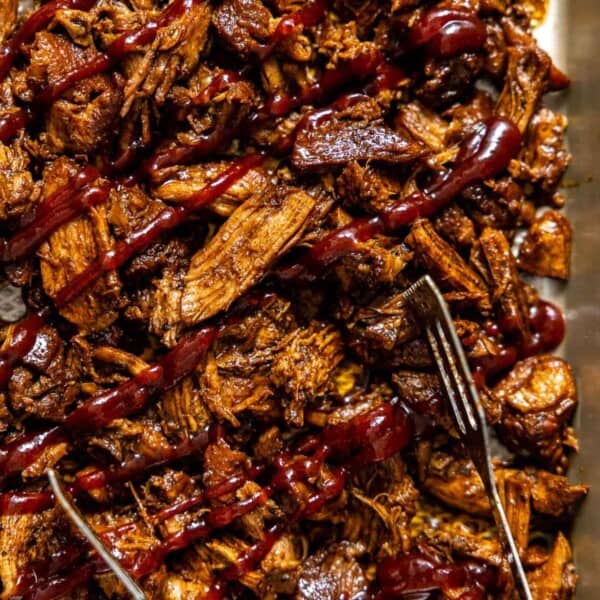
If you want tender, fall-apart pulled pork without babysitting a smoker all day, this Instant Pot pulled pork deliversl. It’s juicy, deeply seasoned, and shreds effortlessly when cooked properly under pressure.

I use a balanced smoky dry rub and a short pressure cook time that breaks down connective tissue so the pork pulls apart easily. No dry, stringy meat. And definitely no bland flavor.

It’s the fastest way to get classic pulled pork texture on a busy weeknight!

You’ll love these Instant Pot Country Style Ribs and this recipe for Instant Pot Carnitas if you’re a fan of tender, fall-apart pork.

three instant pot pulled pork sandwiches on a tray.

How Long to Cook Pulled Pork in the Instant Pot

Cook pork shoulder in the Instant Pot for 15 minutes per pound on high pressure.

For a 4-pound pork shoulder, that equals 60 minutes of pressure cook time, plus 8–10 minutes to come to pressure.

If the pork doesn’t shred easily with two forks, it needs more time. Add 5–10 additional minutes of pressure cooking.

Tender pulled pork is not about hitting 145°F. Pit experts recommend it needs to reach around 195–205°F internally so the connective tissue fully breaks down.

Using the Instant Pot means you can achieve that deliciously juicy, fall-apart-with-a-fork texture in a fraction of the time. You can make it into sandwiches piled high on a toasted bun with coleslaw or serve it in tacos, on top of salads, or as the protein for grain bowls.

Just like baked BBQ chicken thighs and crock pot bbq chicken, this recipe truly brings the BBQ experience to your table with less stress, less time, and tons of flavor.

instant pot pulled pork after pressure cooking.

Why this Instant Pot Pulled Pork Works

This recipe works because it balances three things:

1. Fat Content: Pork shoulder has enough fat to stay juicy under pressure.

2. Proper Cook Time: Pressure cooking long enough allows collagen to break down so the pork shreds instead of slices.

3. Searing First: Browning the meat creates deeper flavor before pressure cooking.

You get smoky, savory pulled pork that tastes like it cooked all day.

Ingredients You Need

instant pot pulled pork ingredients on a countertop.
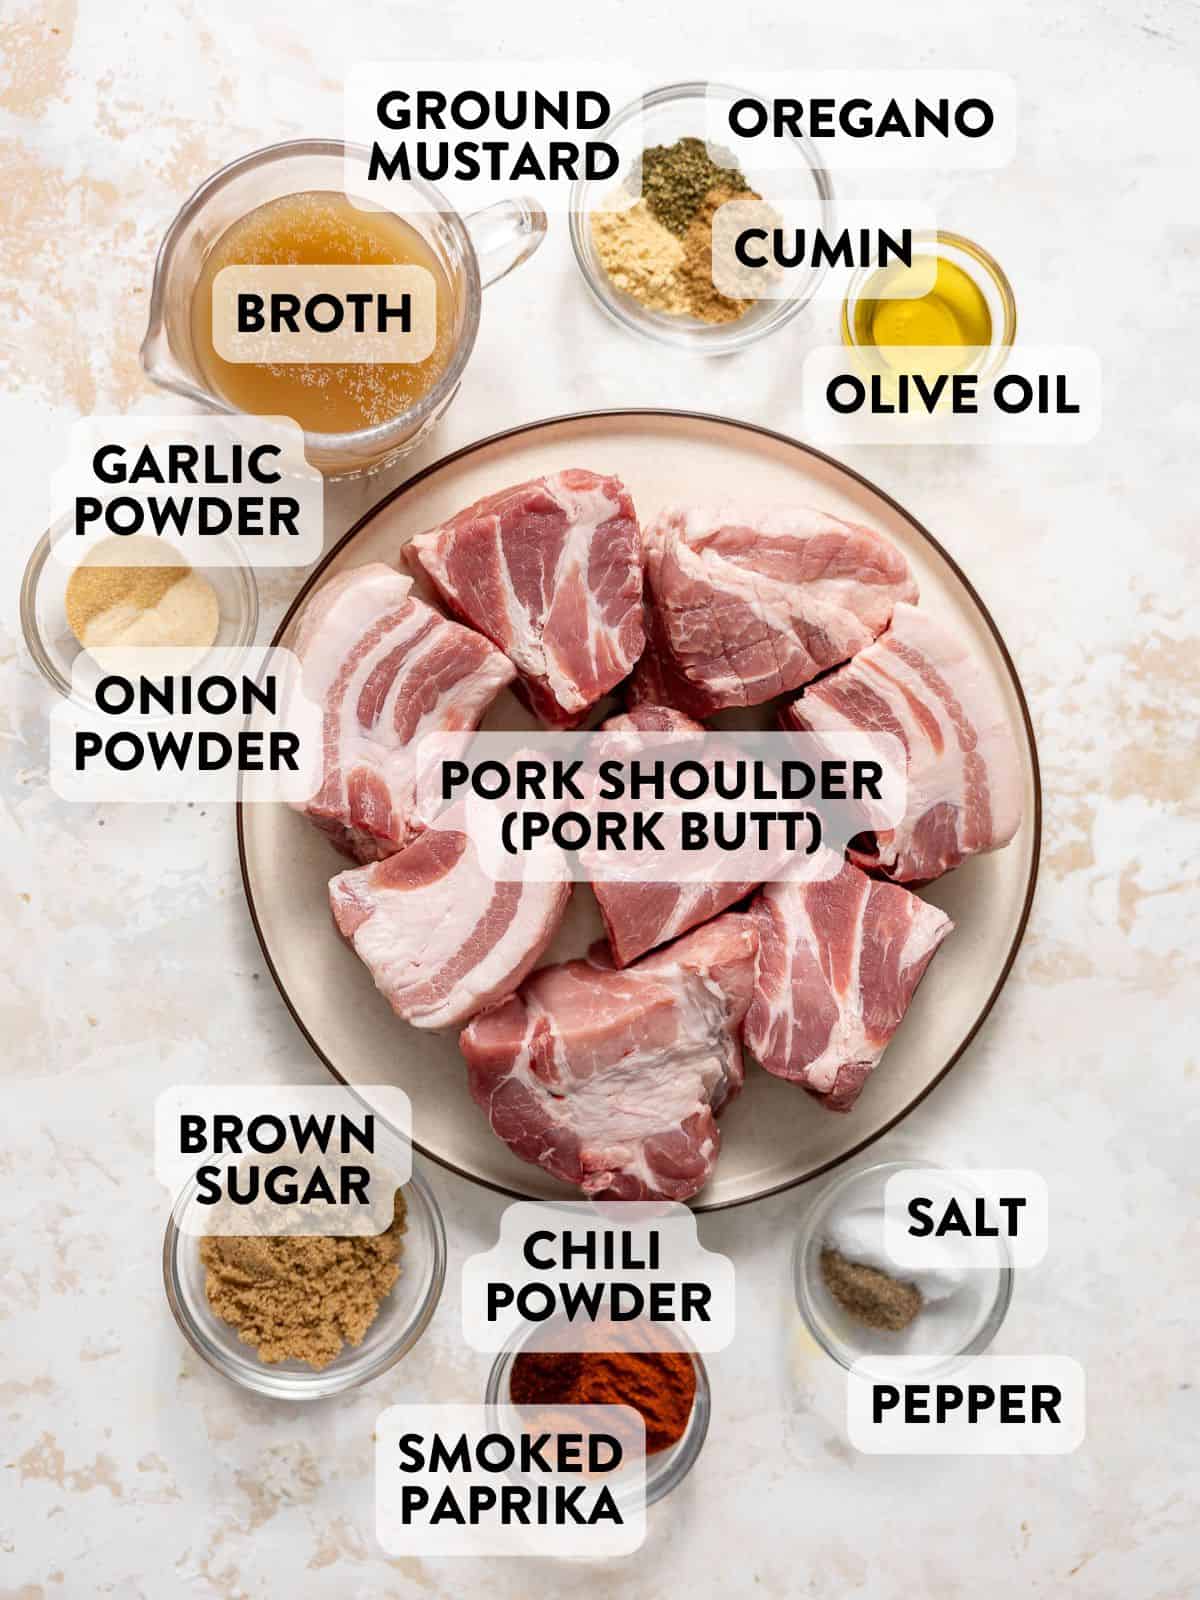
  • Brown Sugar: Adds a touch of caramelized sweetness.
  • Smoked Paprika: Brings in that smoky BBQ flavor.
  • Chili Powder, Cumin, Garlic Powder, Onion Powder: These add depth and warmth.
  • Ground Mustard & Dried Oregano: Mustard adds a tangy undertone; oregano gives herbal balance.
  • Salt, Black Pepper & Cayenne Pepper: Just a hint of heat.
  • Pork Shoulder (Pork Butt): This cut becomes incredibly tender under pressure.
  • Chicken Stock/Broth: Adds moisture to bring the Instant Pot to pressure and keeps the pork juicy.

If you’’re looking for a low sugar sauce option , use an unsweetened BBQ sauce like Primal Kitchen or stir some of the cooking liquid back in before adding sauce to keep flavor high without relying on sugar.

How to Make Instant Pot Pulled Pork

pieces of pork shoulder on a plate coated in dry rub.

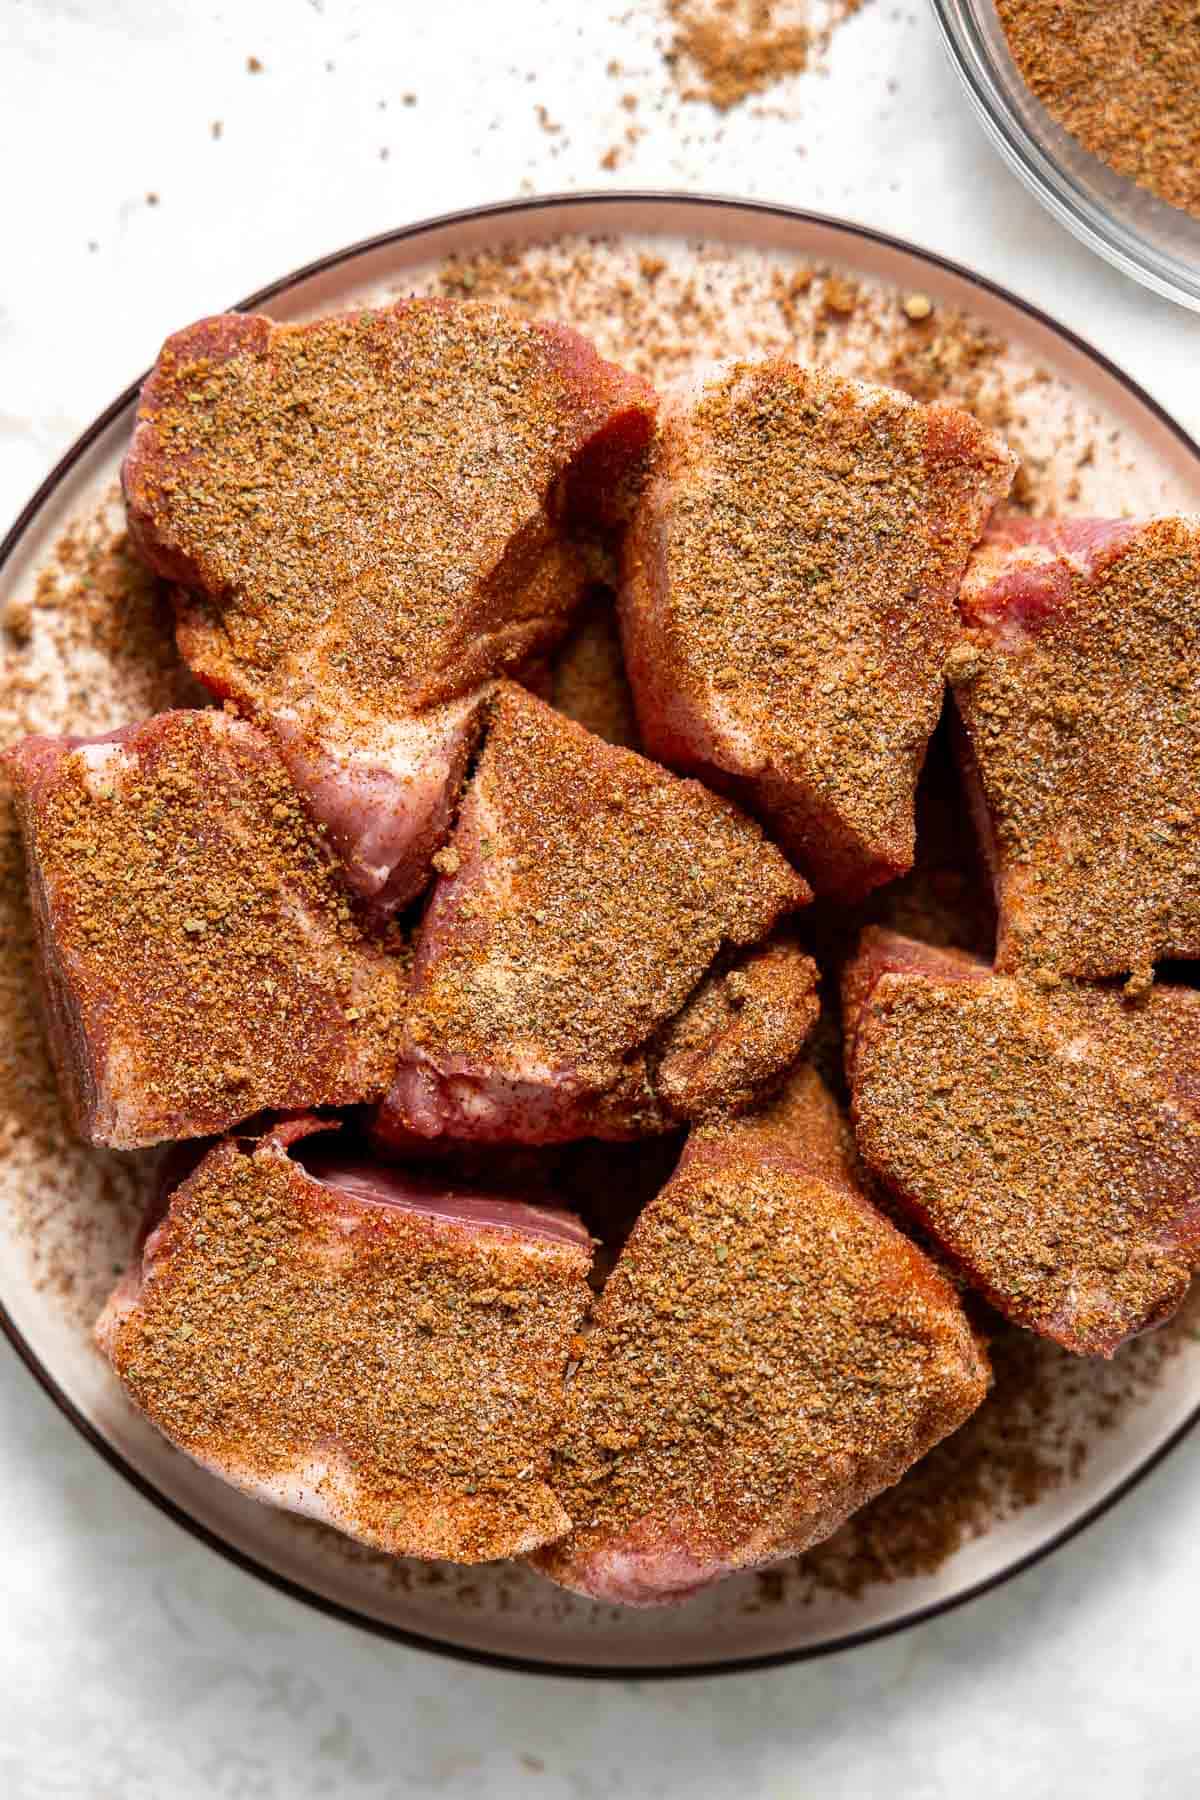
Step 1. Season the Pork. Cut the pork shoulder into large chunks and coat thoroughly in the spice rub. Press the seasoning into every surface so it adheres well.

pork shoulder seared to golden brown in an instant pot.

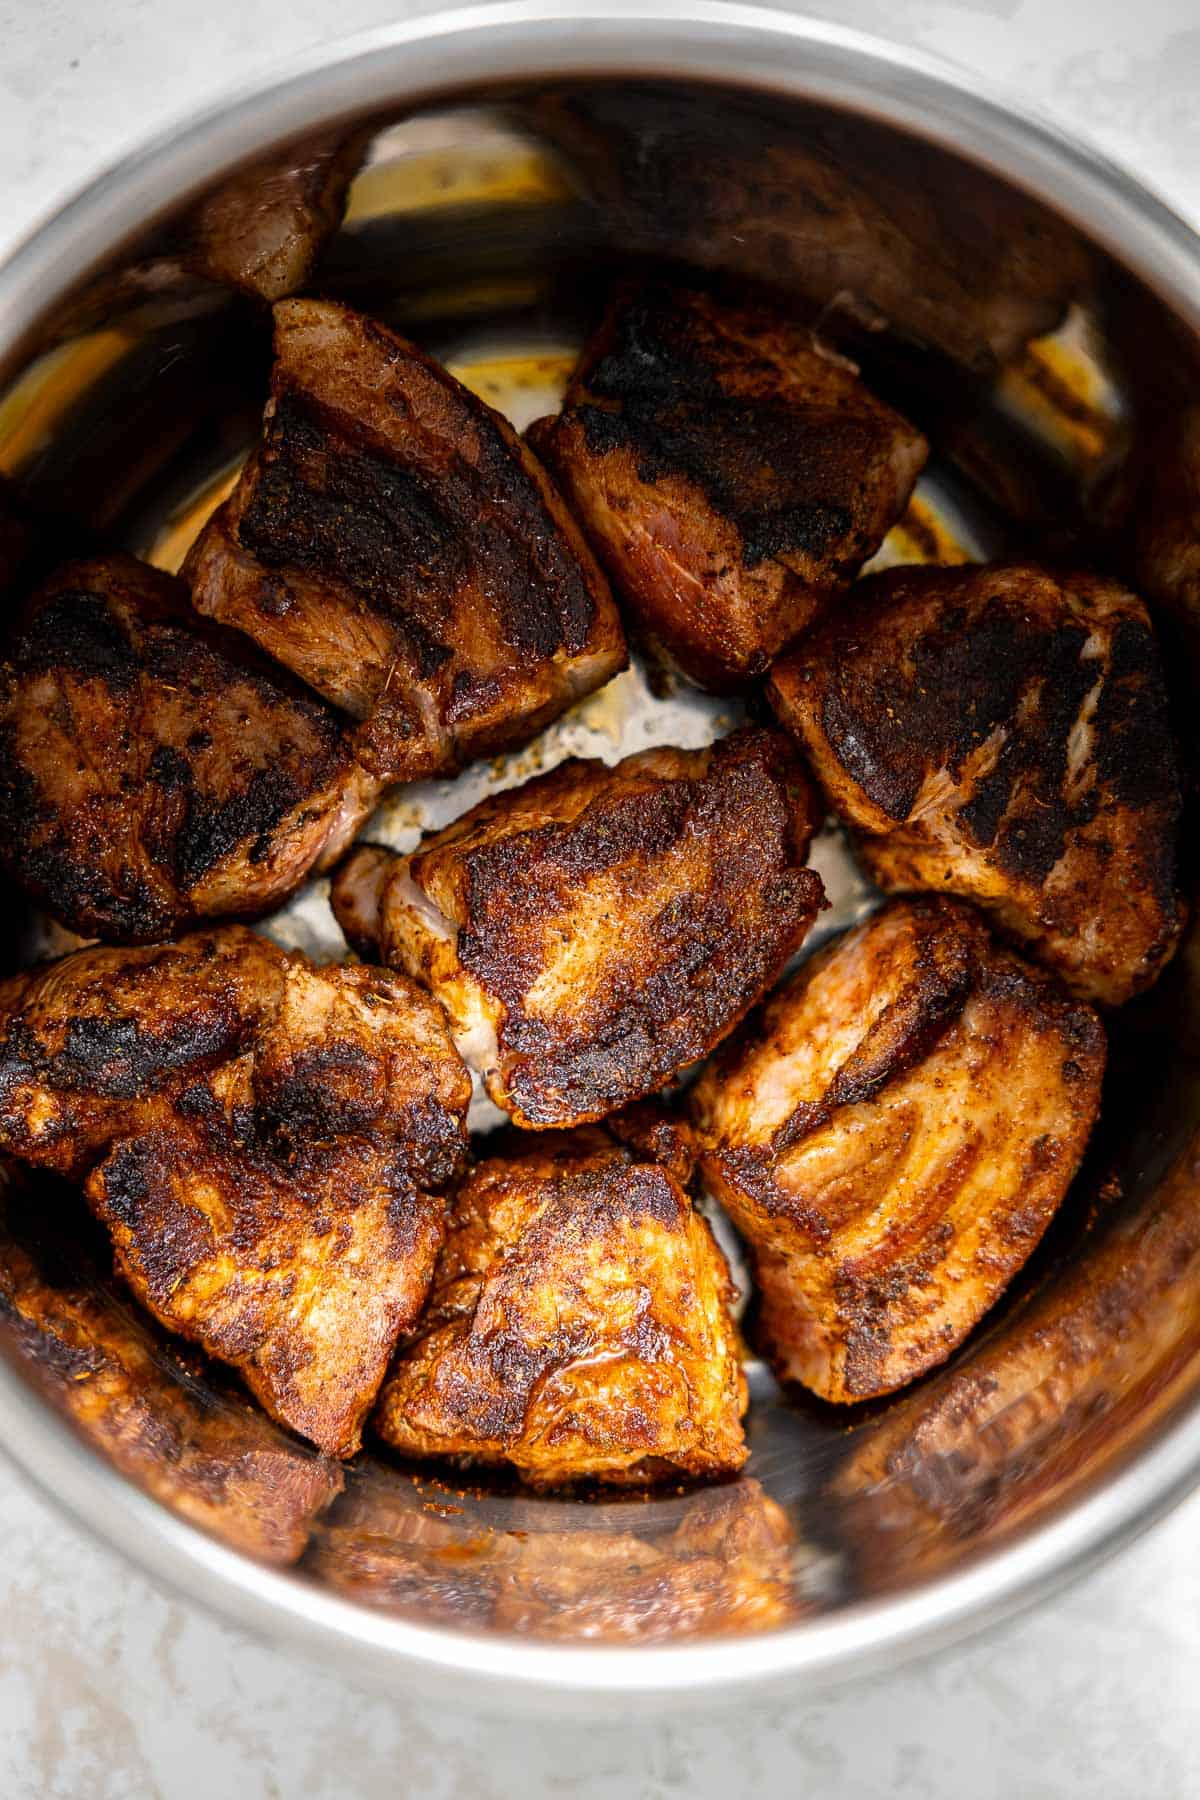
Step 2. Sear for Flavor: Turn the Instant Pot to sauté and brown the pork in batches. This step builds depth and prevents the finished pork from tasting flat.

instant pot pulled pork after pressure cooking.

Step 3. Deglaze & Pressure Cook: Add chicken broth and scrape the bottom of the pot to prevent a burn warning. Return pork to the pot and cook on high pressure for 60 minutes.

shredded instant pot pulled pork on a sheet pan.

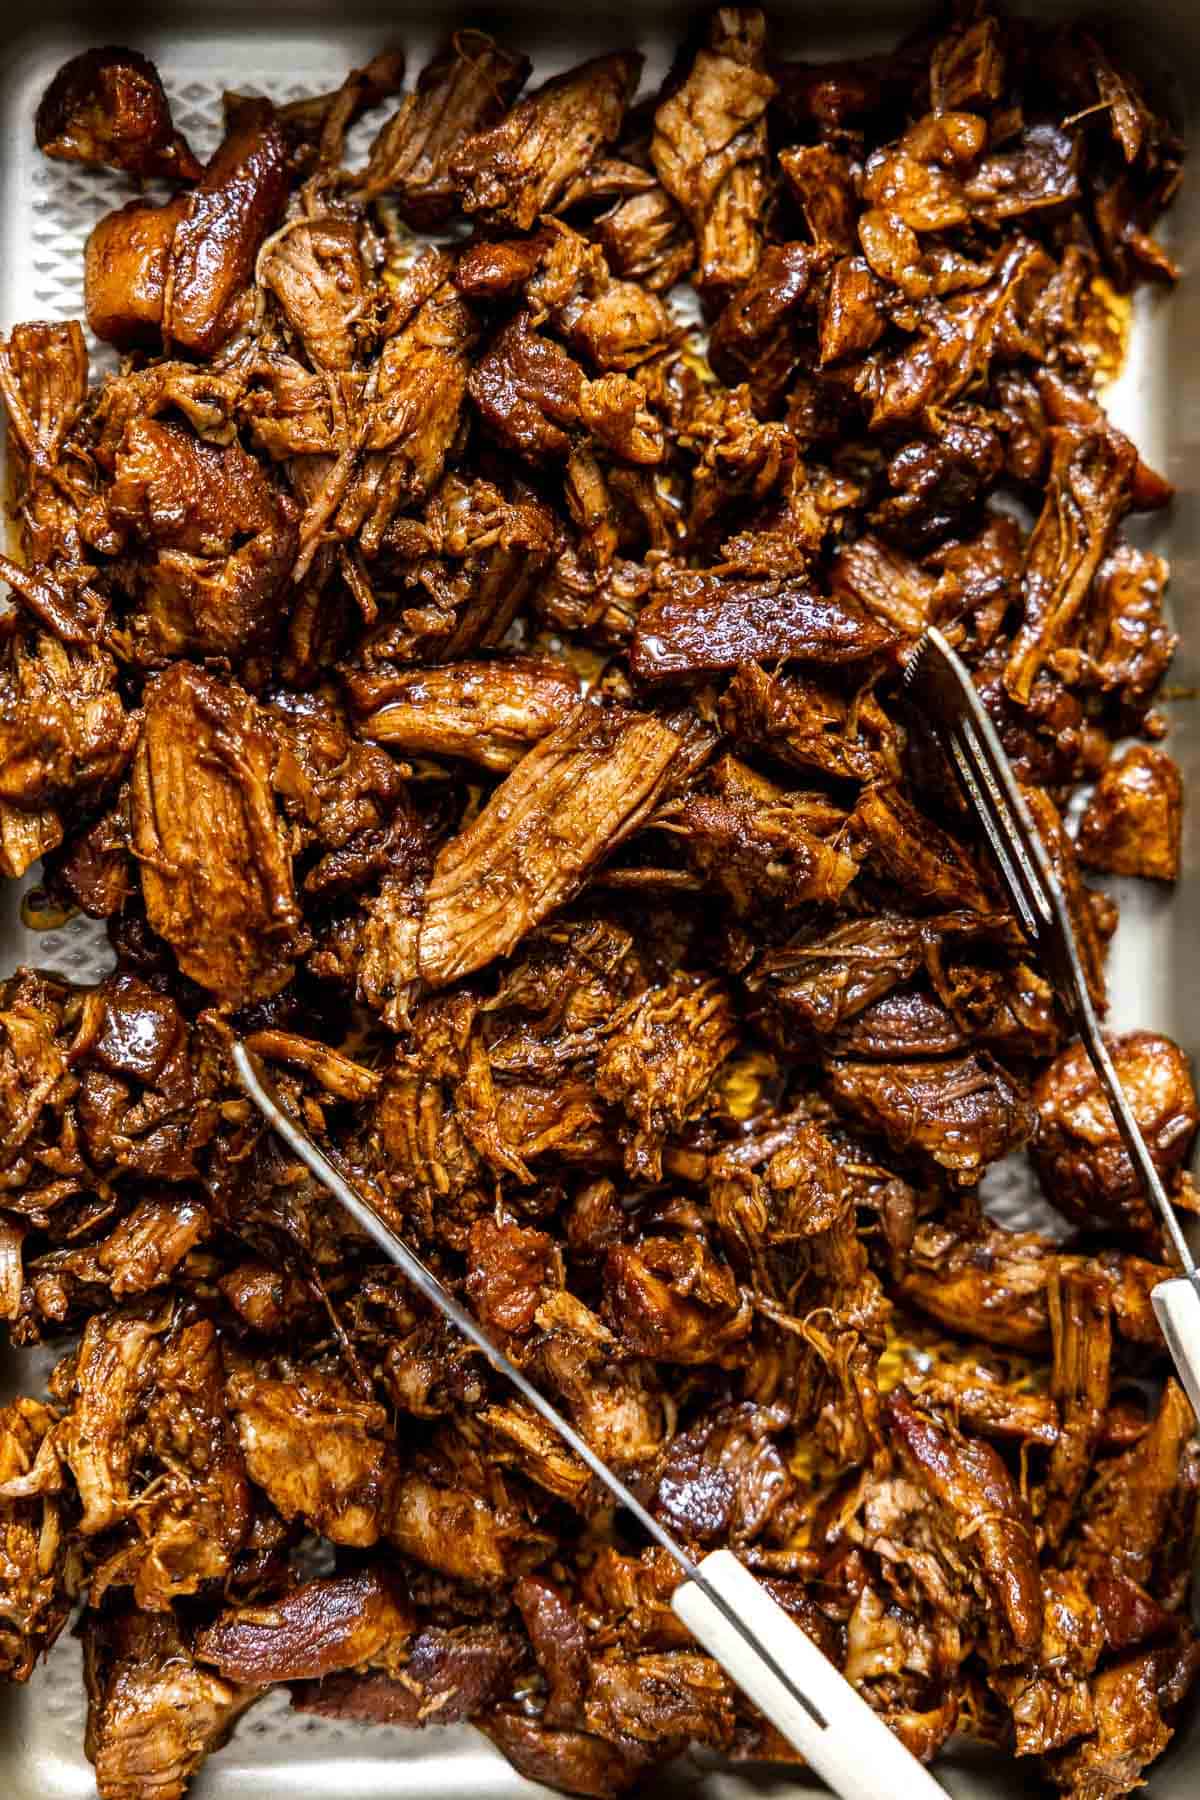
Step 4. Quick Release & Shred: Quick release the pressure. Transfer pork to a sheet pan and shred with two forks. It should fall apart easily. If it resists shredding, return it to the Instant Pot and cook 5–10 more minutes.

Why Is My Pulled Pork Tough?

Pulled pork is usually tough because it has not cooked long enough. The first couple of times I tested this, that happened to me until I increased the cooke time!

Pork shoulder needs enough time to break down collagen. If it slices instead of shreds, it needs more pressure cook time.

Overcooked pork in the Instant Pot is rare. Undercooked is much more common!

How to Keep Pulled Pork Juicy

After shredding, stir some of the cooking liquid back into the meat before adding BBQ sauce.

This keeps the pork moist and flavorful, especially if you are meal prepping or reheating later.

Make it In the Slow Cooker

After seasoning and searing in a skillet, transfer everything to the slow cooker and cook on low for 8–10 hours until shreddable.

Serving Ideas

This is one of those batch-cook proteins that turns into three different dinners during the week. That’s why I love it for busy family schedules.

Storage and Meal Prep

Store shredded pork in an airtight container in the fridge for up to 4 days.

Freeze in portions for up to 3 months. For best results, freeze with some of the cooking juices so it reheats tender and juicy.

Recipe FAQs

What is the best cut of meat for Instant Pot pulled pork?

Pork shoulder, also called pork butt, is best because it contains enough fat to stay tender under pressure cooking and shreds easily with a fork.

Can you overcook pulled pork in the Instant Pot?

It is difficult to overcook pork shoulder in the Instant Pot. If it is tough, it likely needs more cook time.

Do you quick release or natural release?

Quick release works well for this recipe. The pork stays tender and shreds easily.

Can I skip searing?

shredded instant pot pulled pork on a sheet pan.

Feels like Breakfast on the Beach!

bowl of turkey teriyaki vegetables and rice on a counter and then a close up of ground turkey teriyaki rice bowl
  • Thick and delicious with tons of coconut flavor
  • Takes 5 minutes to make
  • Easy to customize with your favorite toppings
  • Full of healthy fats
  • Add protein powder for a complete breakfast
  • Sweet tropical flavors

Love refreshing smoothies? Try this pitaya smoothie bowl, blueberry raspberry smoothie, or tropical kale smoothie next!

spoon dipped into a coconut smoothie bowl topped with kiwi, banana, and mango slices

Why You’ll Love This Smoothie Bowl

  • Thick enough to scoop with a spoon. Not a drink.
  • 5 minutes from freezer to bowl.
  • One blender, no extra dishes.
  • Add 25g of protein with a scoop of vanilla protein powder. Full breakfast, full morning.
  • Naturally Gluten-Free, Paleo, Dairy-Free, and Vegan. No swaps needed.
  • Pre-portion the fruit ahead so weekday mornings are zero decisions.

Ingredients You’ll Need

coconut smoothie ingredients laid out on a counter
  • Frozen banana. One whole. Banana is the texture anchor; don’t skip.
  • Frozen pineapple. ¾ cup. Pre-cut from the freezer aisle works.
  • Frozen mango. ½ cup. Same rule.
  • Full-fat coconut milk. ⅓ cup, from the can. Shake the can well before measuring or you’ll pour off only the watery part.
  • Coconut extract. Optional, ¼ teaspoon. Boosts the coconut flavor without making it taste like sunscreen. A little goes a long way.
  • Vanilla protein powder. Optional, one 25g scoop. I use Be Well by Kelly because the ingredient list is short. If you add protein powder, add an extra splash of coconut milk to keep it blendable.
  • Toppings. Whatever’s in the kitchen: shredded coconut, chia seeds, fresh fruit, granola, nut butter.

How to Make a Coconut Smoothie Bowl

Vanilla protein powder and frozen fruit in a blender
  1. Add the Frozen Fruit First. Dump all the frozen into a high-speed blender. Don’t add the liquid yet. Start dry.
coconut smoothie ingredients combined in a blender
  1. Add the Liquid Slowly. Add the coconut milk, coconut extract, and protein powder if using. Blend on low first, then high. Stop and stir or tamp down as needed. If the blender stalls, add coconut milk one tablespoon at a time until it moves. Don’t drown it.
  1. Pour and Top. Pile the toppings on, hit it with a drizzle of nut butter or honey if you want, and serve immediately. Smoothie bowls melt fast.

How to Get the Texture Right

The whole thing comes down to ratio: 2 parts frozen fruit to 1 part liquid, give or take. If your bowl is:

  • Not sweet enough (off-season fruit can taste flat): add half a frozen banana or a small drizzle of honey or maple syrup.nt
  • Too thin to scoop: add a few more chunks of frozen fruit and blend again.
  • Too thick to blend: add coconut milk one tablespoon at a time. Not all at once.
  • Stalling the blender: scrape down the sides, tamp the fruit down toward the blades, or pulse instead of run.

Coconut Smoothie Bowl Toppings

The toppings are where you make it yours. A few that work:

  • Chia seeds: crunch and fiber. Half a tablespoon goes a long way.
  • Granola: crunch. Use one with chunky clusters.
  • Shredded coconut or coconut flakes: doubles down on the coconut.
  • Nut butter: coconut almond butter, macadamia butter, or cashew butter for a tropical feel. Warm it slightly so it drizzles.
  • Extra fruit: kiwi, banana slices, mango, fresh pineapple. Sparingly, because there’s already a lot of fruit in the bowl.
  • Bee pollen, hemp hearts, or cacao nibs if you want to lean health-y.

FAQS

Why is my smoothie bowl too thin?

Too much liquid. Add more frozen fruit a handful at a time and blend until it thickens. Or remember the rule for next time: 2 parts frozen fruit to 1 part liquid, max.

Why won’t my blender blend it?

Not enough liquid, fruit not chopped small enough, or the blender isn’t powerful enough. Stop, scrape the sides, tamp the fruit toward the blades, and pulse instead of running on high.

Can I make this without protein powder?

Yes. The recipe works as-is without protein powder. If you do add protein, add an extra splash of coconut milk so it blends.

Is this smoothie bowl dairy-free and vegan?

Yes. With coconut milk and a plant-based protein powder, it’s naturally Gluten-Free, Dairy-Free, Paleo, and Vegan.

Can I prep this ahead?

Yes. Pre-portion the frozen fruit into individual zip-top bags. In the morning, dump one bag in the blender, add coconut milk and protein powder, and blend.

How do I store leftovers?

Store the smoothie base (without toppings) in an airtight container in the fridge for up to 1 day. After that, it separates and loses creaminess. Give it a stir or a quick re-blend before serving.

coconut smoothie bowl with toppings on a counter next to a peeled banana and bowl of toasted coconut
Save this Recipe!
Enter your email & I’ll send it straight to your inbox.
Please enable JavaScript in your browser to complete this form.
Tap stars to rate!
4.34 from 24 votes

Coconut Smoothie Bowl

Prep: 5 minutes
Cook: 0 minutes
Total: 5 minutes
Thick, scoopable, and the closest thing to breakfast on the beach you can pull off in five minutes. Frozen pineapple, mango, and banana blended with full-fat coconut milk and a splash of coconut extract. Add a scoop of vanilla protein powder if you want a full breakfast. The whole thing takes one blender and four ingredients you already have if you keep frozen fruit in the freezer.

Save this Recipe!

Enter your email and we’ll send it directly to you.
Please enable JavaScript in your browser to complete this form.
Servings: 1 smoothie bowl

Ingredients

  • 1 frozen banana
  • 3/4 cup frozen pineapple
  • 1/2 cup frozen mango
  • 1/3 cup full fat coconut milk shaken
  • 1/4 teaspoon coconut extract optional
  • 1 scoop (25g) vanilla protein powder optional
  • Toppings: mango, banana, granola, chia seeds, cherries, nut butter, or coconut

Instructions 

  • Add all ingredients to a highs-speed blender. Blend on high for 1-2 minutes until a smooth and thick consistency. If you don't have a high powered blender it may take a little longer or you may need to add another splash of coconut milk.
    1 frozen banana, 3/4 cup frozen pineapple, 1/2 cup frozen mango, 1/3 cup full fat coconut milk, 1/4 teaspoon coconut extract, 1 scoop (25g) vanilla protein powder
  • Pour into a bowl and top with your favorite toppings
    Toppings: mango, banana, granola, chia seeds, cherries, nut butter, or coconut
Last step! If you make this, please leave a review letting us know how it was!

Notes

 
Protein. My absolute favorite protein is Be Well By Kelly protein powder because of the quality of ingredients. It only has 3 ingredients and not added sugars. 
Tips for Thick Smoothie Bowls
  • Use frozen fruit as the base.
  • Start with less liquid and add more as needed to get the desired texture.
  • Use a high-speed blender for best results.
 

Nutrition

Serving: 1bowl | Calories: 216kcal | Carbohydrates: 55g | Protein: 2.6g | Fat: 6.1g | Cholesterol: 0mg | Sodium: 3.2mg | Fiber: 6g | Sugar: 37.9g

Nutrition information is automatically calculated, so should only be used as an approximation.

Tips for Thick Smoothie Bowls

  • Use frozen fruit as the base.
  • Start with less liquid and add more as needed.
  • Use a high-speed blender for best results.

Prep and Storage Tips

Prep ahead: Pre-portion the frozen fruit into individual zip-top bags so weekday mornings are just dump-and-blend.

Storage: Store the smoothie base in an airtight container in the fridge for up to 1 day. It separates after that.

Freezing: Store in a freezer-safe container for up to a month. Thaw in the fridge overnight, give it a stir, and pour into the bowl.

coconut smoothie bowl with all of the toppings and a spoon dipped into it

Save this Recipe!
Enter your email & I’ll send it straight to your inbox.
Please enable JavaScript in your browser to complete this form.
Tap stars to rate!
5 from 6 votes

Instant Pot Pulled Pork Recipe

Prep: 10 minutes
Cook: 1 hour
Total: 1 hour 10 minutes
This Instant Pot pulled pork uses pork shoulder, a smoky dry rub, and 60 minutes of pressure cooking to create tender, fall-apart shredded pork in a fraction of the traditional time. Perfect for BBQ sandwiches, tacos, meal prep, and freezer-friendly dinners!

Save this Recipe!

Enter your email and we’ll send it directly to you.
Please enable JavaScript in your browser to complete this form.
Servings: 6 servings

Ingredients

  • 2 tablespoons brown sugar or coconut sugar
  • 1 Tablespoon smoked paprika
  • 3 teaspoons salt
  • 2 teaspoons chili powder
  • 1 teaspoon garlic powder
  • 1 teaspoon onion powder
  • 1 teaspoon cumin
  • 1 teaspoon ground mustard
  • 1 teaspoon oregano
  • 1/2 teaspoon black pepper
  • Cayenne pepper to taste, optional
  • 4 lb boneless pork shoulder (pork butt)
  • 2 Tablespoons olive oil
  • 1 cup chicken broth
  • BBQ sauce to taste (I like Primal Kitchen's unsweetened BBQ sauce)
  • For sandwiches: buns, coleslaw, and pickles

Instructions 

  • Mix the dry rub: Mix all of the rub spices together in a medium bowl and set aside. Trim excess fat off of the pork shoulder then cut it into 3-4 inch large chunks.
    2 tablespoons brown sugar, 1 Tablespoon smoked paprika, 3 teaspoons salt, 2 teaspoons chili powder, 1 teaspoon garlic powder, 1 teaspoon onion powder, 1 teaspoon cumin, 1 teaspoon ground mustard, 1 teaspoon oregano, 1/2 teaspoon black pepper, Cayenne pepper
  • Season the pork: Coat the pork shoulder thoroughly in the spices, using your hands to rub it in until it turns a deep red color.
    4 lb boneless pork shoulder
  • Sear for flavor: Turn a 6qt instant pot to the saute setting and add the olive oil. Allow to heat for a few minutes until it shimmers. Once it’s hot, work in two batches to sear each side of the pork, about 2 minutes per side.
    2 Tablespoons olive oil
  • Pressure cook: Cancel the saute, remove the pork to a plate and add the chicken stock. Use a wooden spoon to scrape any brown bits off the bottom of the pan. Add the pork back to the instant pot (it’s ok if they overlap then close the lid and make sure the vent is set to the sealing position. Pressure cook on high for 1 hour. It will take about 8-10 minutes for it to come to pressure.
    1 cup chicken broth
  • Quick release: When the time is up, quick release the pressure. To do this, use a wooden spoon to open the vent and release the steam. You can cover the vent with a kitchen towel to quiet the noise and reduce the amount of steam.
  • Shred: Carefully open the lid and check the internal temperature. For shreddable pulled pork, the internal temperature should reach approximately 195–205°F so the connective tissue fully breaks down. If the pork does not shred easily, return it to pressure for 5–10 more minutes. Use tongs to remove the pulled pork to a baking sheet. The internal temperature of the pork shoulder should be 145°F. Stir with your favorite BBQ sauce and serve.
Last step! If you make this, please leave a review letting us know how it was!

Notes

Slow Cooker: follow the instructions to dry rub the pork then sear it in a large skillet on the stove. Instead of the Instant Pot, add everything to the slow cooker and cook on low for 8-10 hours. Shred and mix with your favorite BBQ sauce.
Storage: Store shredded pork in an airtight container in the fridge for up to 4 days.
Meal Prep Tip: Stir some of the cooking liquid back into the shredded pork before storing to keep it moist when reheated.
Freezer Tip: Freeze in airtight containers for up to 3 months with a few tablespoons of cooking juices for best texture after thawing. 
Nutritional values do not include BBQ sauce

Video

Nutrition

Serving: 1serving (5 ounces) | Calories: 531kcal | Carbohydrates: 7.7g | Protein: 60.7g | Fat: 27.3g | Cholesterol: 203mg | Sodium: 1480mg | Fiber: 1.1g | Sugar: 5g

Nutrition information is automatically calculated, so should only be used as an approximation.

This post may contain affiliate links. Read our disclosure policy.

5 from 6 votes (4 ratings without comment)

Leave a comment

Your email address will not be published. Required fields are marked *

Recipe Rating


7 Comments

  1. Connie Miller says:

    This recipe sounds great! Is there any particular reason why you do quick release. I’ve read that it’s better to do slow release with meat, so was curious. I’m looking forward to trying this.

    1. Molly Thompson says:

      Hey Connie! That’s a great question. I’ve tested this both ways and didn’t see much of a difference in the actual recipe so I chose quick-release to make the recipe faster lol!

  2. Brittany says:

    5 stars
    Our whole family LOVES how the pork turns out using this recipe. There never seem to be leftovers. I use this recipe in a crockpot, and it turns out perfect every time!

    1. Molly Thompson says:

      Thanks, Brittany! We make this all the time too and our kids love when we put it in sweet potatoes! Thanks for taking the time to share.

  3. Lilmama509 says:

    5 stars
    Just made this and oh my gosh – AMAZING !!!! I’ve never been able to make yummy pulled pork but I did tonight with this recipe !

    1. Molly Thompson says:

      This is the best!!! So happy you loved it! Do you like the videos under each instruction?!

  4. Alex says:

    The blog says 1 hour cook but the recipe instructions say 25 minutes- which is it? Thanks!