

Why You’ll Love this White Cheddar Mac and Cheese Recipe

- Rich and Creamy: A luxurious sauce that perfectly coats each pasta shell.
- Panera—but better: it’s rich and creamy like the restaraunt, but homemade is always better (and cheaper).
- Gluten-Free friendly: Easily adaptable with gluten-free flour options.
- Simple and Quick: Minimal ingredients and straightforward steps make it easy to prepare.
- Versatile: Customize with different cheeses or add-ins to suit your taste.
- Perfect for Kids: They will eat this up any day of the week.
Need another cozy pasta dish? Try creamy spaghetti chicken, boursin cheese pasta, or cottage cheese alfredo next.
Better Than Boxed — Or Takeout!
You’ve probably seen the Annie’s boxed version of white cheddar mac and cheese. Or maybe your family loves the Panera version. There’s something about that creamy white sauce coating every noodle.
Thanks to this 15-minute recipe, you can have a better than boxed white cheddar mac n cheese. It’s cozy, nostalgic, and easy to make. You’re going to love it for a quick weeknight dinner, holiday side dish, or simple lunch for kids.
This recipe stands out thanks to its perfectly balanced cheese blend and creamy sauce that clings to each pasta shell. It’s straightforward and foolproof, making it easy to recreate restaurant-quality mac and cheese at home. Serve it with rice krispie chicken or hot honey chicken tenders for an extra cozy meal.
It’s a staple Thanksgiving side dish in our house because it’s one we can always count on the kids to eat!
Need another cheesy side dish? Try homemade broccoli casserole, cauliflower gratin, or cheesy scalloped potatoes next.
Ingredients You’ll Need
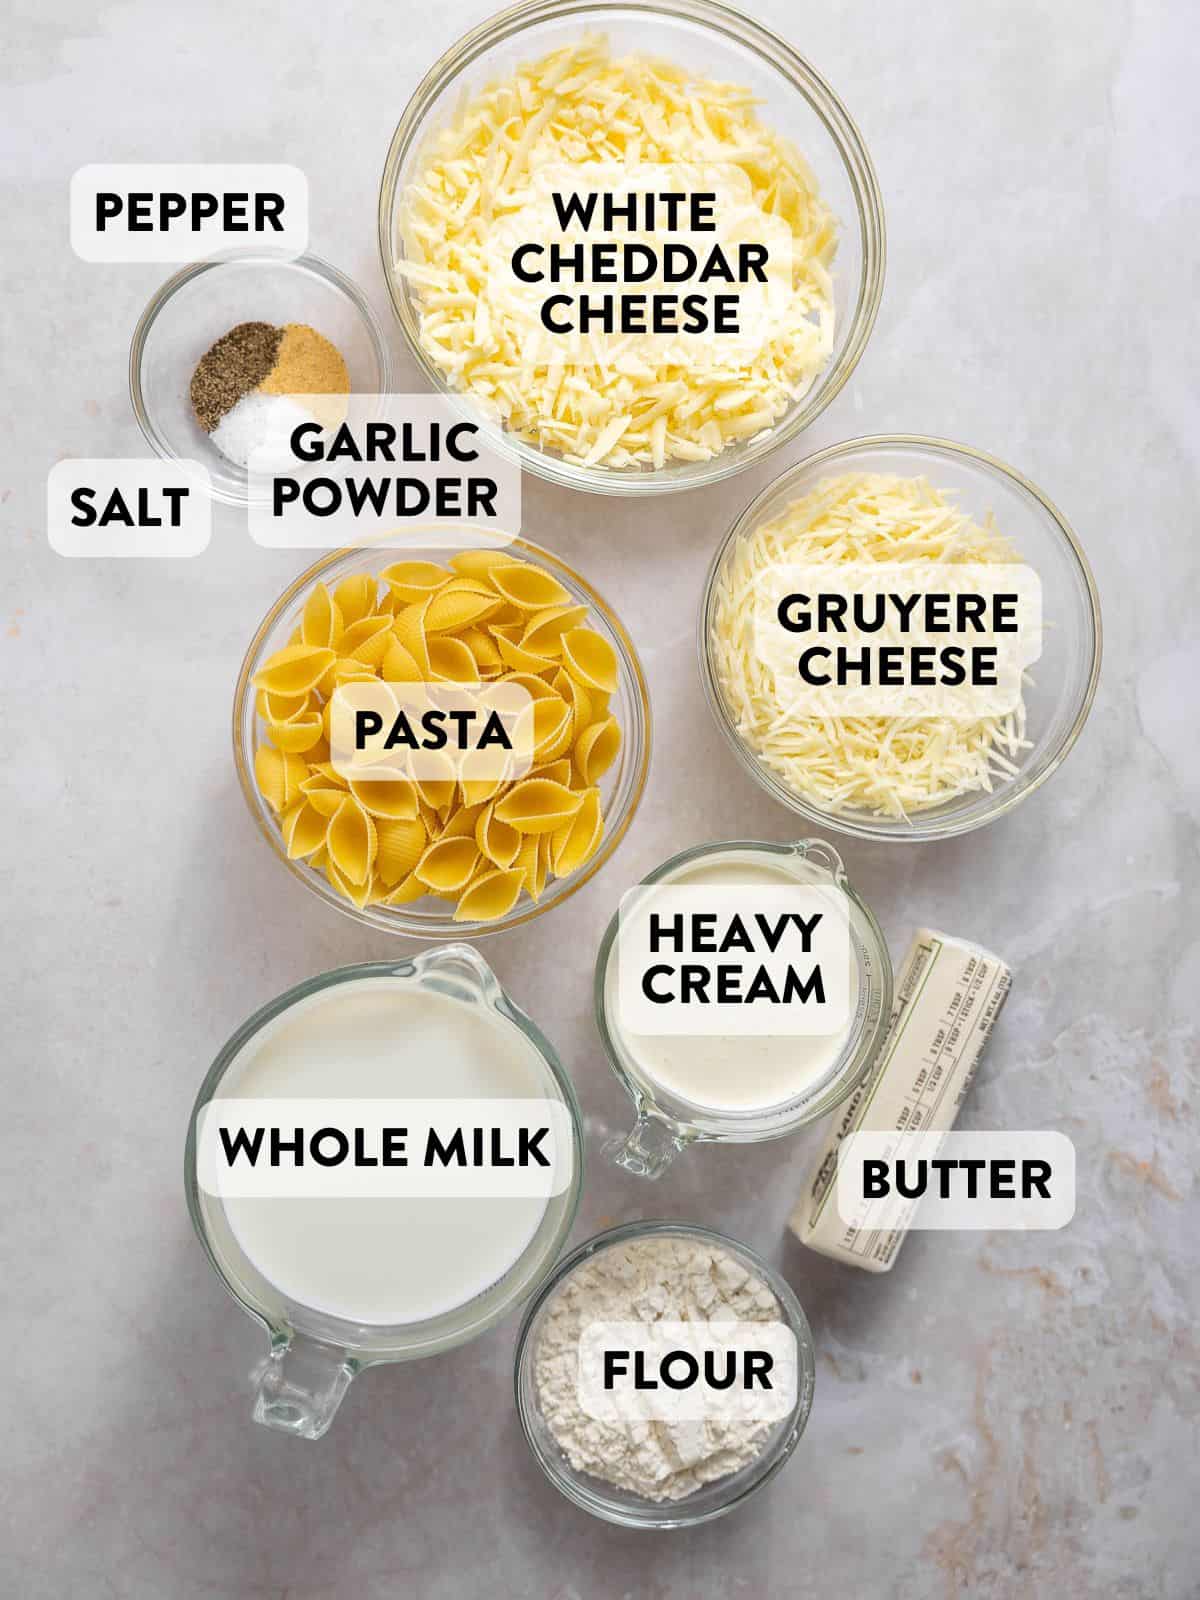
- Pasta Shells: The perfect vessel for capturing the creamy cheese sauce. Use gluten-free if needed (I like Jovial). Other small pasta like Cavatappi and elbows capture cheese sauce well.
- Unsalted Butter: Forms the base of the roux, adding richness to the sauce.
- All-Purpose Flour (gluten-free if needed): Helps thicken the sauce, creating a smooth and velvety texture.
- Whole Milk: Provides the creamy foundation for the cheese sauce.
- Heavy Cream: Enhances the richness and creaminess of the sauce.
- Shredded Cheese: A mixture of white sharp cheddar cheese and gruyere offers a mix of bold flavors with plenty of depth.
- Spices: salt, pepper, and garlic powder balance it out.
Expert Recipe Tips
- Perfect Roux: Ensure the roux is well-cooked to eliminate any raw flour taste, whisking continuously until it turns a light golden color.
- Don’t use pre-shredded cheese. It contains preservatives that prevent it from melting as well. Take the extra 10 minutes to shred it yourself! I love this particular box grater.
- Use high-quality cheese and other ingredients. There aren’t many in this recipe, so they need to shine!
- Don’t overcook the noodles. They will continue to cook in the warm cheese sauce. Make sure they’re just al dente or they could become mushy.
- Use whole milk for extra creaminess.
How to Make White Cheddar Mac and Cheese
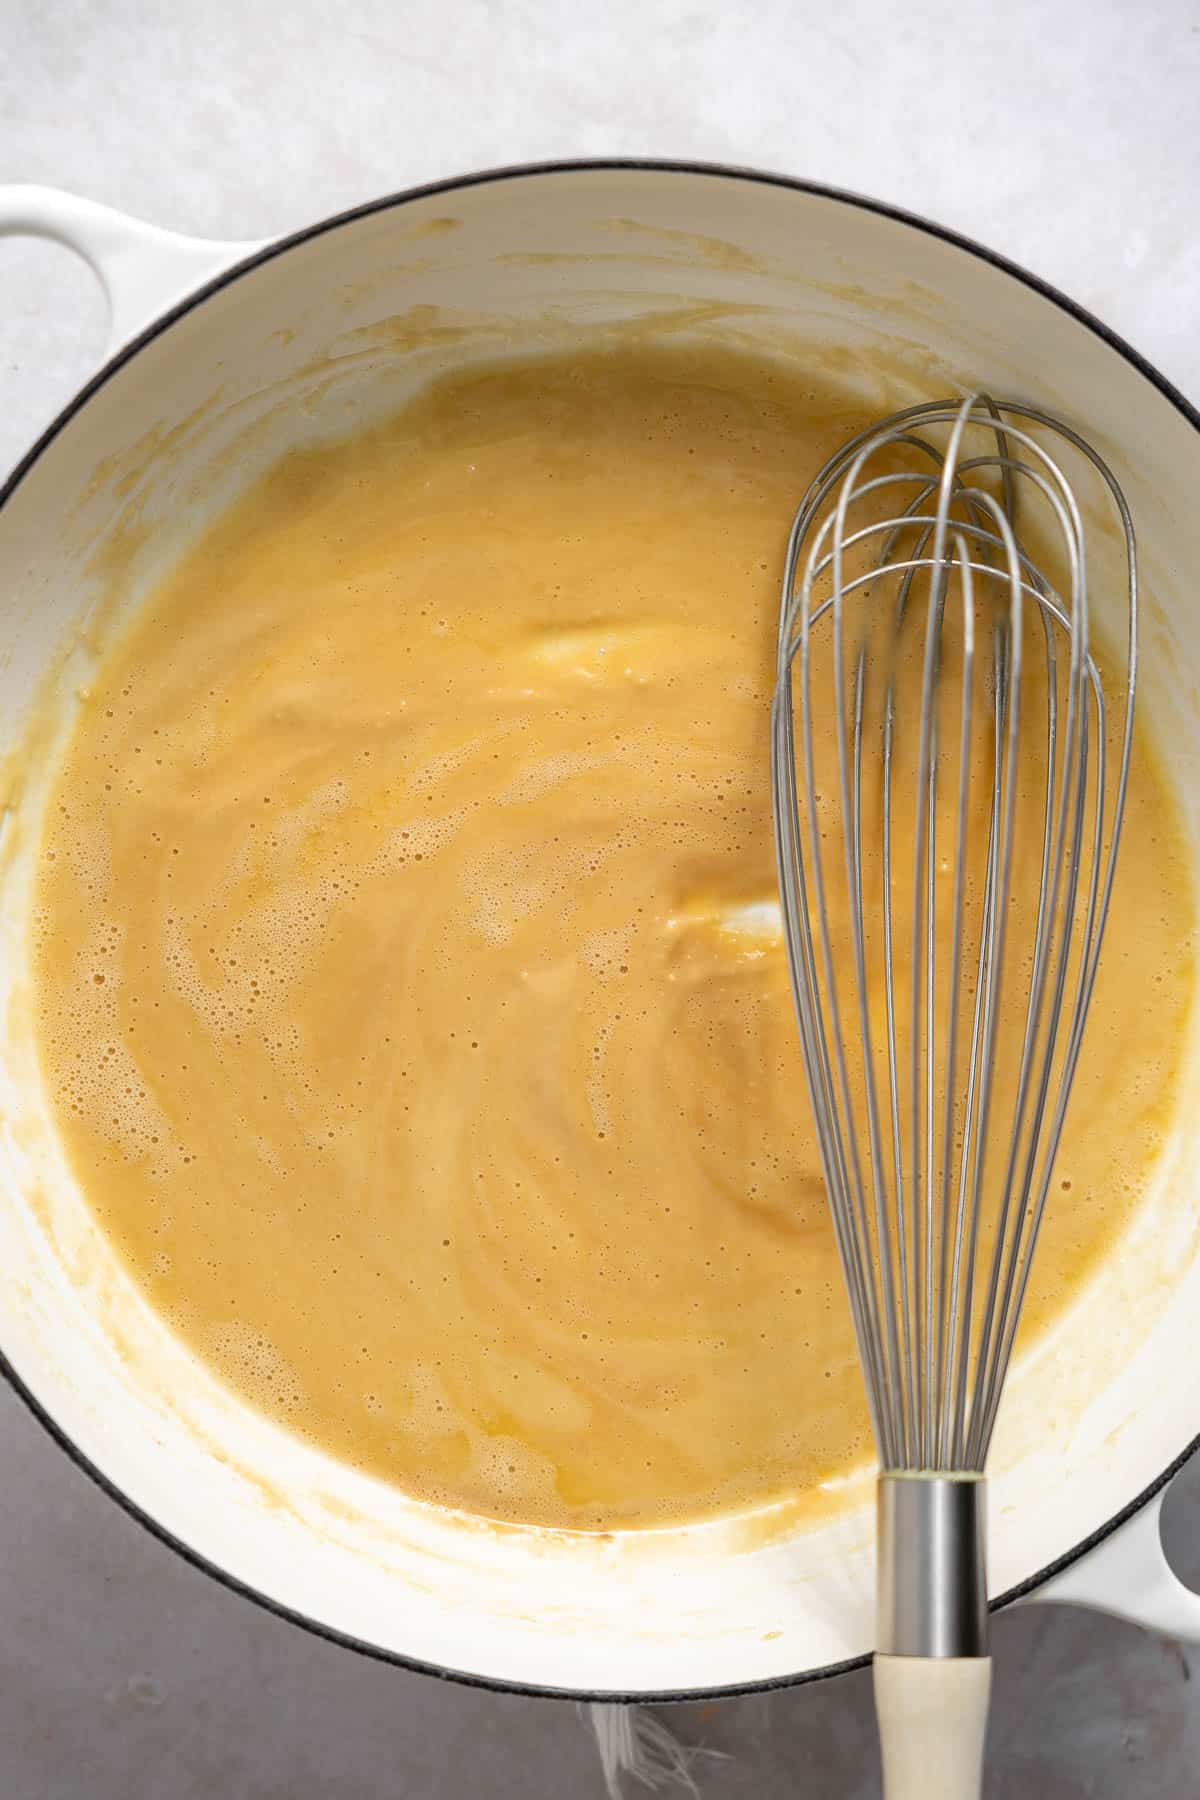
Step 1. Make the roux: Melt butter in a saucepan, whisk in flour to form a roux. Pour in the milk and cream, whisking until smooth and thickened.
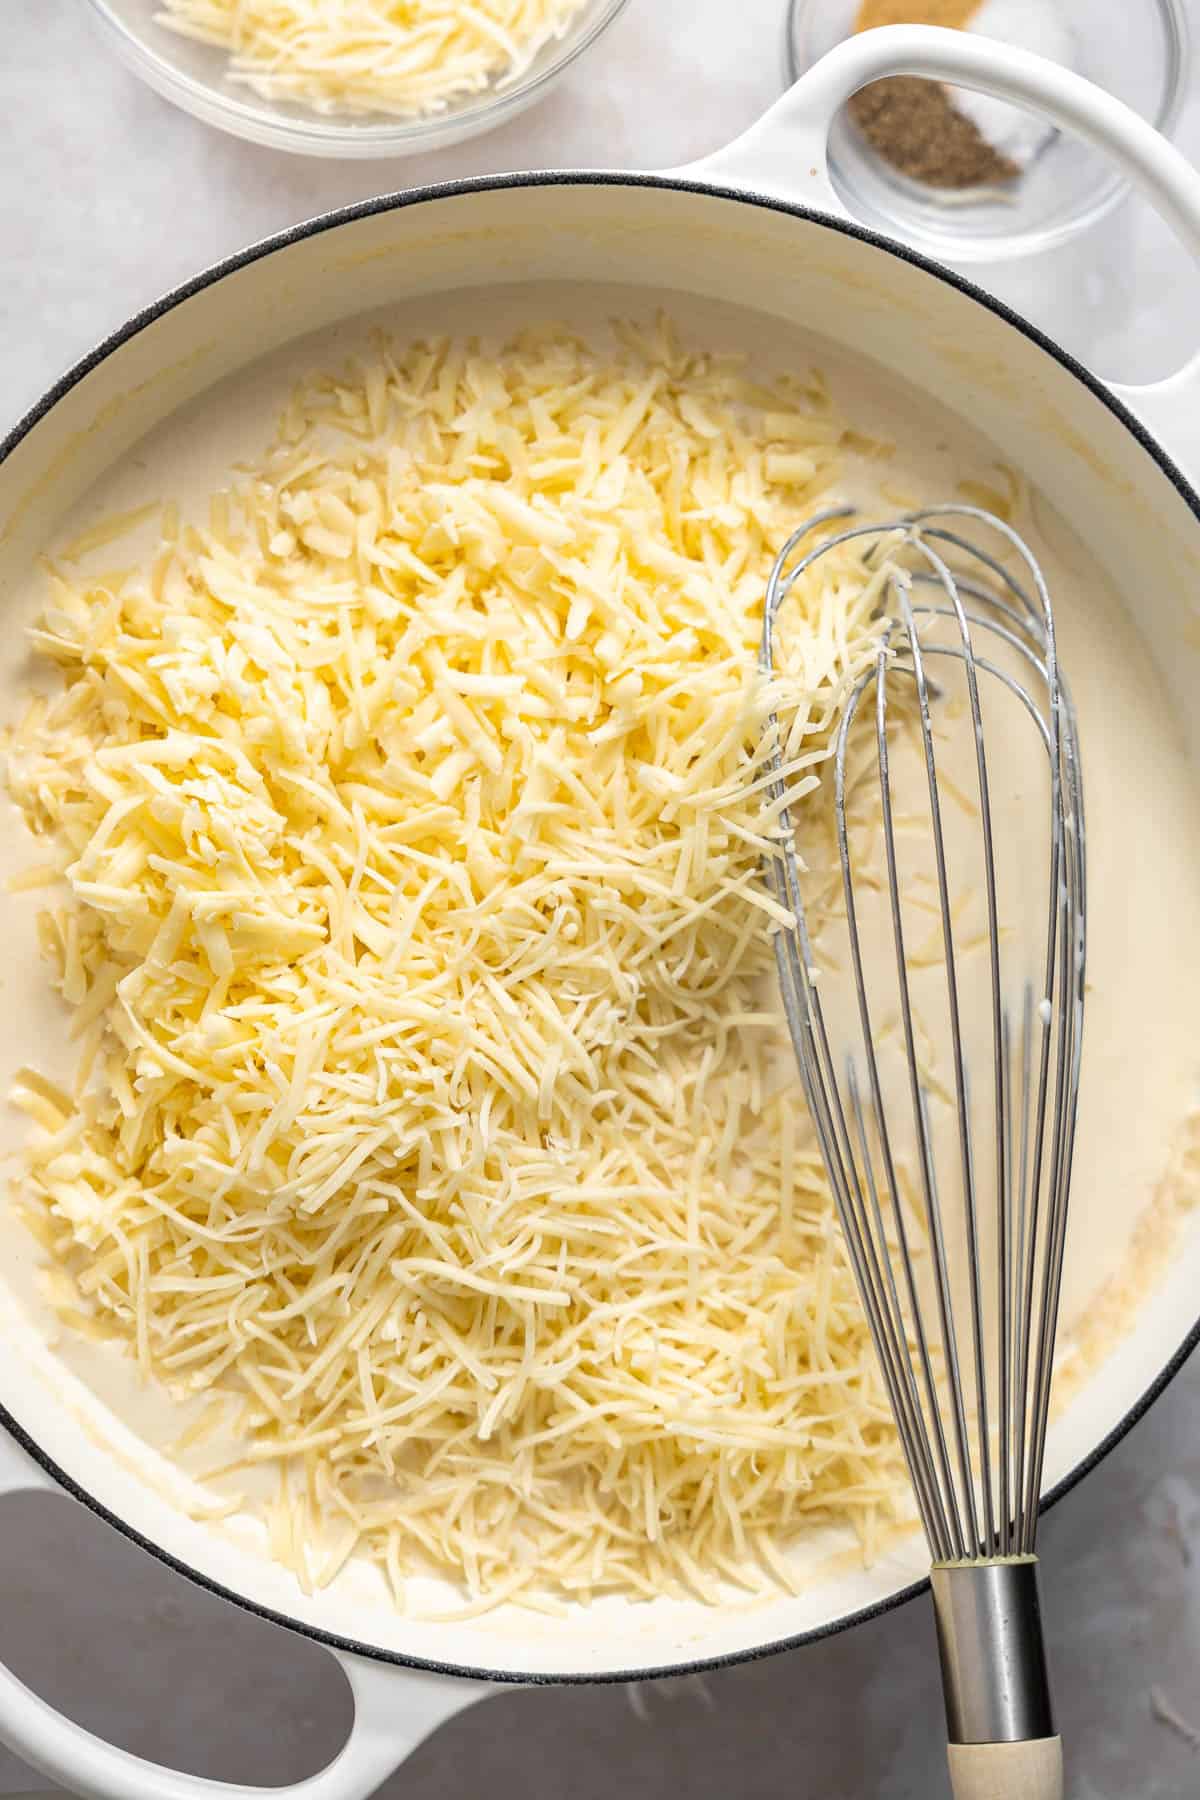
Step 2. Finish the Cheese Sauce. Stir in shredded white cheddar and your choice of gruyere, manchego, or fontina until melted and creamy. Season with salt, garlic powder, and black pepper.

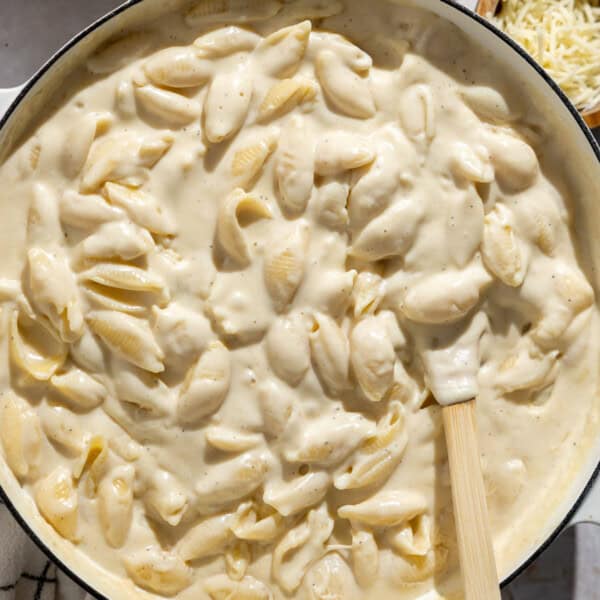
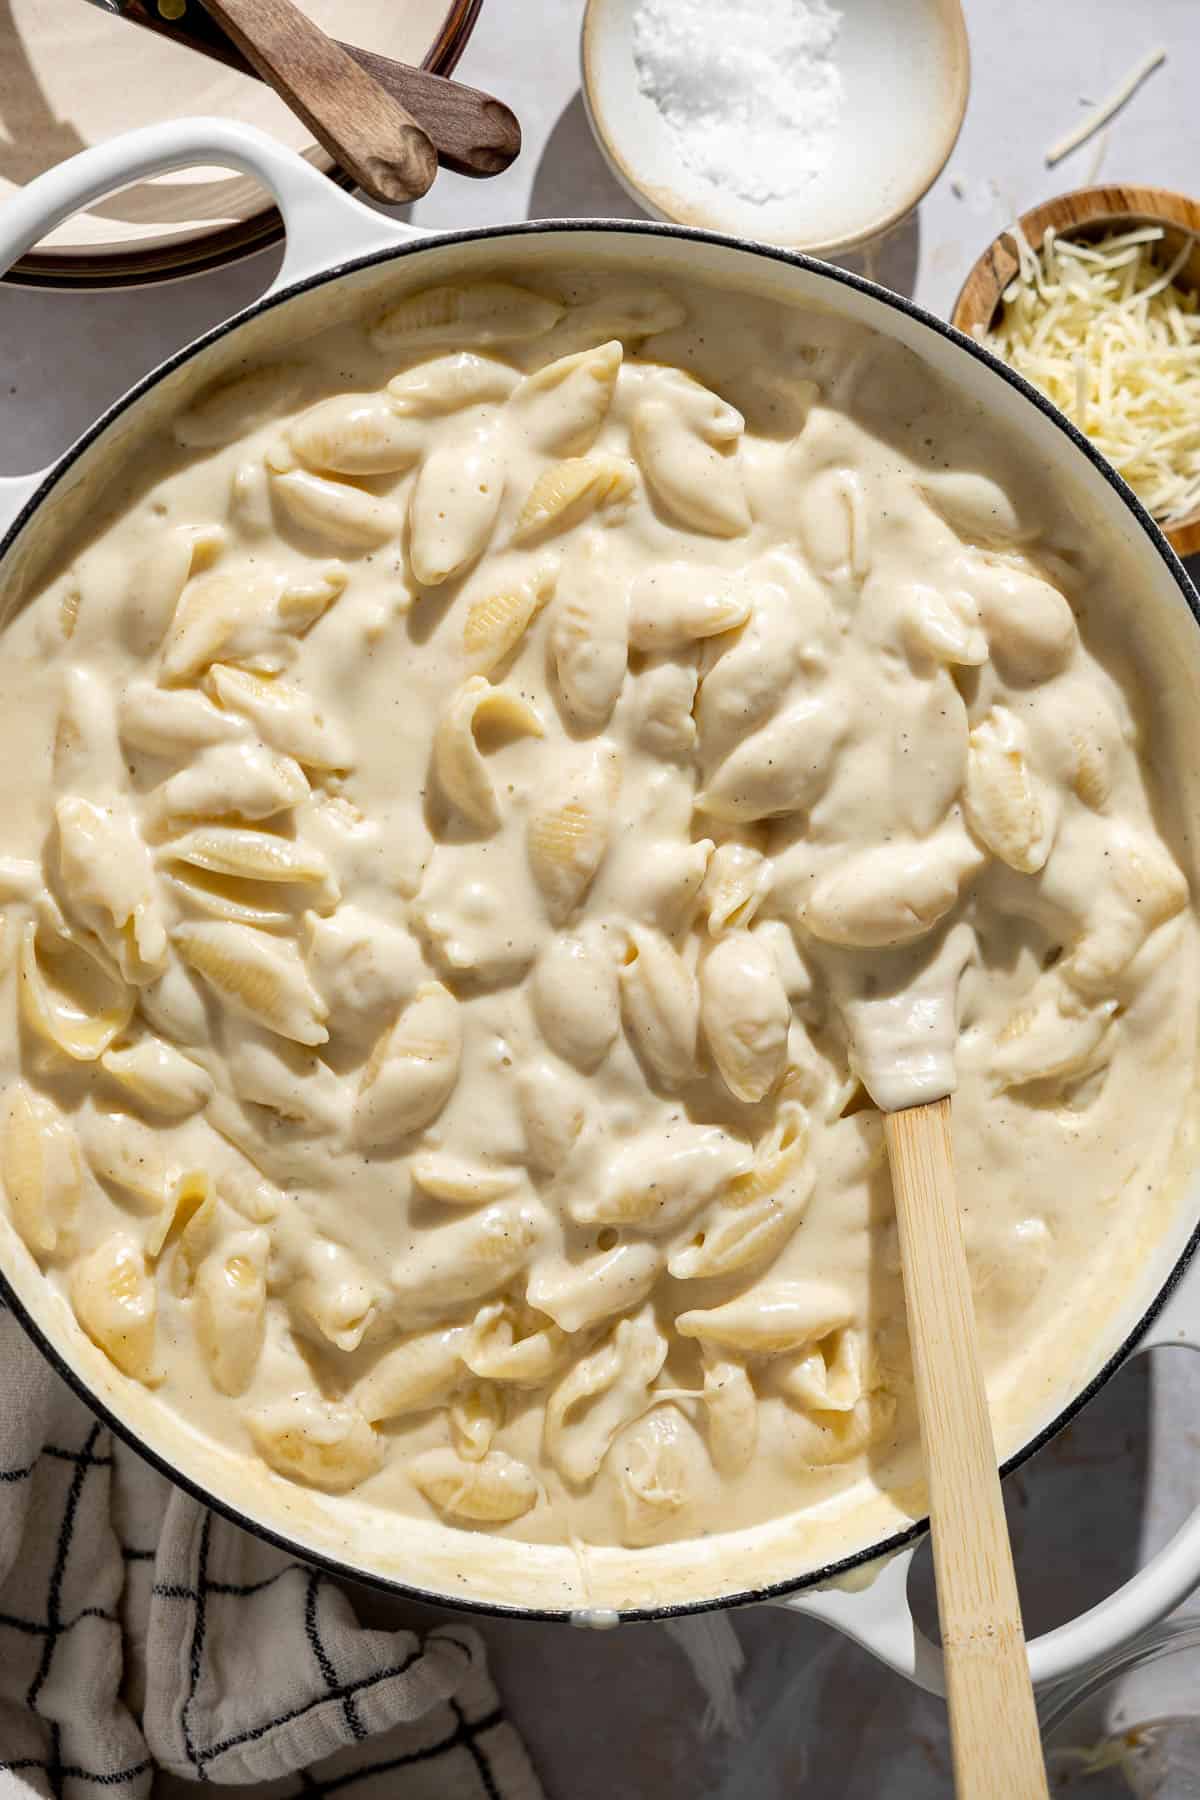
Step 3. Mix with Pasta. Toss the cooked pasta with the cheese sauce until well coated. Serve warm and enjoy!
Recipe Variations
- Add protein: Add 2 cups of cottage cheese to the cheese sauce and noodles.
- Baked white cheddar mac and cheese: I tested this as a baked mac and cheese with a crunchy topping. Transfer the mac and cheese to a casserole dish and top it with a mixture of crushed cheddar crackers and butter. Bake until bubbly! (see recipe notes)
- Try a variety of cheese: Monterey jack, white American cheese, or even yellow cheddar are great options. Sprinkle some parmesan cheese on top if you have that on hand!
- Add greens: Boil broccoli florets for a few minutes then drain and add to the macaroni before baking. Or add in roasted broccoli!
- Dairy-free and vegan alternative: Try this vegan mac and cheese. (It’s so rich and creamy!)
Make-Ahead and Storage Tips
Make Ahead: Prepare the sauce and cook the noodles 1-2 days in advance. Store them separately and mix, assemble, and bake when you’re ready to serve the dish.
To store: Transfer any leftovers to an airtight container and refrigerate for up to 2 days.
Need more delicious holiday sides? Try boursin mashed potatoes, chorizo cornbread stuffing, or cauliflower gratin.
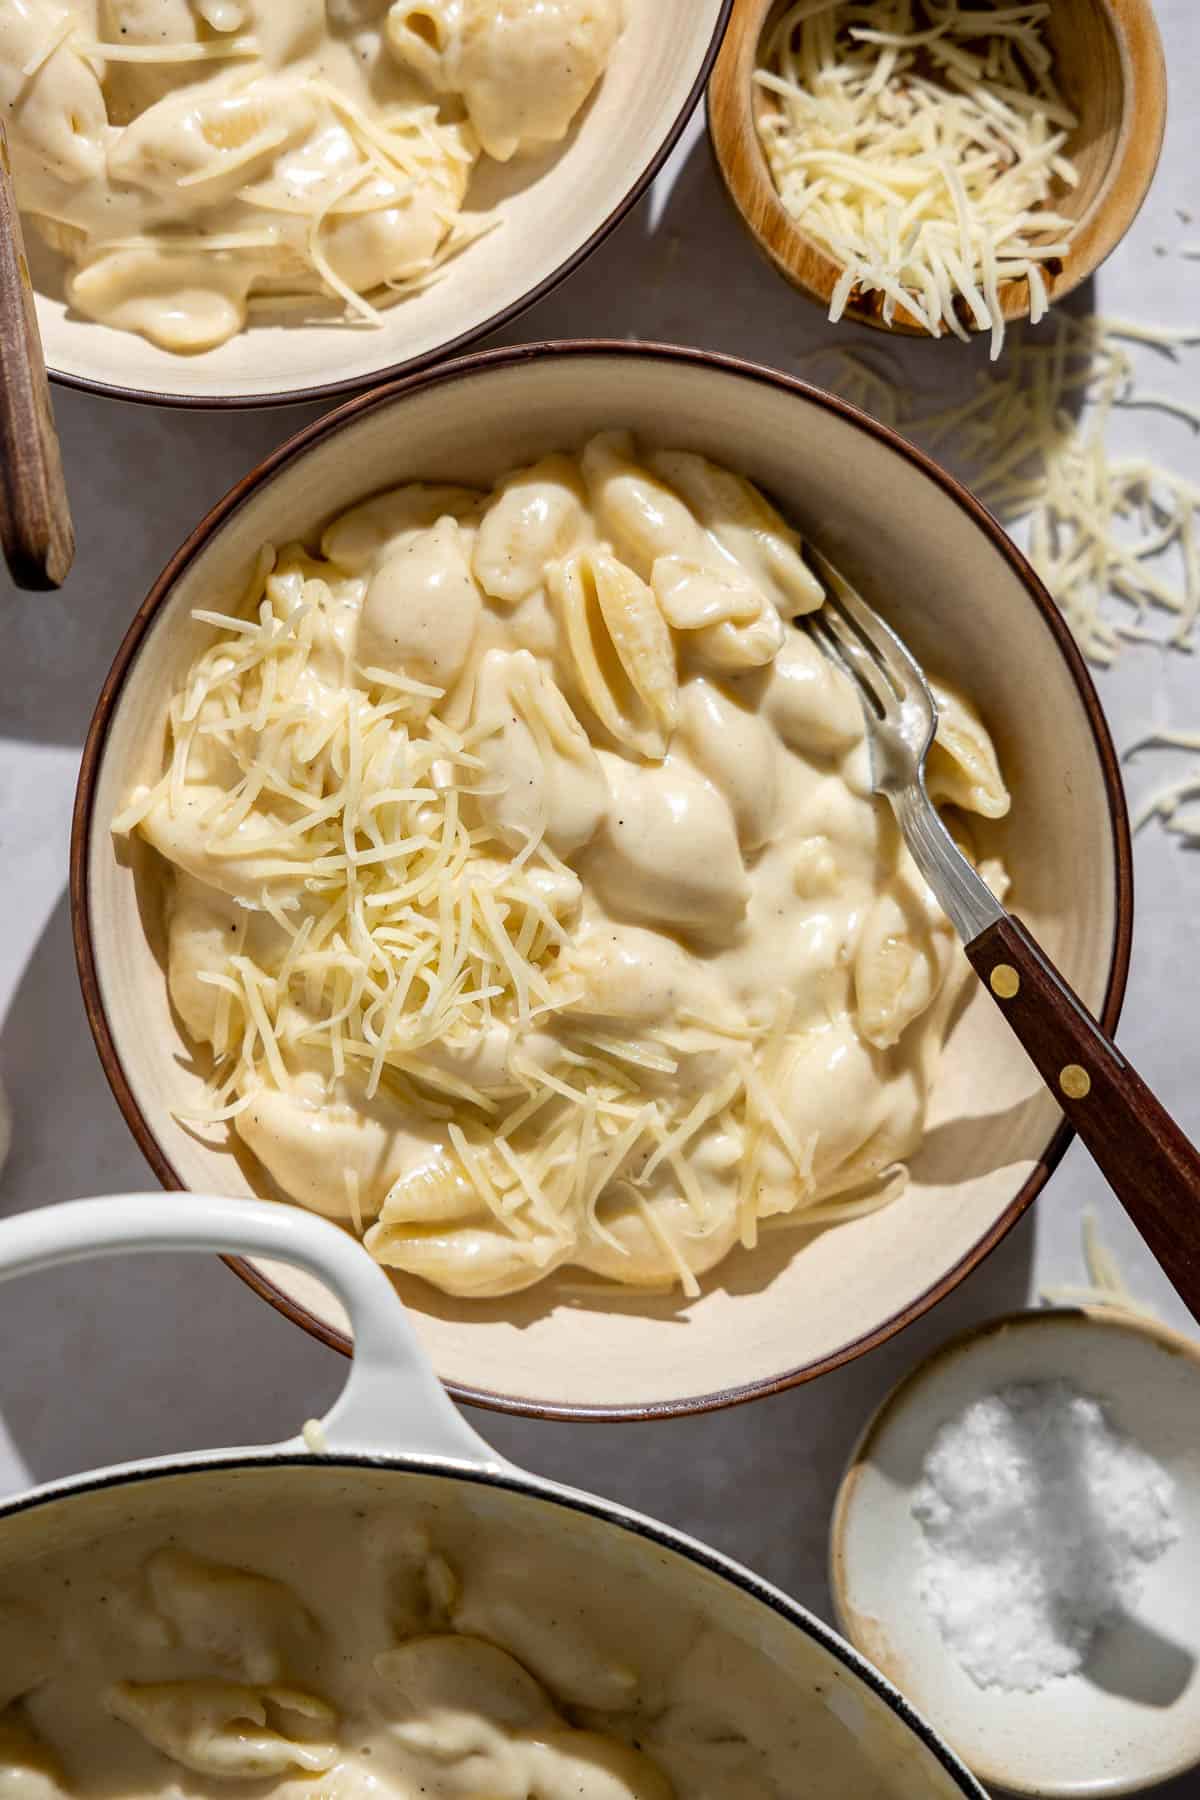
White Cheddar Mac and Cheese
Save this Recipe!
Ingredients
White Cheddar Mac and Cheese
- 1 pound medium pasta shells gluten-free if needed
- ½ cup unsalted butter
- ½ cup all purpose flour gluten-free if needed
- 2 1/2 cups whole milk plus more as needed
- 1 cup heavy cream
- 1 1/2 cups (6 ounces) shredded sharp white cheddar cheese
- 1 1/2 cups (6 ounces) gruyere, manchego, or fontina cheese
- 1 teaspoon kosher salt plus more to taste
- 1/2 teaspoon garlic powder
- Pinch of black pepper
Instructions
- Bring a large pot of salted water to a boil. Add the uncooked pasta and cook according to the package instructions. Cook them until just al dente. Drain and do not rinse.1 pound medium pasta shells
- Melt the butter in a large saucepan over medium heat. Sprinkle the flour over top and whisk continuously until thickened. Turn the heat down to medium-low and continue to whisk the butter and flour mixture (roux) for 3-4 minutes. This cooks the flour and helps remove any raw flour taste.½ cup unsalted butter, ½ cup all purpose flour
- Whisk the milk, heavy cream, salt, pepper, and garlic powder into the roux until no lumps remain. Turn the heat up to medium-high, and bring to a gentle boil to thicken for 2-3 minutes. Add a splash of milk as needed to thin it out. Turn the heat back down and add each kind of cheese, continuing to stir until it's melted.2 1/2 cups whole milk, 1 cup heavy cream, 1 1/2 cups (6 ounces) shredded sharp white cheddar cheese, 1 1/2 cups (6 ounces) gruyere, manchego, or fontina cheese, 1 teaspoon kosher salt, 1/2 teaspoon garlic powder, Pinch of black pepper
- Stir the cooked pasta into the sauce until it's coated. Serve warm and enjoy! See notes for baked mac and cheese.
Notes
Video
Nutrition
Nutrition information is automatically calculated, so should only be used as an approximation.
FAQs
I like the mixture of cheddar and gruyere for most mac and cheese recipes. This white cheddar mac and cheese uses sharp white cheddar and gruyere.
Whether you’re using boxed mac and cheese or homemade mac and cheese, add some real shredded cheese to amp it up. You couold also add seasoning like garlic powder and black pepper. Consider mixing in roasted broccoli for some greens.
Absolutely! Elbow macaroni, penne, or even gluten-free varieties work perfectly. Just ensure the pasta is cooked al dente to prevent it from becoming mushy.
Yes! Substitute the butter and cheeses with dairy-free alternatives and use plant-based milk and cream to create a creamy, dairy-free mac and cheese.
Recipe by: Molly Thompson of What Molly Made | Photography by: Kate Poskochil
This post may contain affiliate links. Read our disclosure policy.


We added a touch extra salt, but this recipe is delicious and super easy!! My kids loved it
Thanks Ashley!!
This was absolutely delicious. Came together beautifully, has great flavor, and my whole family loved it. Only change I made was substituting panko for the cheese cracker topping when baking, but I’d imagine that would have been delicious if I’d had that on hand! Will be adding this to our holiday dinner rotation!
Do you really triple the flour if you triple the recipe?
Yes!
This recipe is *chefs kiss* and i love that it’s a healthier option than Panera! Sooooo delicious!
Thank you so much Bri!
Instructions don’t make any sense. In the instructions it calls for ingredients not listed in the ingredient section. Where the instructions call for these ingredients (ground mustard and cream cheese) it’s wildly out of sequence. You also call for dividing the macaroni boiling some and leaving some dry, but then call for adding the ingredients after the dish is finished baking? Something or messed up here.
Glad you said something! Something was weird about it and there were extra instructions that got included from testing this recipe. I updated it! Thanks!