
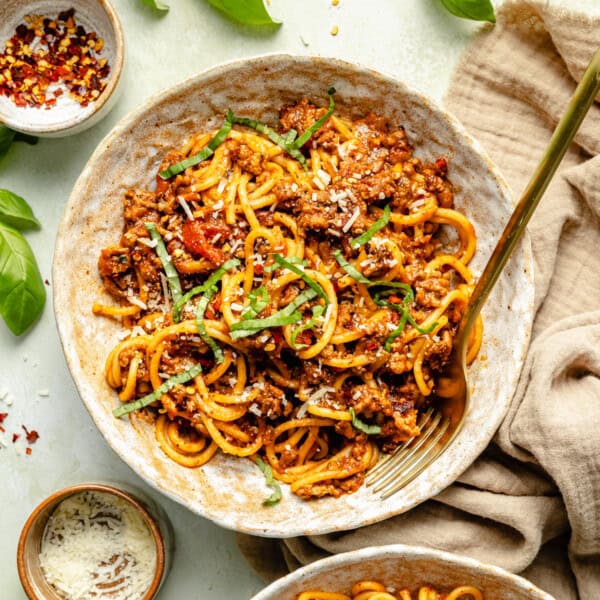

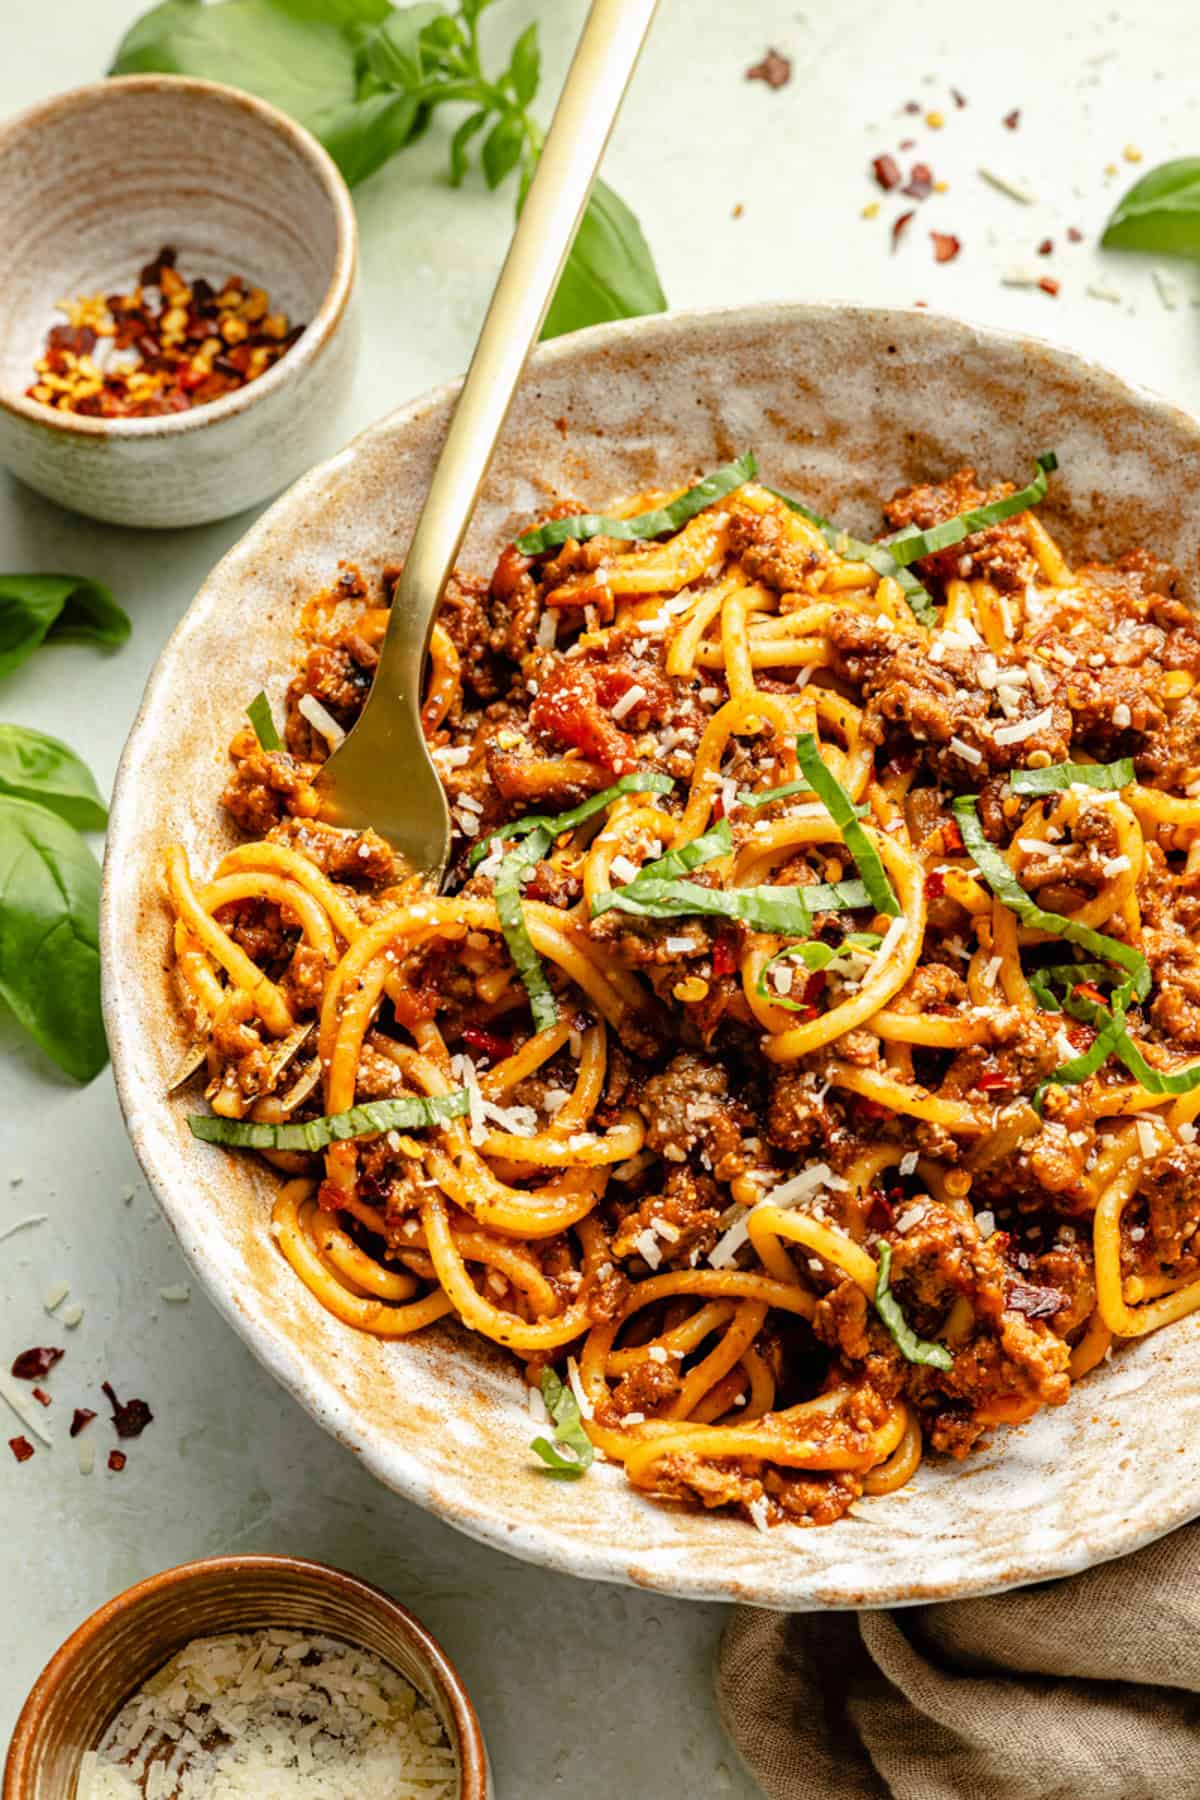
Gluten-free pasta and the Instant Pot make a lot of people nervous, and for good reason. GF pasta can clump, go mushy, or fall apart if the timing is off by even a minute.
This recipe solves all of that.
You’ll break the spaghetti in half, layer it in a criss-cross pattern (that’s the clumping fix), set it to 8 minutes on HIGH, and walk away.
The meat sauce builds in the same pot, so dinner is truly one-pot, done in 30 minutes, and nobody at the table will know it’s gluten-free.
If you love easy pasta nights, also save this Burrata pasta and Instant Pot lasagna soup for your weeknight rotation.
Looking for more Italian recipes? Try gluten-free meatballs, creamy spaghetti chicken, or gluten-free sheet pan pizza next.
Ingredients You’ll Need
- Olive oil – Helps sauté the onions and prevent sticking.
- Yellow onion & garlic – Adds depth and classic Italian flavor.
- Ground beef – Lean beef (I used 93%). Swap with ground turkey or italian sausage.
- Seasonings – A simple blend of kosher salt, garlic powder, onion powder, and dried basil brings warmth and flavor.
- Spaghetti sauce – Use a high-quality sauce like Rao’s for the best taste.
- Beef broth – The liquid helps cook the pasta evenly in the Instant Pot. Chicken broth works too.
- Spaghetti Noodles– Classic pasta choice that absorbs the sauce beautifully.
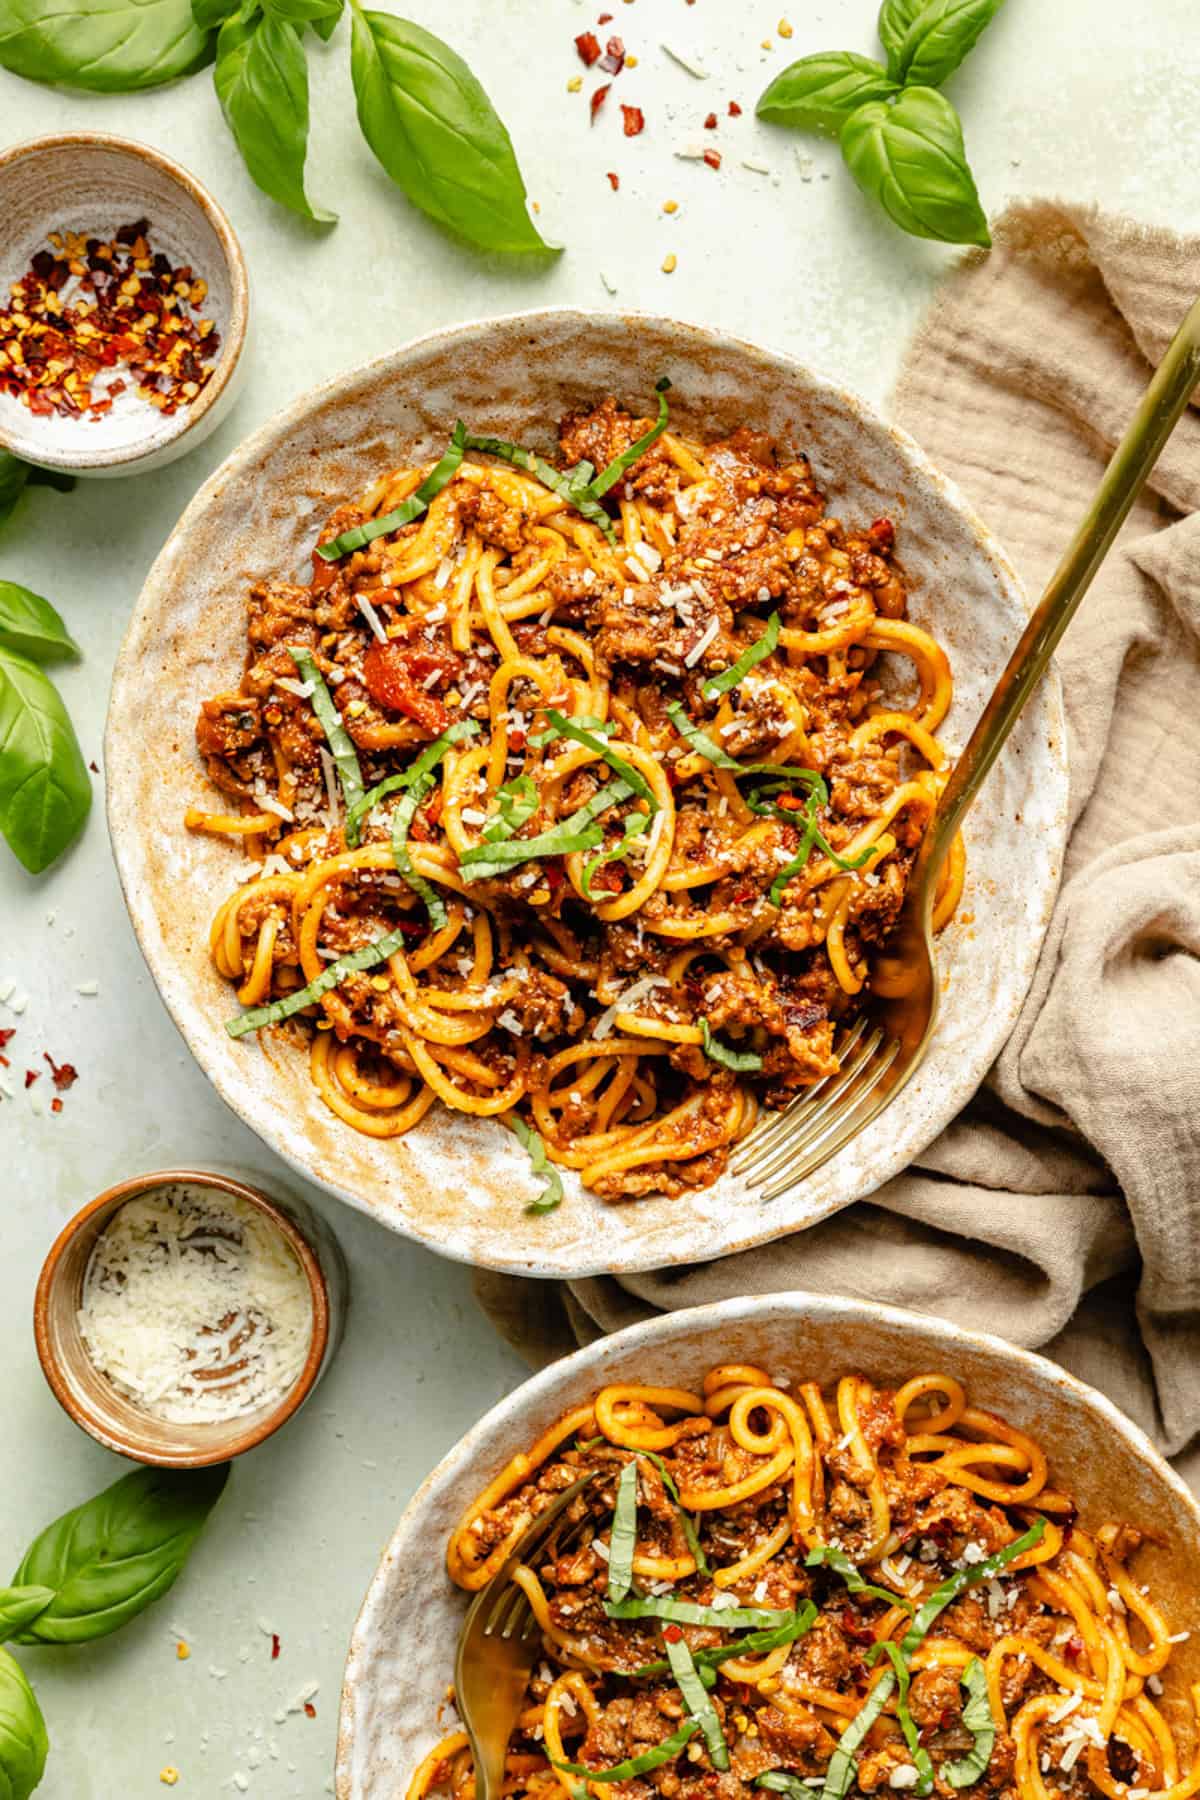
- Toppings – Parmesan cheese, fresh basil, and red pepper flakes for serving.
How to Make Gluten-Free Instant Pot Spaghetti
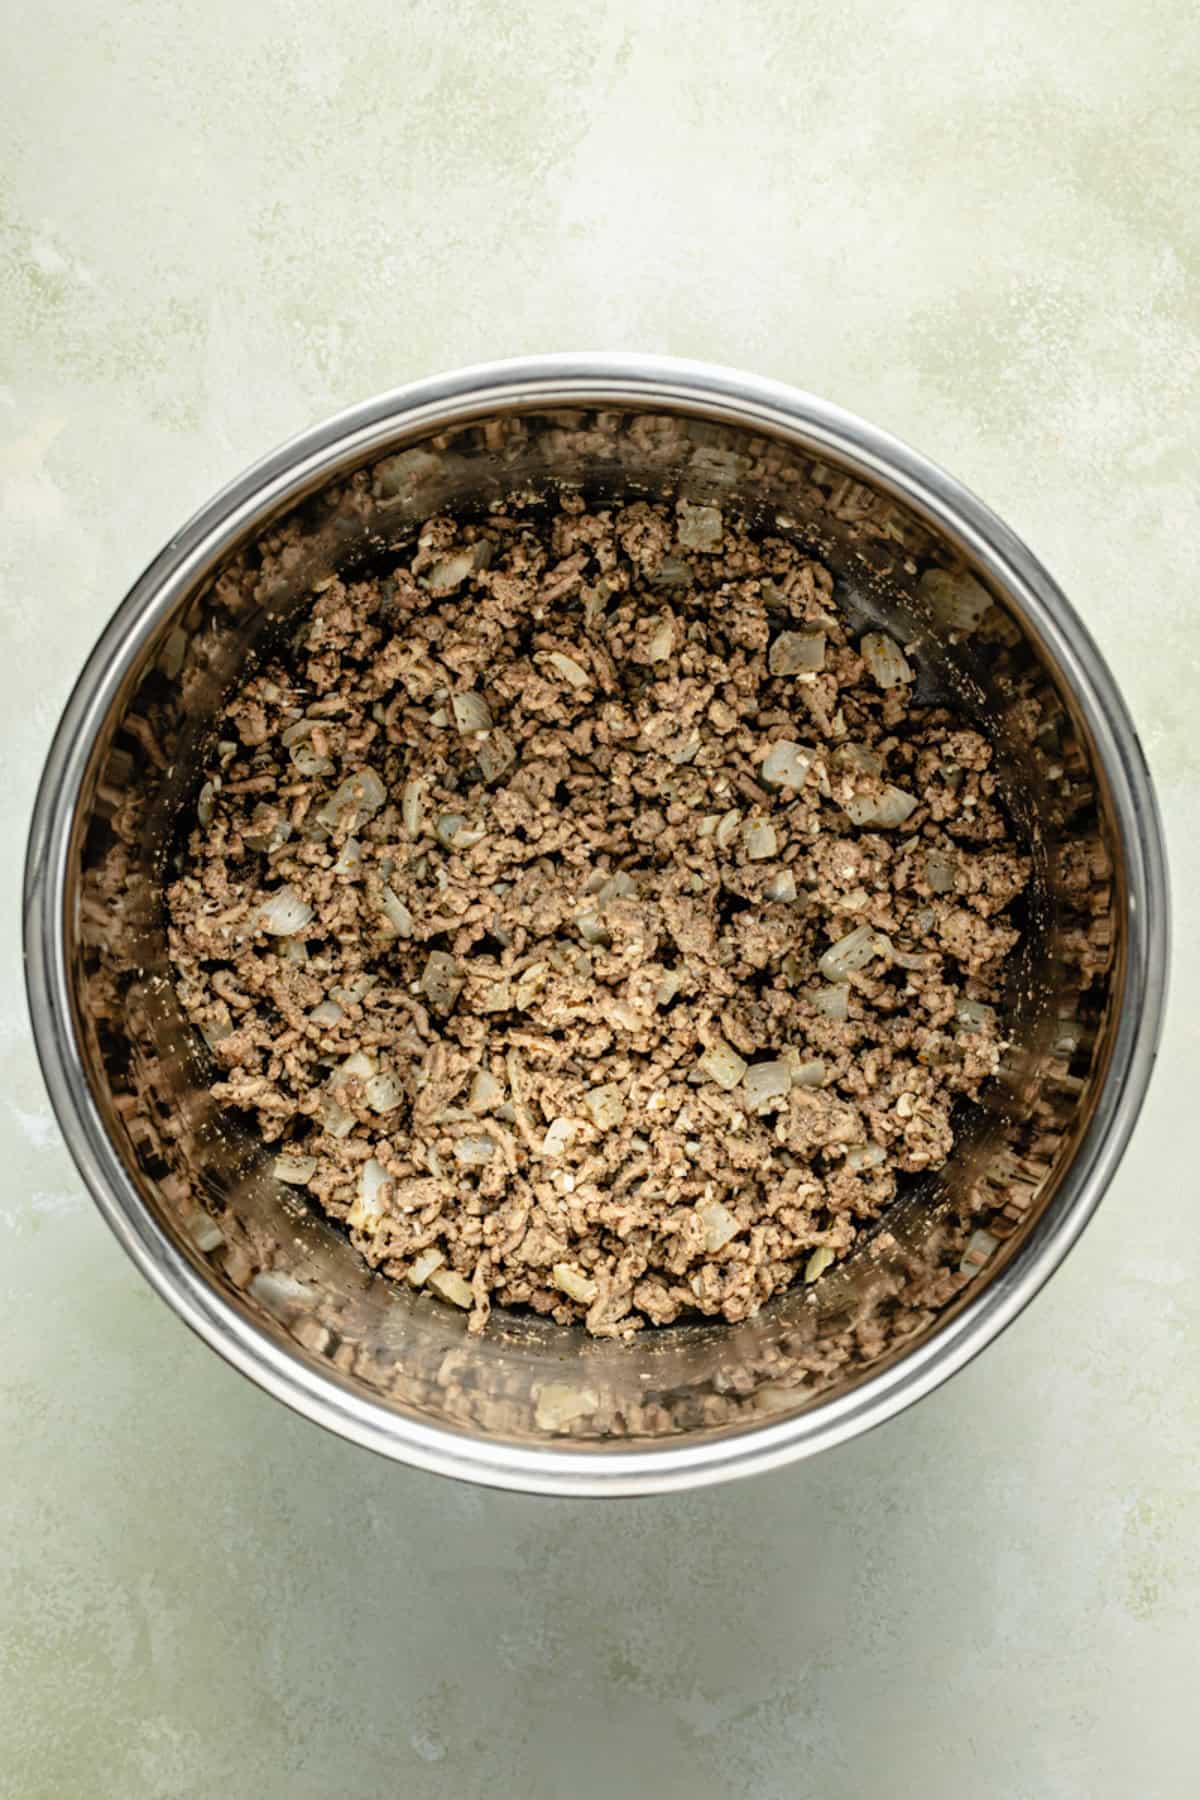
Step 1. Sauté the onions and cook the beef: Set the Instant Pot to Sauté mode, add olive oil and cook the onion and garlic. Add the beef and brown until no pink remains.
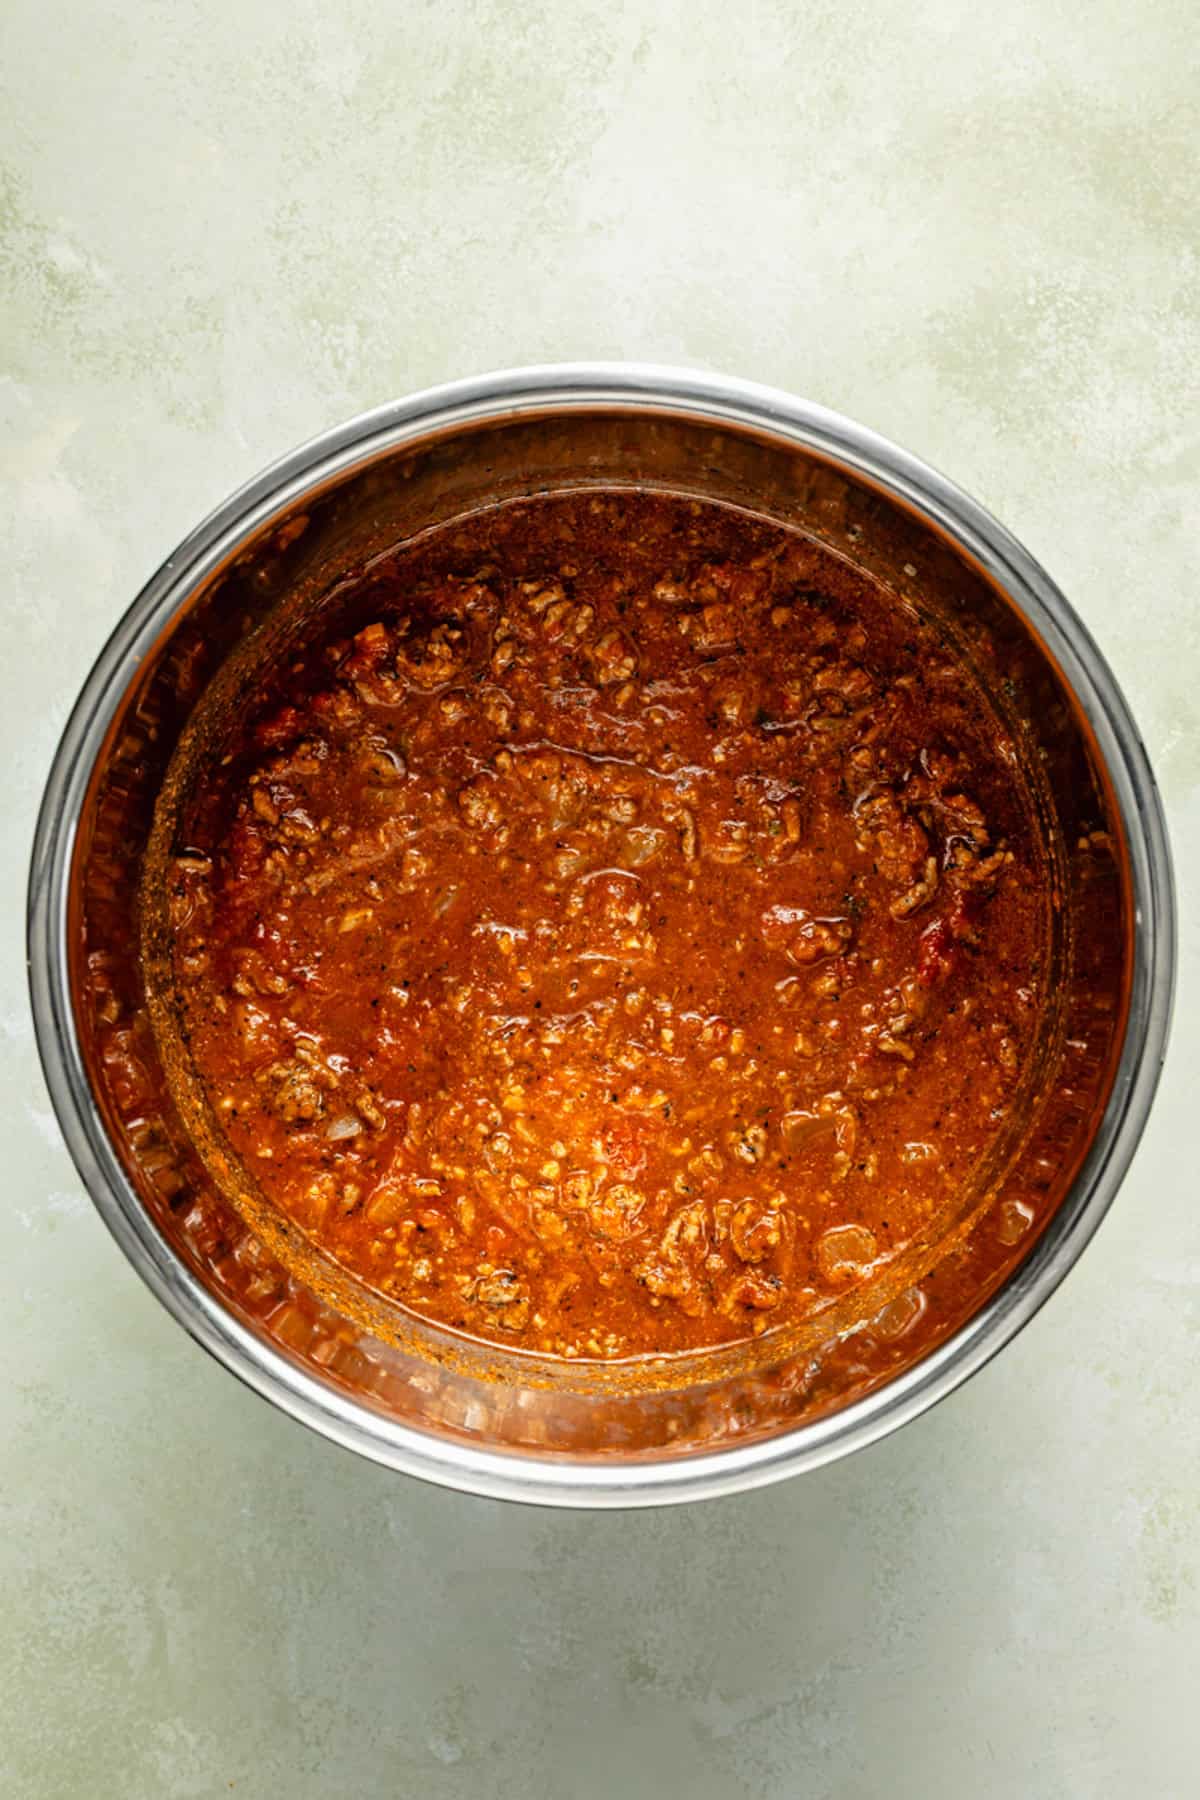
Step 2. Deglaze & add sauce. Turn off Sauté mode and pour in 1 cup of water, stirring to loosen any browned bits from the bottom. Add marinara sauce and stir well.
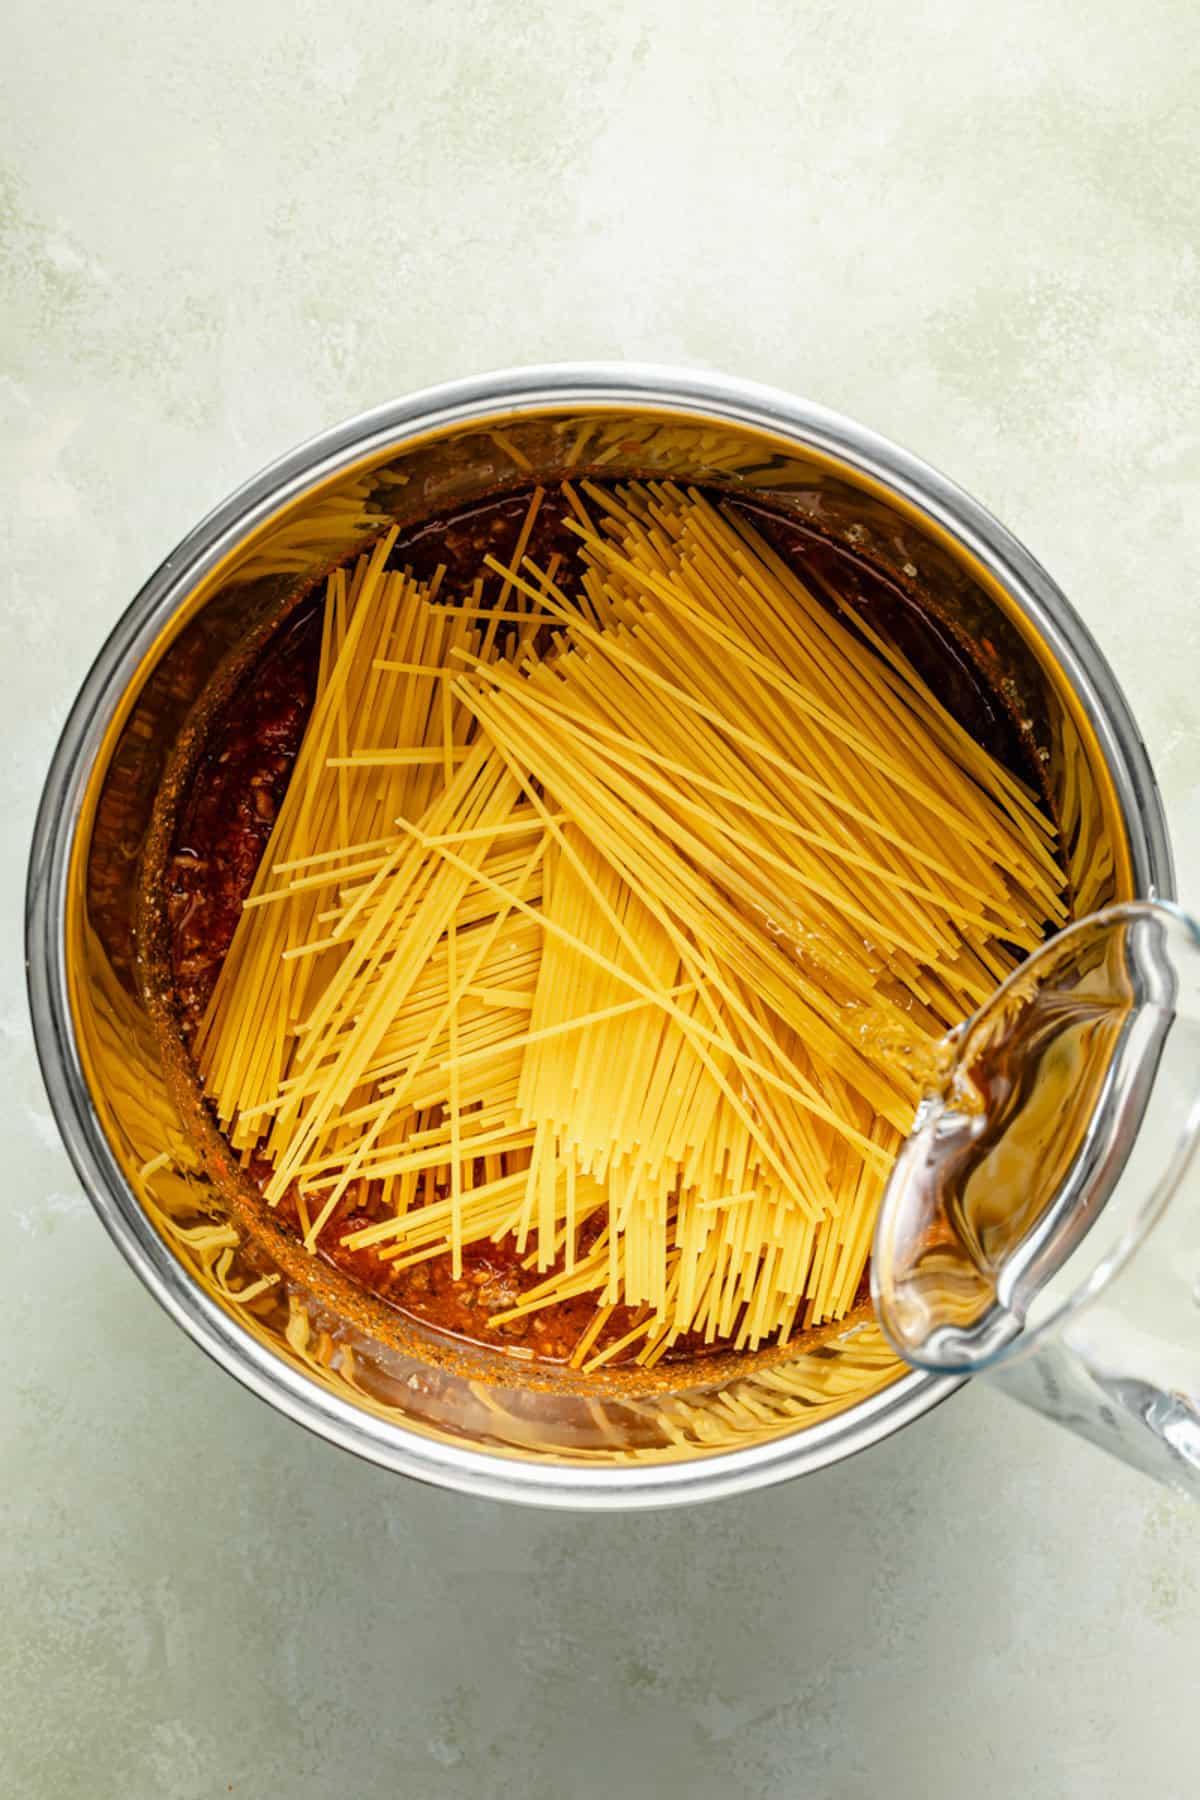
Step 3. Layer the spaghetti. Break uncooked spaghetti in half and layer it on top of the sauce. Do not stir! Pour the remaining 1 cup of water over the pasta, ensuring all noodles are covered.
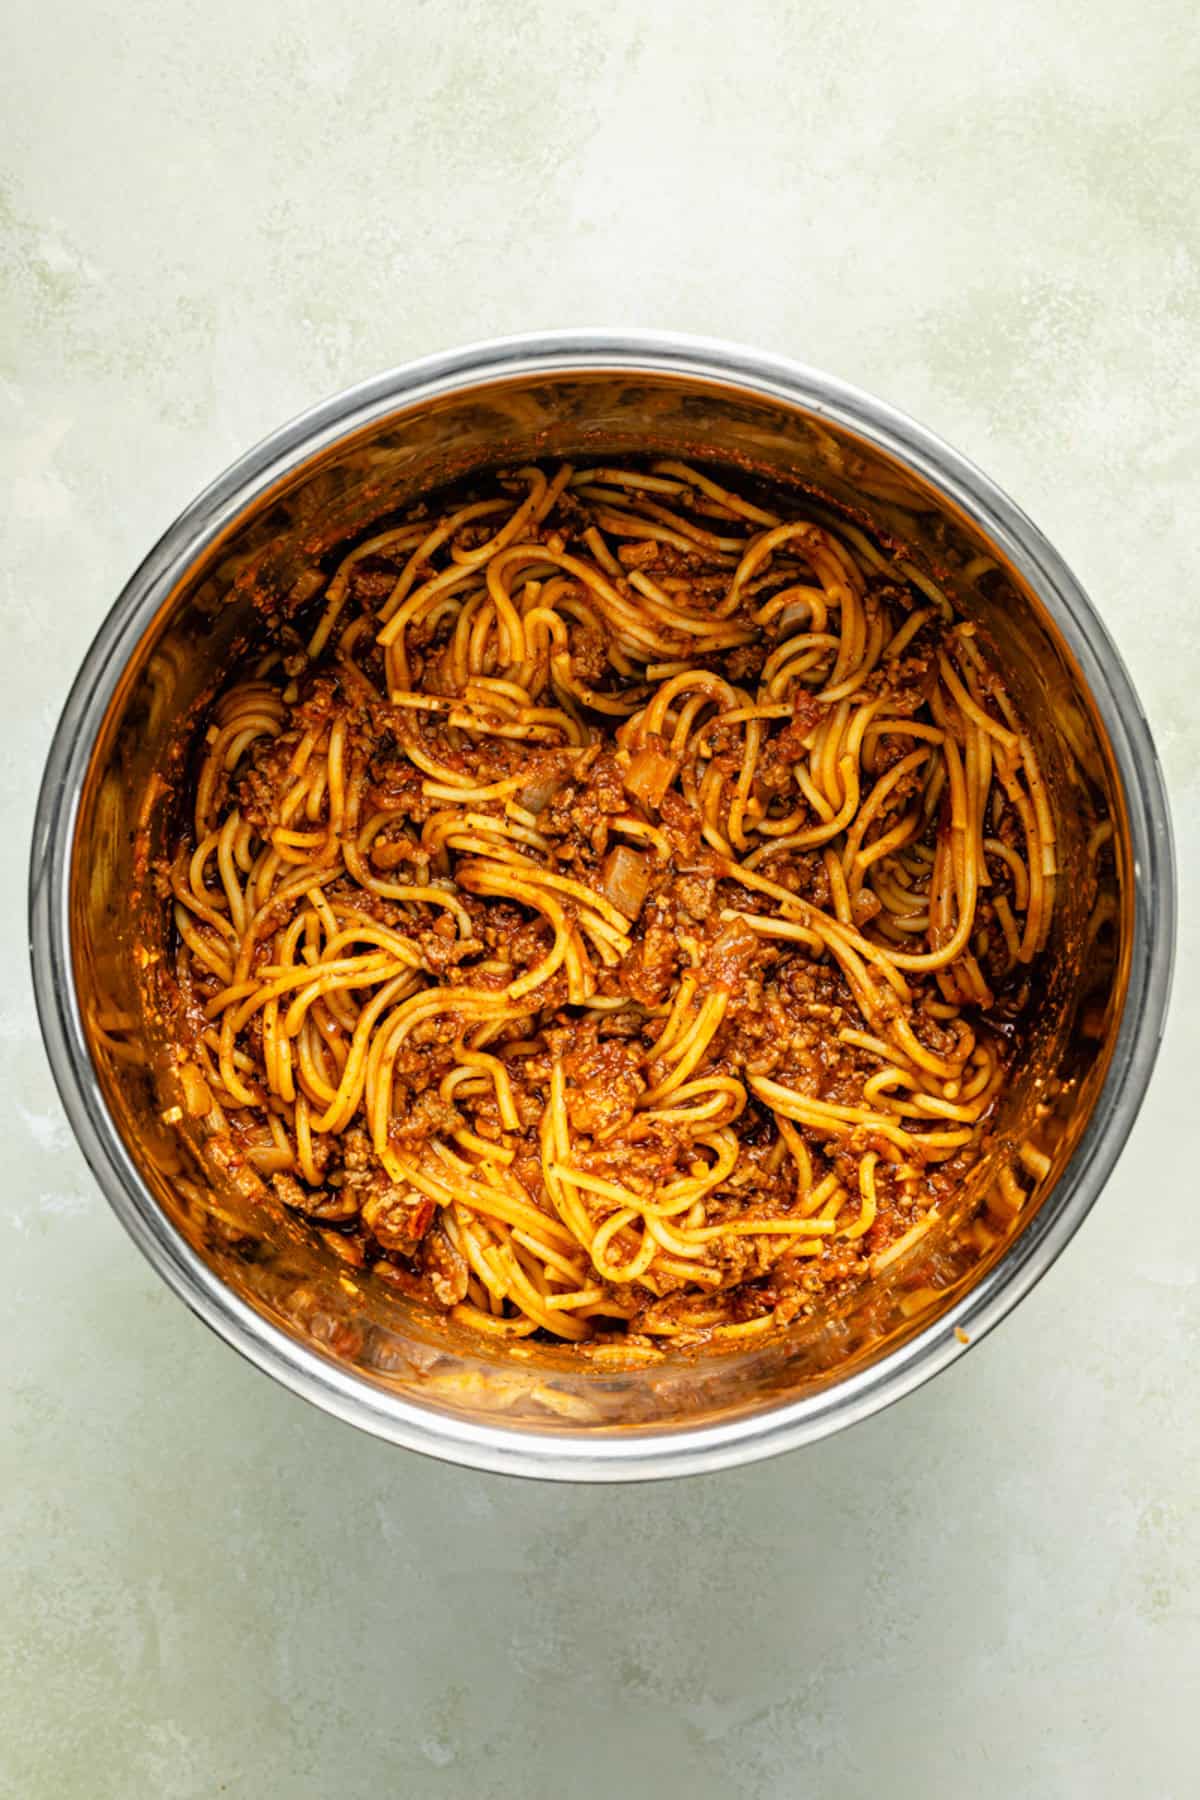
Step 4. Pressure cook. Close the lid, set the valve to Sealing, and cook on High Pressure for 8 minutes. (It will take about 8-10 minutes to come to pressure before the timer starts.). Quick release and enjoy!
Tips for the Best Instant Pot Spaghetti
- Don’t stir the spaghetti before cooking! Layering the ingredients prevents the dreaded “burn notice.”
- Use a high-quality marinara sauce for the best flavor—since it’s the base of the sauce, you’ll taste the difference!
- Break the pasta in half so it fits evenly in the Instant Pot and cooks uniformly.
- For a richer sauce, stir in ½ cup of heavy cream or grated Parmesan after cooking.
- Want a little spice? Add ½ teaspoon of red pepper flakes when seasoning the meat.
- Get creative with vegetables. Try adding diced carrots, celery, or bell peppers to the onion.
What to Serve with Spaghetti & Meat Sauce
🍞 Garlic Bread – Because extra sauce means extra dipping!
🥗 Side Salad – A fresh green salad balances the hearty pasta.
🧀 Extra Cheese – Parmesan, pecorino, or even mozzarella!
Recipe FAQs
Set the Instant Pot to 8 minutes on HIGH pressure. The pot takes about 8–10 minutes to come to pressure, then counts down from 8. Use a quick release immediately when the timer goes off — leaving it on natural release too long makes GF pasta mushy.
Break the spaghetti in half (or thirds) and layer it in a criss-cross pattern, rotating each layer about 45 degrees rather than laying all noodles parallel. You can’t stir during cooking, so the arrangement upfront is everything. This single step prevents virtually all clumping.
Barilla GF (corn-and-rice blend) holds up best and is the most widely available. Jovial and Delallo are also excellent and two of my favorites. Avoid rice-only spaghetti varieties because they tend to break apart and go gummy.
Yes, if you don’t need it gluten-free, regular spaghetti works perfectly with the same 8-minute cook time and criss-cross layering trick. The technique is identical.
Storage & Reheating Instructions
Refrigerate: Store leftovers in an airtight container for up to 4 days.
Freeze: Let cool completely, then freeze in portions for up to 3 months.
Reheat: Warm leftover spaghetti in the microwave with a splash of water or in a saucepan over low heat.
More Pasta Recipes
- One pot creamy cajun chicken pasta [dairy free]
- One pot taco pasta
- Creamy penne arrabbiata
- Sweet potato gnocchi
Feels like Breakfast on the Beach!
- Thick and delicious with tons of coconut flavor
- Takes 5 minutes to make
- Easy to customize with your favorite toppings
- Full of healthy fats
- Add protein powder for a complete breakfast
- Sweet tropical flavors
Love refreshing smoothies? Try this pitaya smoothie bowl, blueberry raspberry smoothie, or tropical kale smoothie next!

Why You’ll Love This Smoothie Bowl
- Thick enough to scoop with a spoon. Not a drink.
- 5 minutes from freezer to bowl.
- One blender, no extra dishes.
- Add 25g of protein with a scoop of vanilla protein powder. Full breakfast, full morning.
- Naturally Gluten-Free, Paleo, Dairy-Free, and Vegan. No swaps needed.
- Pre-portion the fruit ahead so weekday mornings are zero decisions.
Ingredients You’ll Need

- Frozen banana. One whole. Banana is the texture anchor; don’t skip.
- Frozen pineapple. ¾ cup. Pre-cut from the freezer aisle works.
- Frozen mango. ½ cup. Same rule.
- Full-fat coconut milk. ⅓ cup, from the can. Shake the can well before measuring or you’ll pour off only the watery part.
- Coconut extract. Optional, ¼ teaspoon. Boosts the coconut flavor without making it taste like sunscreen. A little goes a long way.
- Vanilla protein powder. Optional, one 25g scoop. I use Be Well by Kelly because the ingredient list is short. If you add protein powder, add an extra splash of coconut milk to keep it blendable.
- Toppings. Whatever’s in the kitchen: shredded coconut, chia seeds, fresh fruit, granola, nut butter.
How to Make a Coconut Smoothie Bowl

- Add the Frozen Fruit First. Dump all the frozen into a high-speed blender. Don’t add the liquid yet. Start dry.
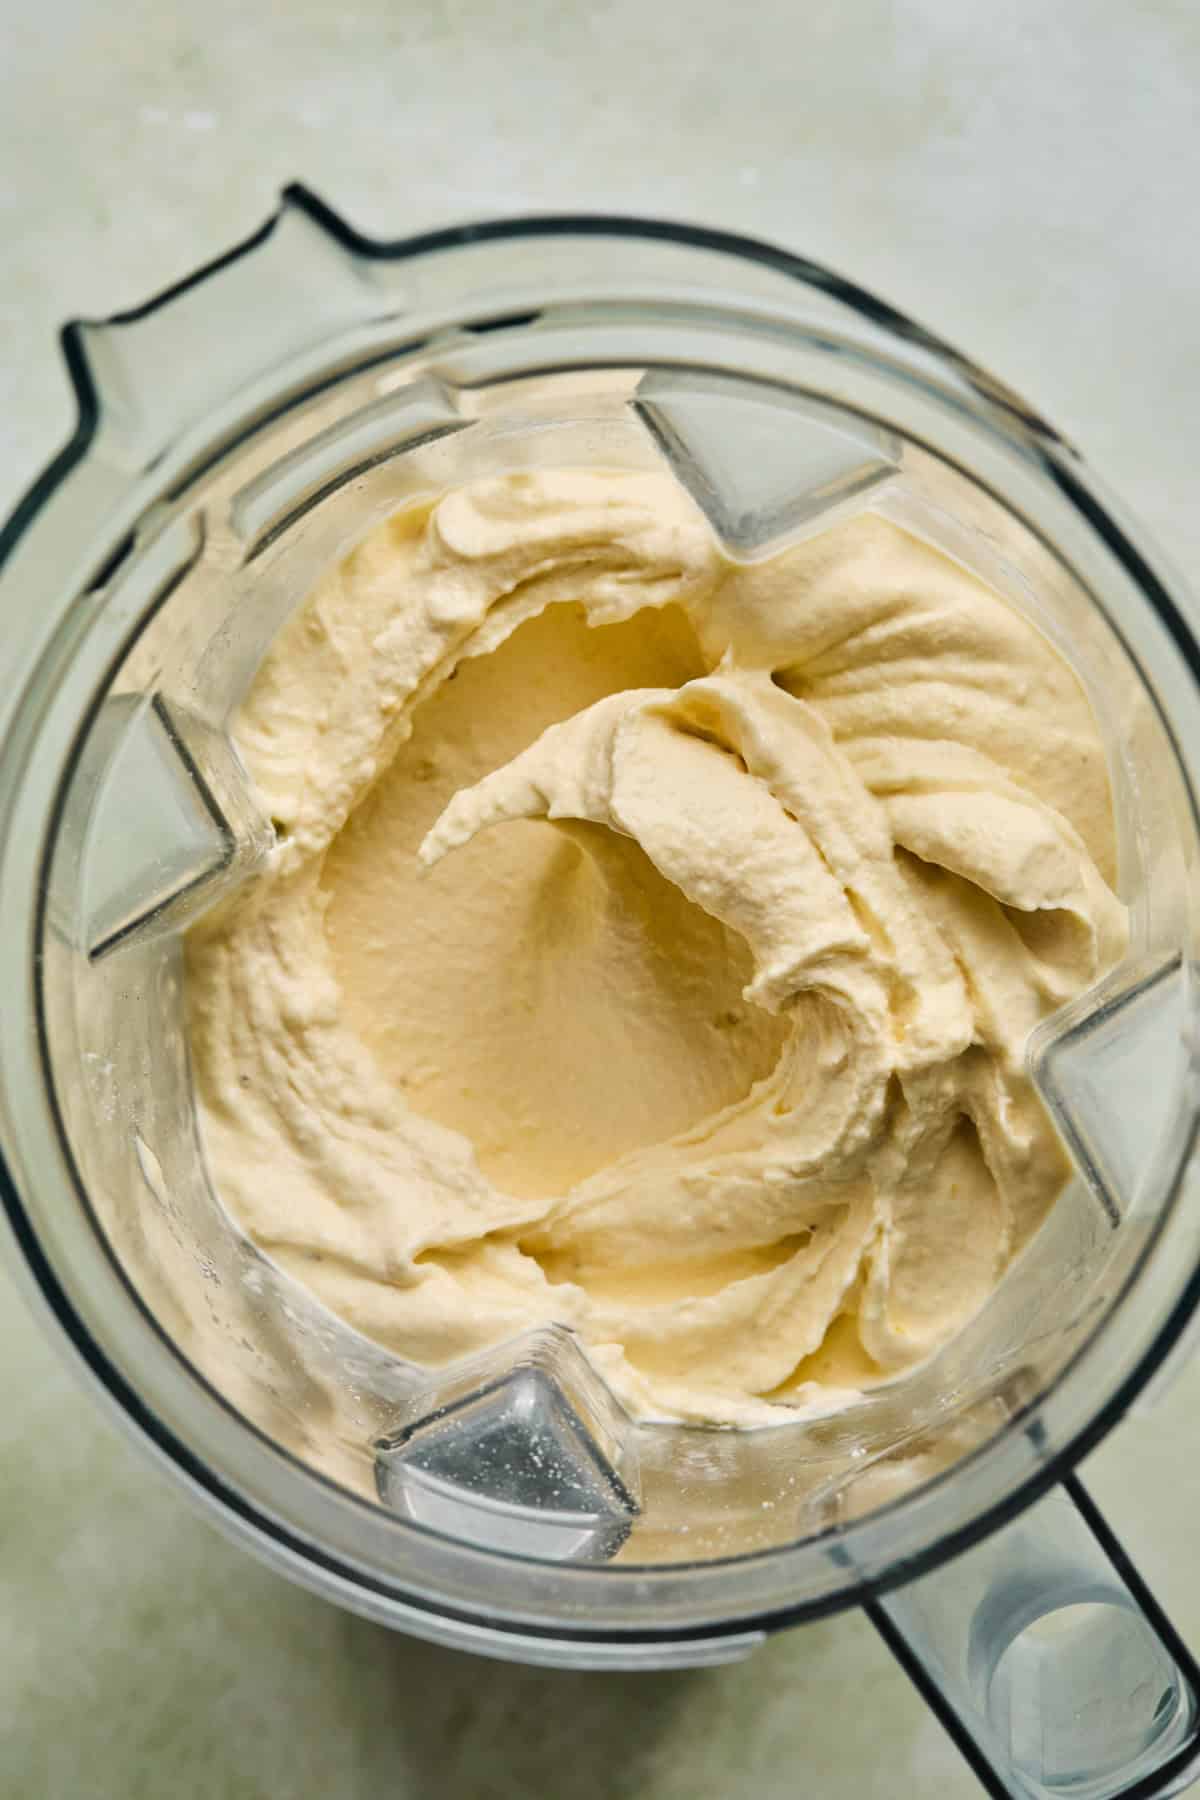
- Add the Liquid Slowly. Add the coconut milk, coconut extract, and protein powder if using. Blend on low first, then high. Stop and stir or tamp down as needed. If the blender stalls, add coconut milk one tablespoon at a time until it moves. Don’t drown it.
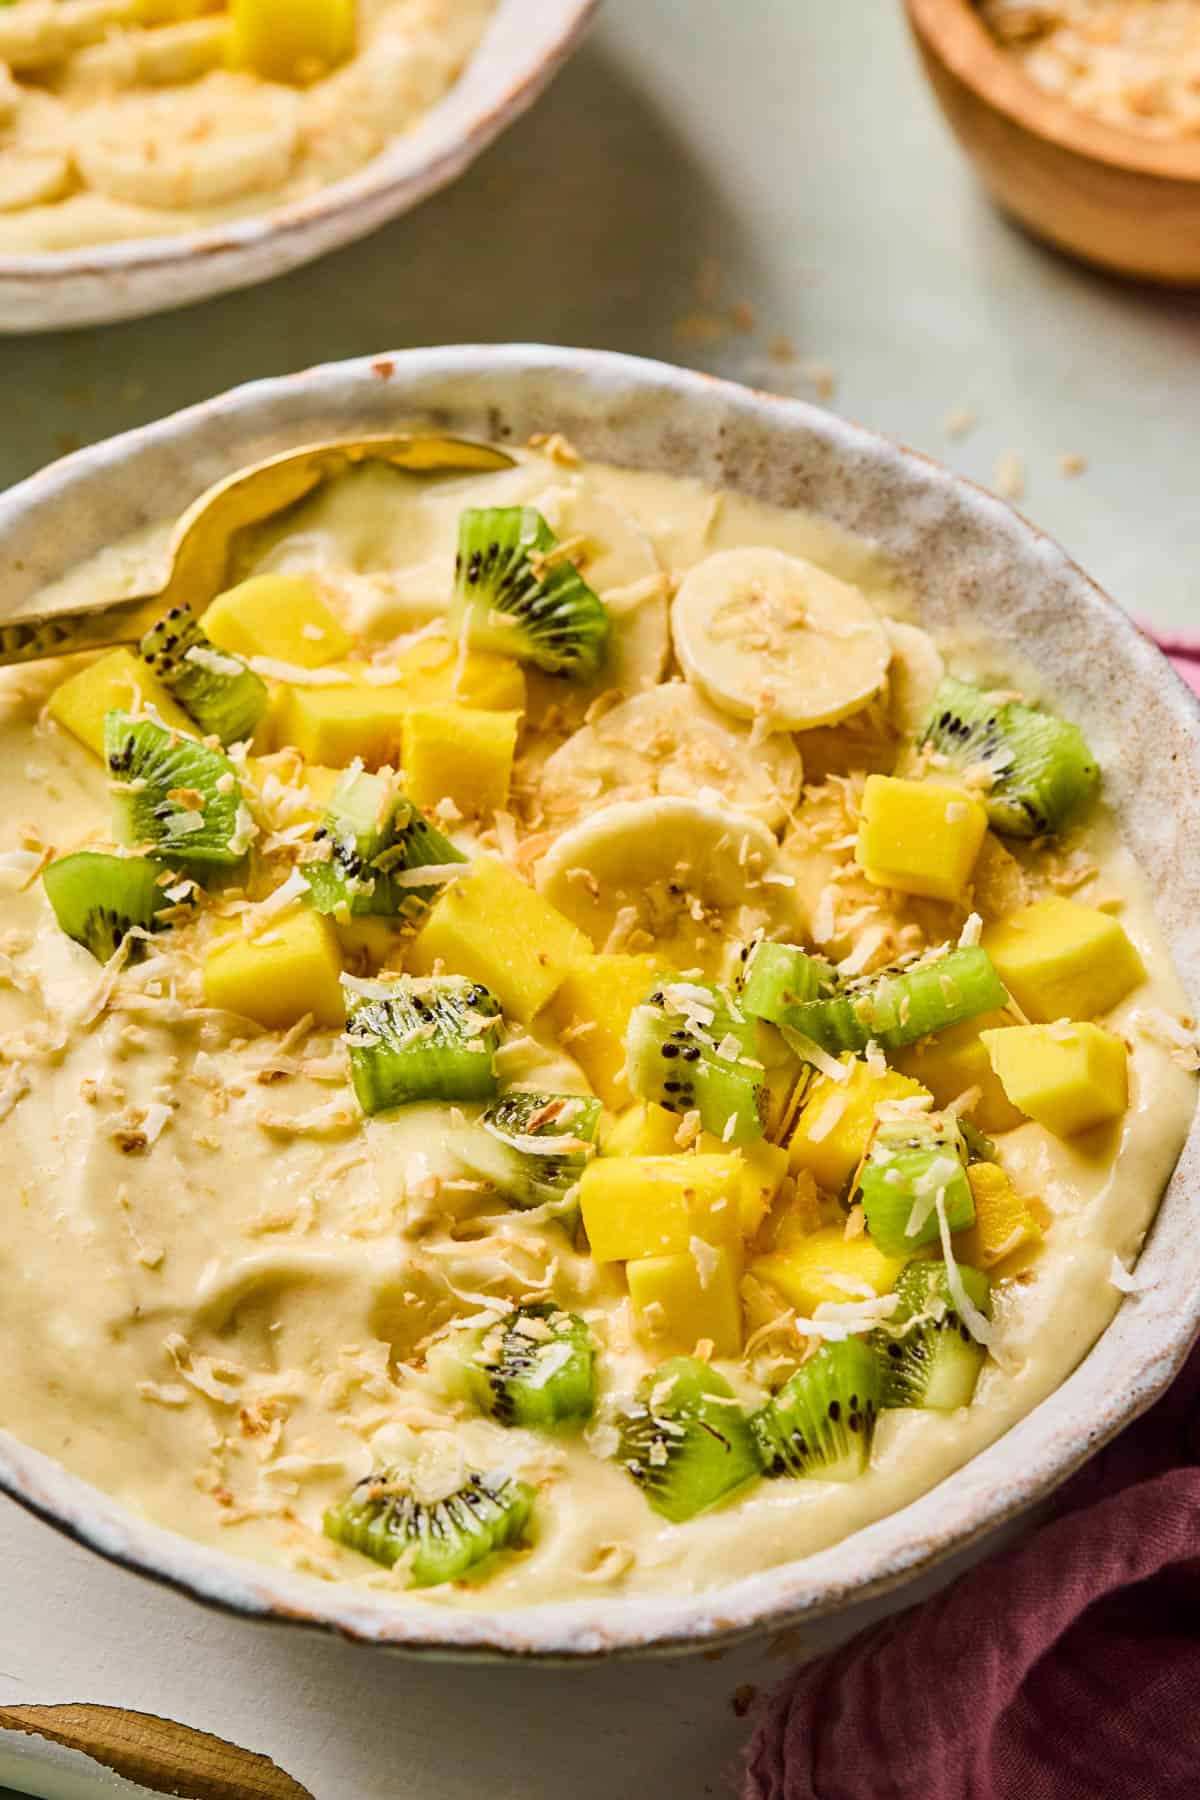
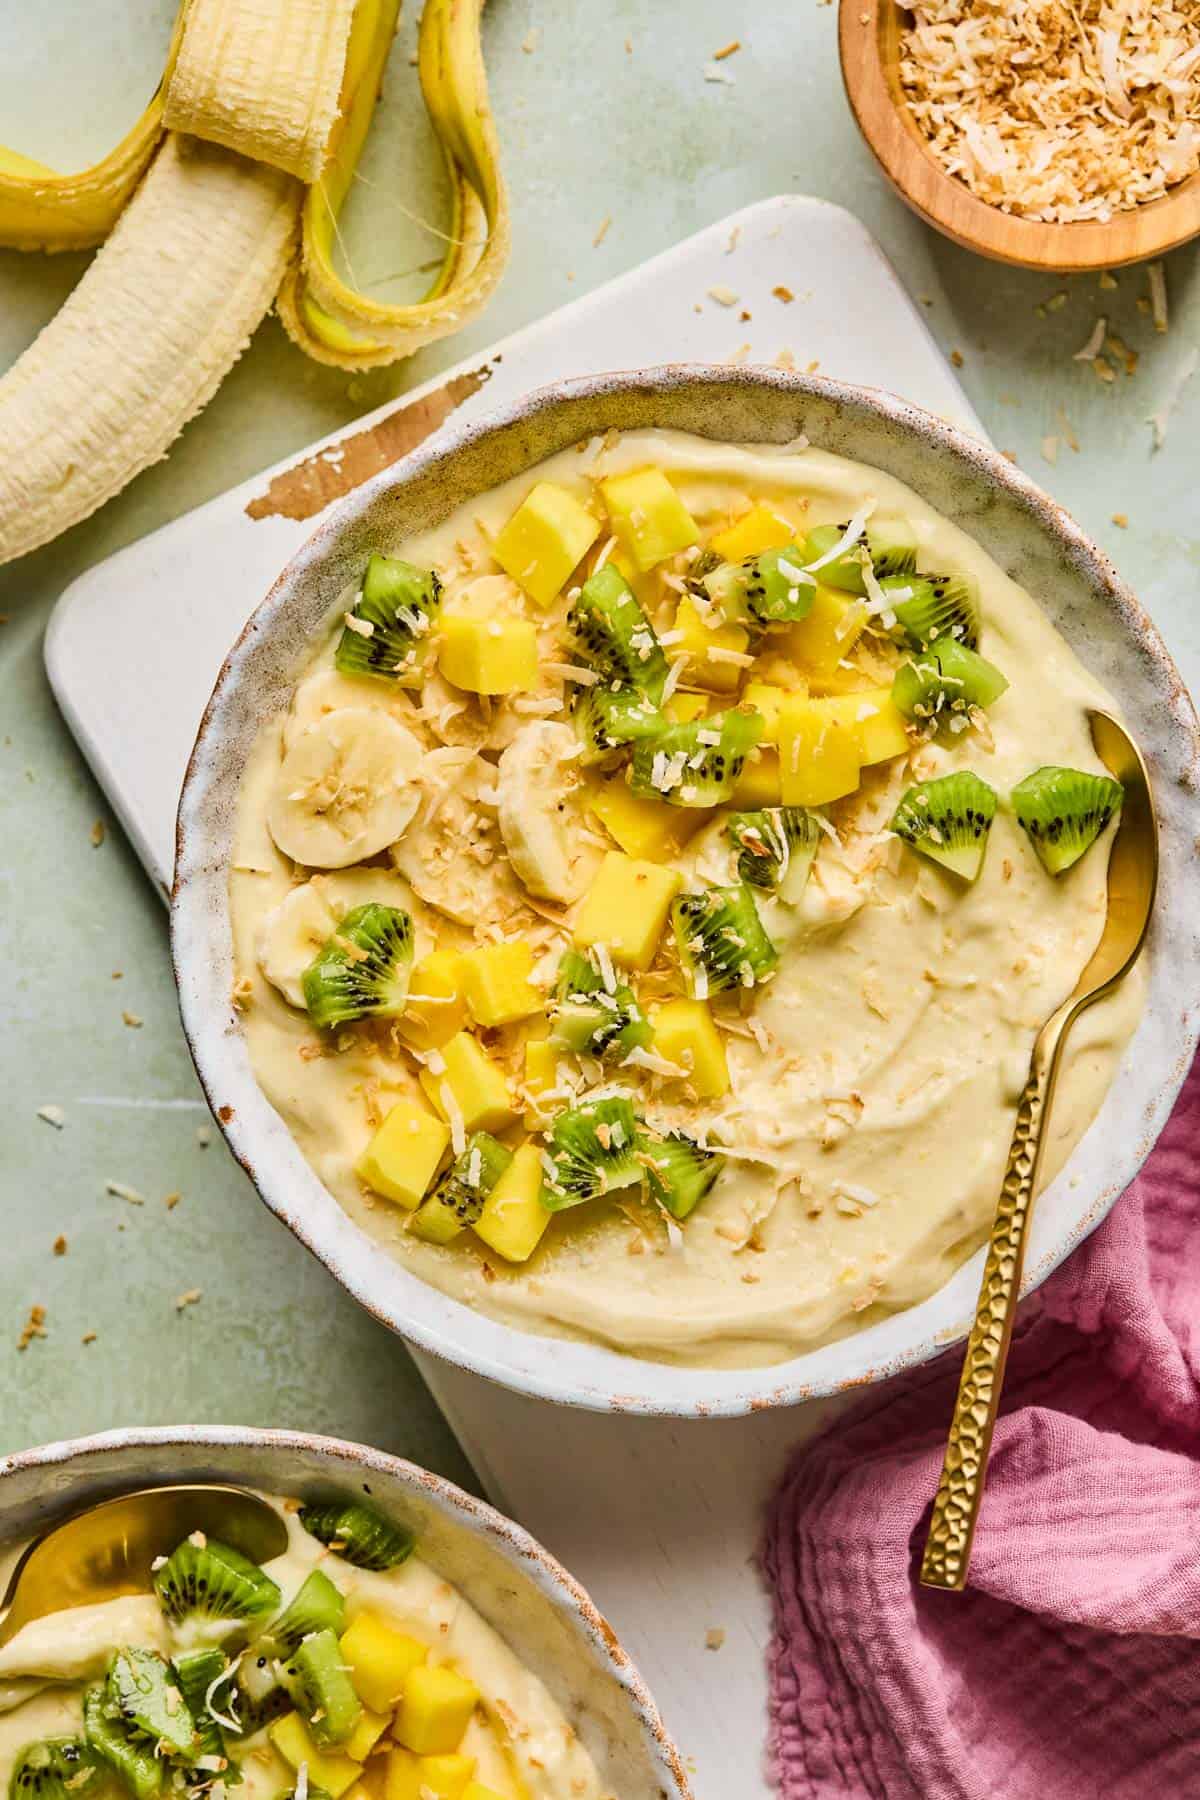
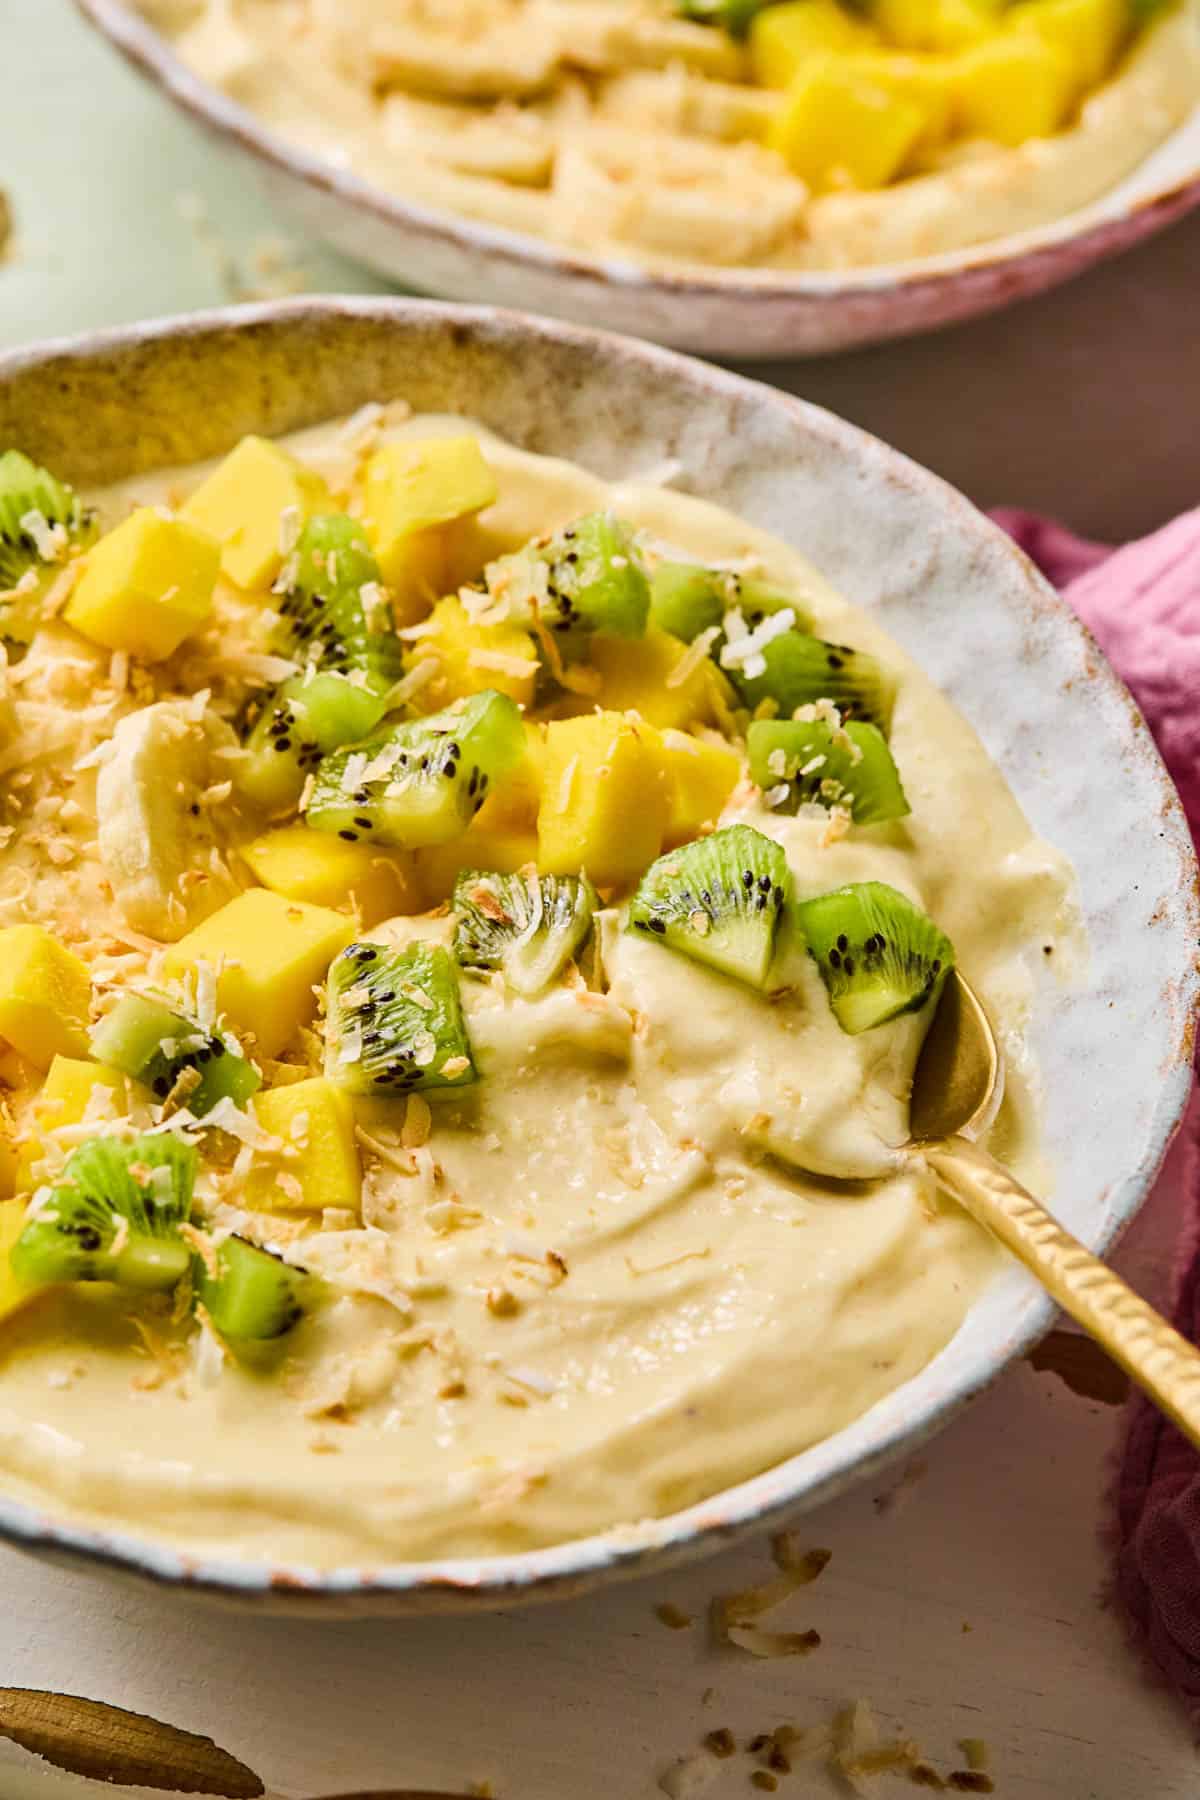
- Pour and Top. Pile the toppings on, hit it with a drizzle of nut butter or honey if you want, and serve immediately. Smoothie bowls melt fast.
Coconut Smoothie Bowl Toppings
The toppings are where you make it yours. A few that work:
- Chia seeds: crunch and fiber. Half a tablespoon goes a long way.
- Granola: crunch. Use one with chunky clusters.
- Shredded coconut or coconut flakes: doubles down on the coconut.
- Nut butter: coconut almond butter, macadamia butter, or cashew butter for a tropical feel. Warm it slightly so it drizzles.
- Extra fruit: kiwi, banana slices, mango, fresh pineapple. Sparingly, because there’s already a lot of fruit in the bowl.
- Bee pollen, hemp hearts, or cacao nibs if you want to lean health-y.
Prefer a more decadent smoothie? Try our cake batter protein shake, chocolate peanut butter protein smoothie, or chocolate and cherry smoothie.
FAQS
Too much liquid. Add more frozen fruit a handful at a time and blend until it thickens. Or remember the rule for next time: 2 parts frozen fruit to 1 part liquid, max.
Not enough liquid, fruit not chopped small enough, or the blender isn’t powerful enough. Stop, scrape the sides, tamp the fruit toward the blades, and pulse instead of running on high.
Yes. The recipe works as-is without protein powder. If you do add protein, add an extra splash of coconut milk so it blends.
Yes. With coconut milk and a plant-based protein powder, it’s naturally Gluten-Free, Dairy-Free, Paleo, and Vegan.
Yes. Pre-portion the frozen fruit into individual zip-top bags. In the morning, dump one bag in the blender, add coconut milk and protein powder, and blend.
Store the smoothie base (without toppings) in an airtight container in the fridge for up to 1 day. After that, it separates and loses creaminess. Give it a stir or a quick re-blend before serving.
Coconut Smoothie Bowl
Save this Recipe!
Ingredients
- 1 frozen banana
- 3/4 cup frozen pineapple
- 1/2 cup frozen mango
- 1/3 cup full fat coconut milk shaken
- 1/4 teaspoon coconut extract optional
- 1 scoop (25g) vanilla protein powder optional
- Toppings: mango, banana, granola, chia seeds, cherries, nut butter, or coconut
Instructions
- Add all ingredients to a highs-speed blender. Blend on high for 1-2 minutes until a smooth and thick consistency. If you don't have a high powered blender it may take a little longer or you may need to add another splash of coconut milk.1 frozen banana, 3/4 cup frozen pineapple, 1/2 cup frozen mango, 1/3 cup full fat coconut milk, 1/4 teaspoon coconut extract, 1 scoop (25g) vanilla protein powder
- Pour into a bowl and top with your favorite toppingsToppings: mango, banana, granola, chia seeds, cherries, nut butter, or coconut
Notes
- Use frozen fruit as the base.
- Start with less liquid and add more as needed to get the desired texture.
- Use a high-speed blender for best results.
Nutrition
Nutrition information is automatically calculated, so should only be used as an approximation.
Tips for Thick Smoothie Bowls
- Use frozen fruit as the base.
- Start with less liquid and add more as needed.
- Use a high-speed blender for best results.
Prep and Storage Tips
Prep ahead: Pre-portion the frozen fruit into individual zip-top bags so weekday mornings are just dump-and-blend.
Storage: Store the smoothie base in an airtight container in the fridge for up to 1 day. It separates after that.
Freezing: Store in a freezer-safe container for up to a month. Thaw in the fridge overnight, give it a stir, and pour into the bowl.
More Smoothie Recipes
Instant Pot Gluten-Free Spaghetti
Save this Recipe!
Ingredients
- 1-2 Tablespoons olive oil
- 1 medium yellow onion diced
- 3 cloves garlic minced
- 1 lb ground beef I used 93% lean
- 1 teaspoon kosher salt
- 1 teaspoon garlic powder
- 1 teaspoon onion powder
- 2 teaspoons dried basil
- 2 cups water or beef broth, divided
- 1 (24oz) jar marinara sauce I used Rao's
- 12 ounces spaghetti
- To serve: Parmesan cheese, basil, red pepper flakes
Instructions
- Add the olive oil to the Instant Pot and set to saute mode. Allow to heat for 1-2 minutes. Add the onion and cook for 1-2 minutes until translucent then add the garlic and cook for another minute until fragrant.1-2 Tablespoons olive oil, 1 medium yellow onion, 3 cloves garlic
- Add the ground beef and use a wooden spoon to break the beef up into small chunks. While it’s cooking, add the salt, garlic powder, onion powder and dried basil. Continue cooking the beef until completely brown and no pink remains, about 5 minutes total.1 lb ground beef, 1 teaspoon kosher salt, 1 teaspoon garlic powder, 1 teaspoon onion powder, 2 teaspoons dried basil
- Turn saute mode off and add 1 cup of water, stirring with a wooden spoon to remove any brown chunks from the bottom of the instant pot. Add the pasta sauce and stir well.2 cups water, 1 (24oz) jar marinara sauce
- Break the uncooked spaghetti in half so it fits in the instant pot and place on top of the pasta sauce, meat and water. Do not stir. Add the remaining cup of water on top of the uncooked pasta and do not stir.12 ounces spaghetti
- Close the lid of the instant pot and make sure the knob is set to “sealing.” Set the pressure cooker to high (manual) for 8 minutes. It will take about 8-10 minutes to come to pressure then start counting down.
- When the timer goes off, use a wooden spoon or towel to quick release the pressure valve. To do this, turn the valve from “sealing” to “venting.” Open the lid and serve immediately with parmesan, basil or red pepper flakes.
Notes
Nutrition
Nutrition information is automatically calculated, so should only be used as an approximation.
This post may contain affiliate links. Read our disclosure policy.


I tried this recipe with a few modifications. It was delicious!
I used Marinara with garlic, Basil pesto & Italian herb blend. I used gluten free spiral pasta.
Kept the same cooking time however it did rest for about 10 minutes before serving.
Thanks Dianne!
Hi Molly, this is one of my all time favorite recipes. It is a regular staple in our house!! So, thank you!!! I have family coming over this week and I’d love to make it!! Do you have experience 1.5x or 2x the recipe in the instapot? Does it fit / cook OK? Thank you in advance!!
So glad you like it! You can totally double it and it should fit just fine:) No need to change cook times! Also, sorry if I was a little delayed in getting back to you! Hope you got it figured out for your family.
You mention beef broth in the ingredients but then I don’t see it mentioned in the recipe. Can I just straight substitute the beef broth for the 2 cups of water? Thank You
Hey Brittany! Yes, you can use water or broth interchangeably.
Would it work to prepare this and set it to start after sitting awhile? A couple hours later before cooking?
Hey there! I wouldn’t recommend leaving the beef sitting. it’s best to do it all at once. Thanks!
I used Barilla gf pasta and followed your recipe precisely, scrumptious!
Love it! Thanks!
I made this without the meat and with brown rice cappellini. It tasted great, but there were some clumps of pasta. I want to try again, does anyone know how to take care of this problem?
Hey there! This happens sometimes with brown rice pasta. It sounds like the pasta is overcooked, so I wouldn’t cook it as long the next time. Maybe try 5-6 minutes. Hope this helps!
I dip my pasta in the water before I put it in the instant pot and make sure I really mix up the pasta so it is like pixie sticks. I personally use Barilla fettuccine instead of spaghetti.
Easy easy and so delicious!
I’m not a fan of gluten free pasta but I have a wheat allergy in my family. I made this recipe with Barilla gluten free pasta and will say it got high praise all around.
This is my all time favorite, go to easy week night meal! My kids love it and my husband thinks I’m making fancy spaghetti and it’s SO easy! I use Ronzoni brand thin, gluten free noodles, I have used banza spirals as well. It always turns out fabulous! Don’t go rogue and use pasta sauce with cheese in it, or it will burn to the pan 😂
I have loved every recipe of Molly’s I’ve tried so far, so thanks for the great meals!!
Can you make the spaghetti with meatballs the same way? Pre-cooked turkey meatballs and not ground beef and pork. My current diet does not allow any meats except chicken and turkey.
What if I don’t have a instant pot, could I use a crockpot instead?
Hey Connie! Unfortunately I haven’t tried it in the slow cooker, but I bet there’s some recipes out that specificially for this. Thanks!
What size instant pot? I want to double the batch
Hi Jackie! Curious if you ever tried to double this? I was wondering the same thing in a standard insta pot!
Sooo easy and delicious! I LOVE that this is all made in one pot – cleanup was a breeze. The spaghetti came out perfectly Al dente. 🙂 we subbed ground turkey for ground beef and it was delicious. Adding this to our recipe rotation! Thanks!
Don’t try this. Followed exactly! Wasted over 20 dollars and got a burn notice.. would not come to pressure and seal! Thanks a lot
Hey Chuck! Sounds like you may need to check on your Instant Pot if it’s not sealing or coming to pressure. You should only need a 1/2 cup of liquid/sauce in the Instant Pot to come to pressure and avoid a burn notice, according to Instant Pot’s website. We’ve tested this several times and have made it often for dinners throughout the week without issue. Thanks!
I followed the directions and my pasta still stuck like glue. Very disappointed. The sauce flavor was good but I won’t try pasta in an instant again. I used garbanzo bean pasta.
Hi Tina! I think I may need to make a note about the exact cook times varying. Chickepea pasta gets gluey if it’s cooked too long. I made a note about cook times varying based on the pasta, but I should clarify more. I would try cooking it for less time, maybe 5 minutes, or using a rice pasta instead. Hope that helps!
Hi there,
I plan on trying this with gluten free spaghetti. When you say cooking time varies, do you mean we should add more or less time for the gluten free option?
I don’t want to over/under cook the pasta if I can prevent it.
Thanks for the recipe. It looks fabulous!
-Nick
Hey Nick! Yes, the cook times may vary based on the type of pasta you use, like any pasta or spaghetti recipe. I found the amount of time listed was great for brown rice or regular pasta, but chickpea pasta takes a little less time. Thanks!
When do you add the garlic and onions? I don’t see it in the instructions. I could guess, but I like to be 100% accurate with recipes when I try them the first time!
Hey Beth!! I think that part got deleted on accident after a few updates I made. You cook the onion and garlic first right before the beef! I updated the recipe thanks for letting me know!
Would you say that this is a inflammatory diet recipe?
Hey Linda! It doesn’t include any dairy or gluten so it does fit into an anti-inflammatory diet, but I usually try to fit in more veggies and greens when I can! You could add some zucchini or peppers to the sauace if you want to get in more veggies!