
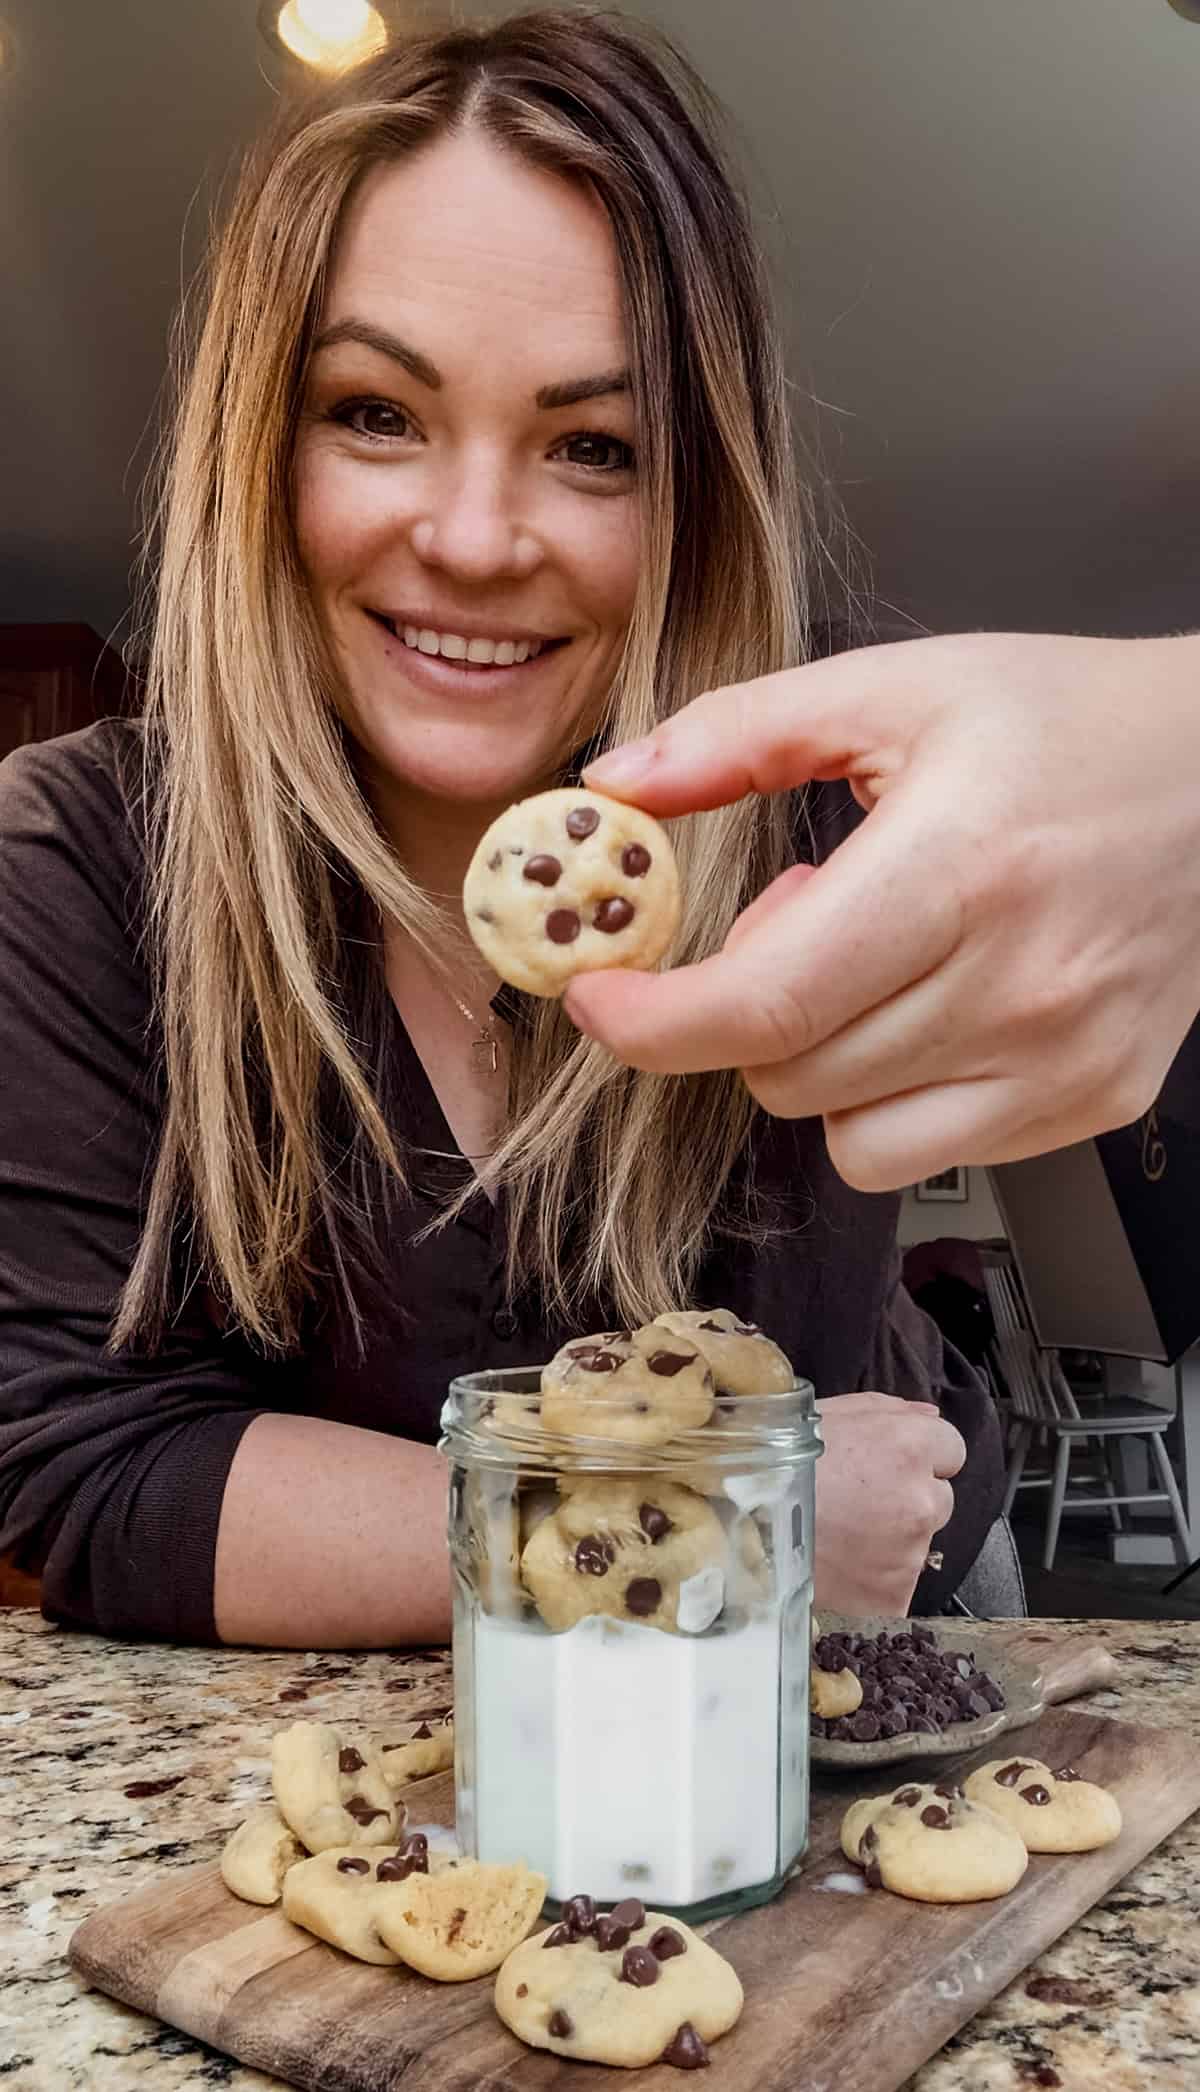
I made these on a Tuesday when my husband was out of town. No real reason, I just wanted to do something fun with the kids, something that felt like a treat.
I pulled out my go-to chocolate chip cookie dough from my peppermint chocolate chip cookies, made them tiny, and put the bowl on the counter. They were gone before the end of the week. My kids thought it was the best week ever, and I did not correct them.
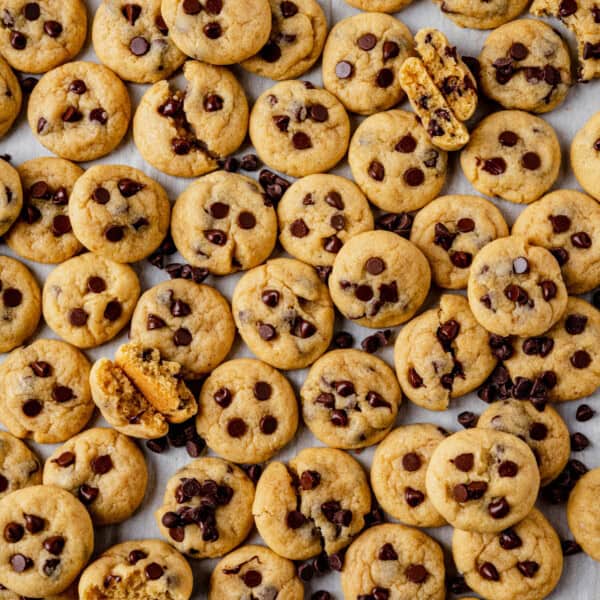
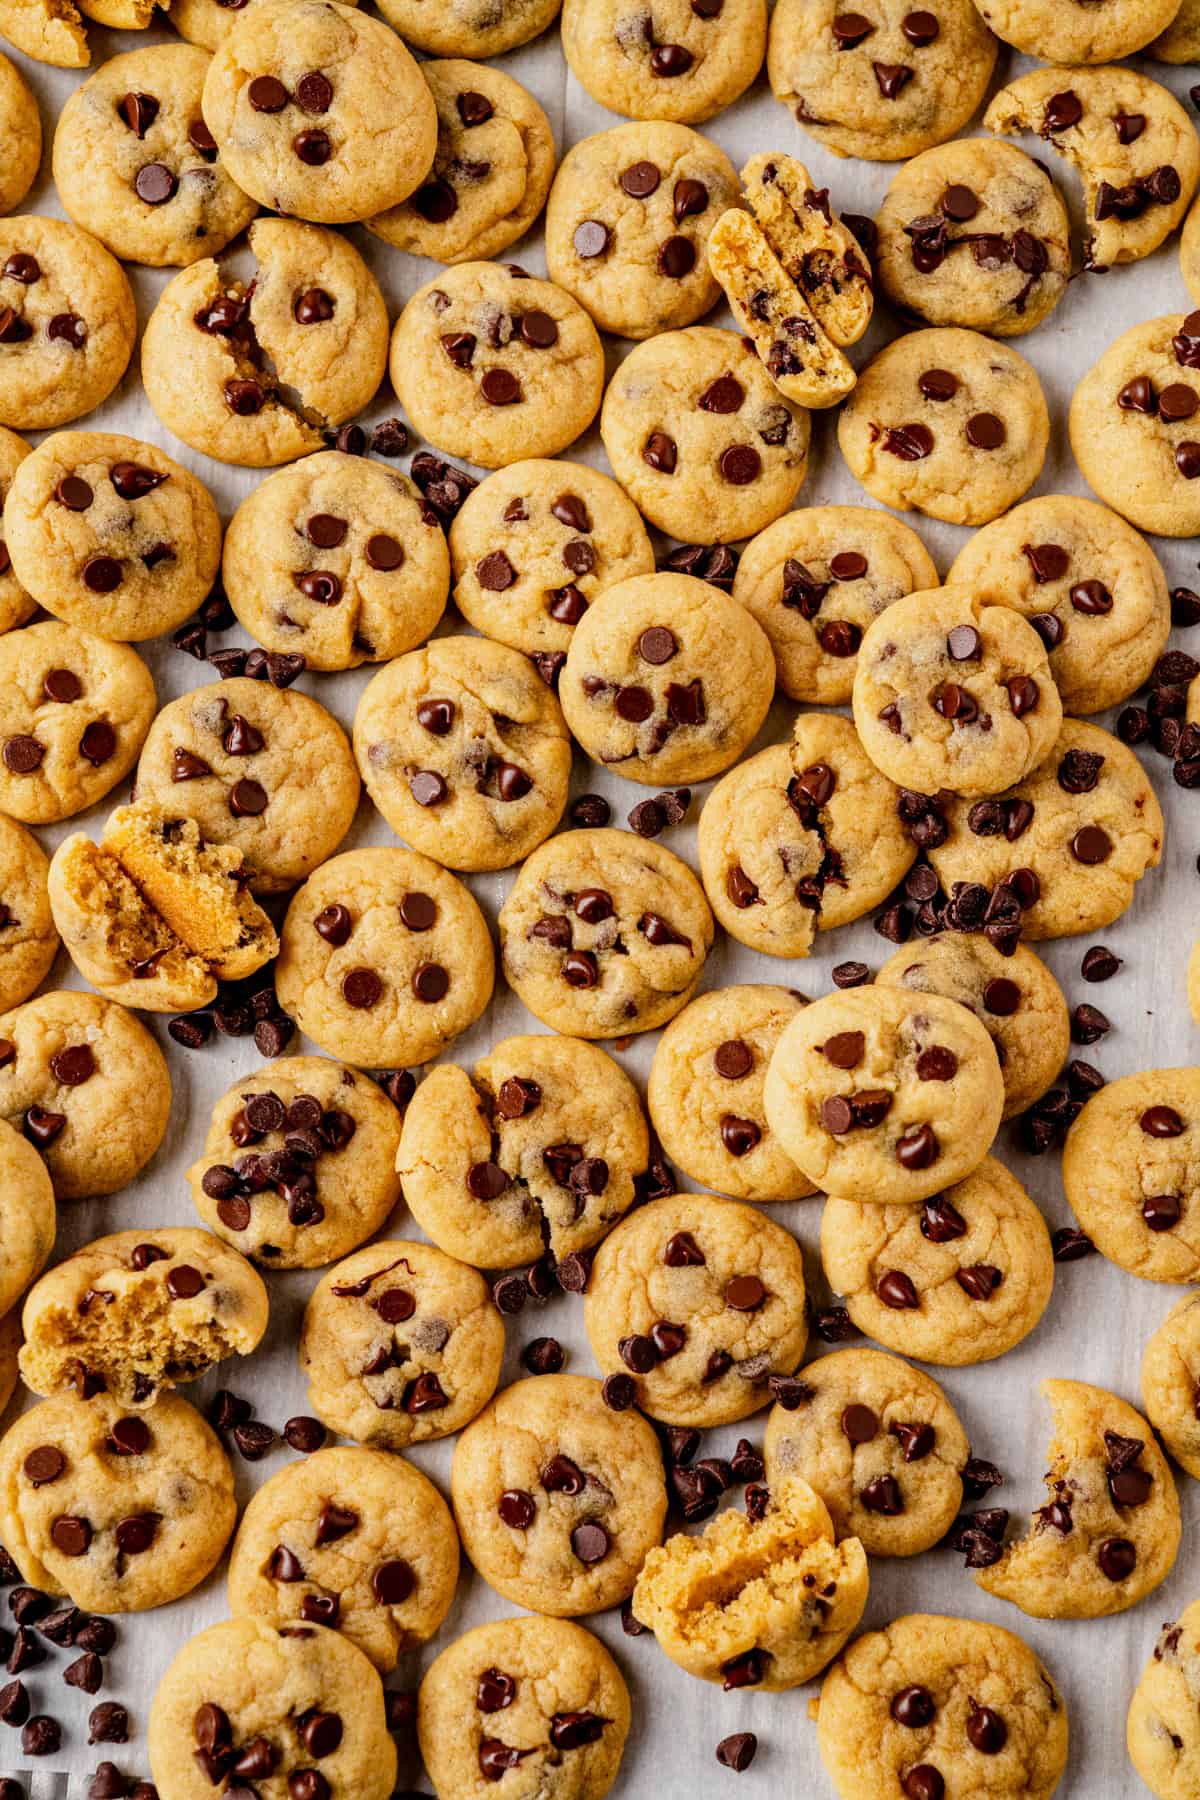
And now these are the cookies I make for every soccer goodie bag, every class party tray, every time I want to set a bowl out for guests and watch it empty.
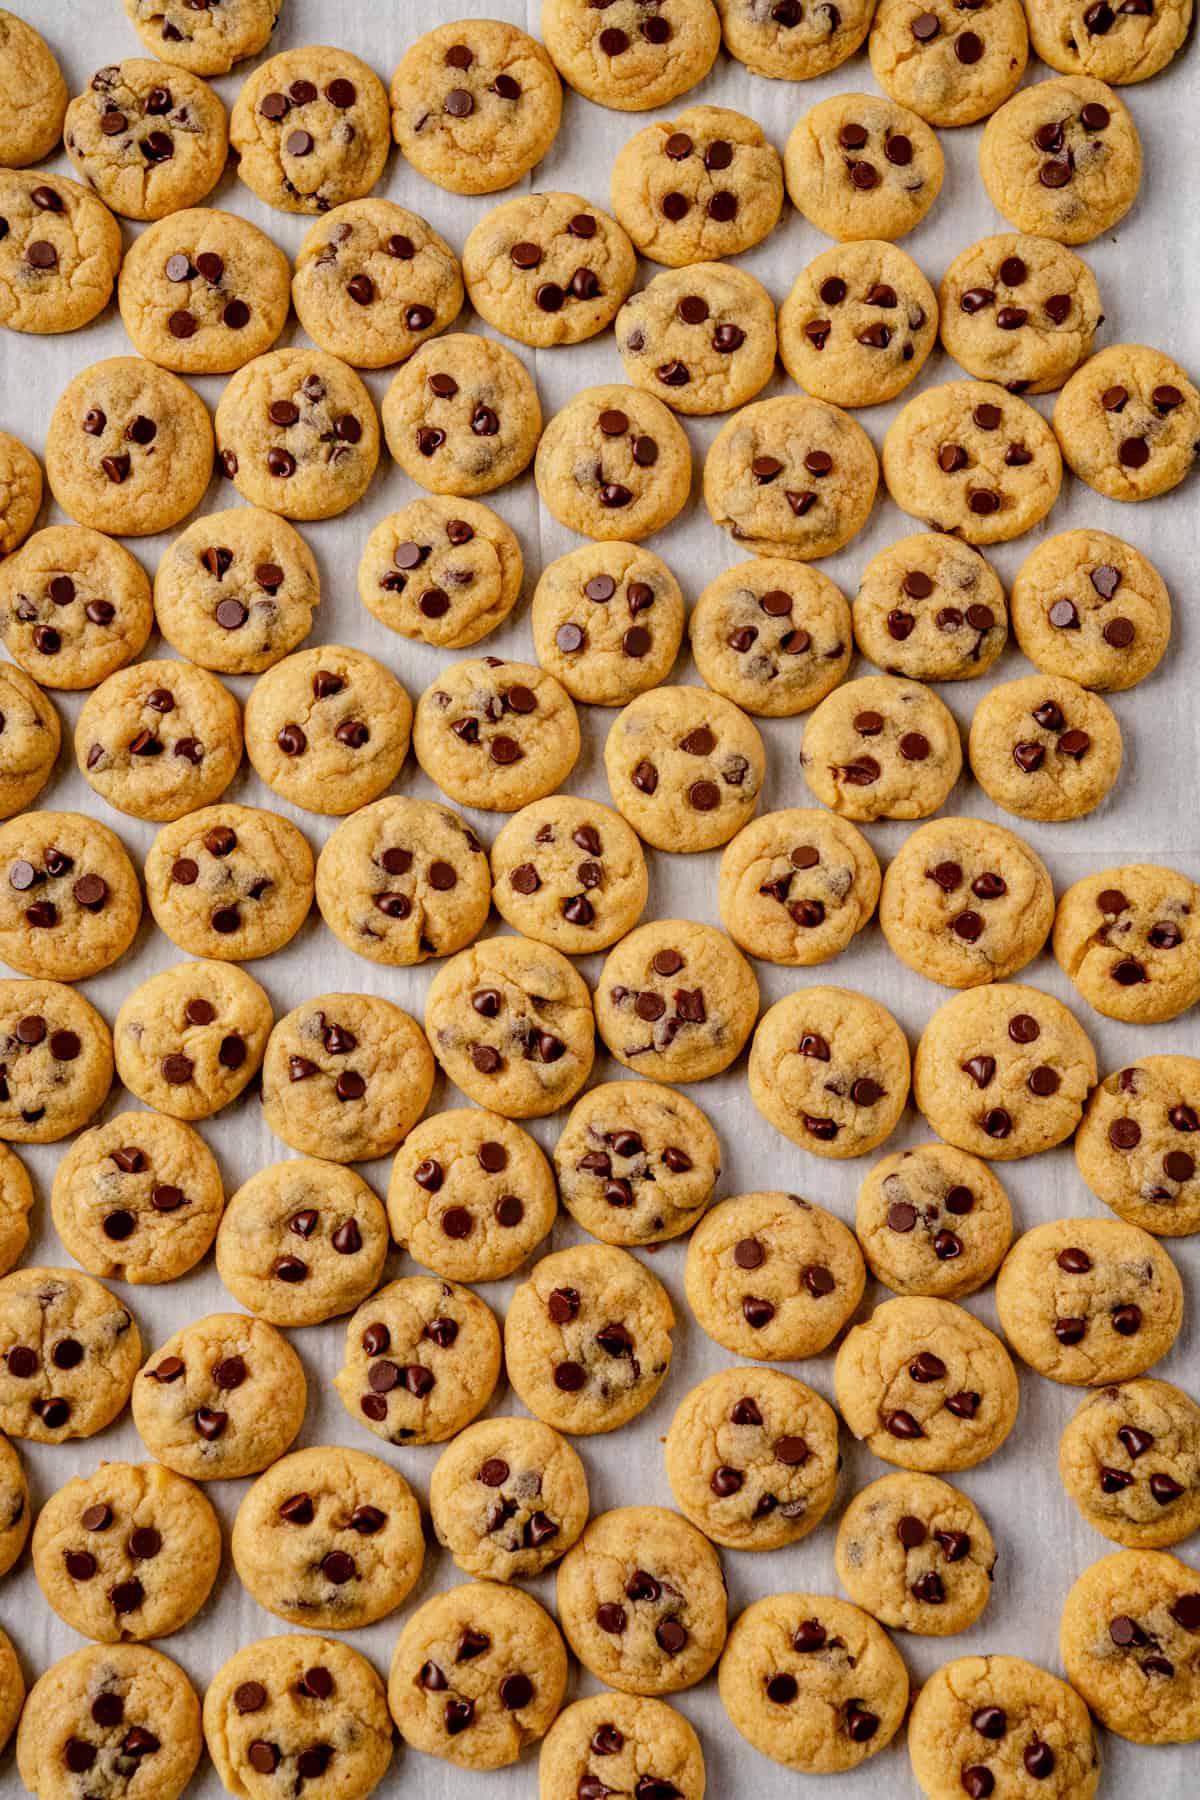
There’s something about the cutie size that makes people lose all self-control. You’ll reach for one, and then five minutes later you’ve had eight and you’re not even a little sorry.
If you love mini baked goods, you have to see my mini cinnamon rolls and mini Christmas cookies. That post went completely viral and it’s where my obsession with tiny cookies really started.
What Makes These Different From a Regular Cookie Made Small
Here’s the key: you can’t just take regular cookie dough and scoop it smaller. I learned this the hard way.
When the cookies are this tiny, there’s less dough mass holding everything together, so they spread into flat little pancakes and lose their shape before the centers even have a chance to set.
The fix is simple. I use a slightly higher amount of flour than my base recipe. Just enough that the dough holds its round shape at 1 inch without getting dry or cakey.
And here’s what I love about it: that one adjustment means you don’t need to chill the dough at all. Most mini cookie recipes tell you to chill so they don’t spread. I adjusted the flour ratio in the base so you don’t have to.
You can go from mixing bowl to oven in 15 minutes.
I also add a tablespoon of cornstarch, which keeps them soft for days, and an extra egg yolk for chew. Small details that really matter at a smaller size.
Love a classic chocolate chip cookie? Try my peppermint chocolate chip cookies (leave out the peppermint) for the full-size version or make my reader-favorite chocolate chip pudding cookies.
What You’ll Need
Nothing unusual here. This is a real pantry recipe!
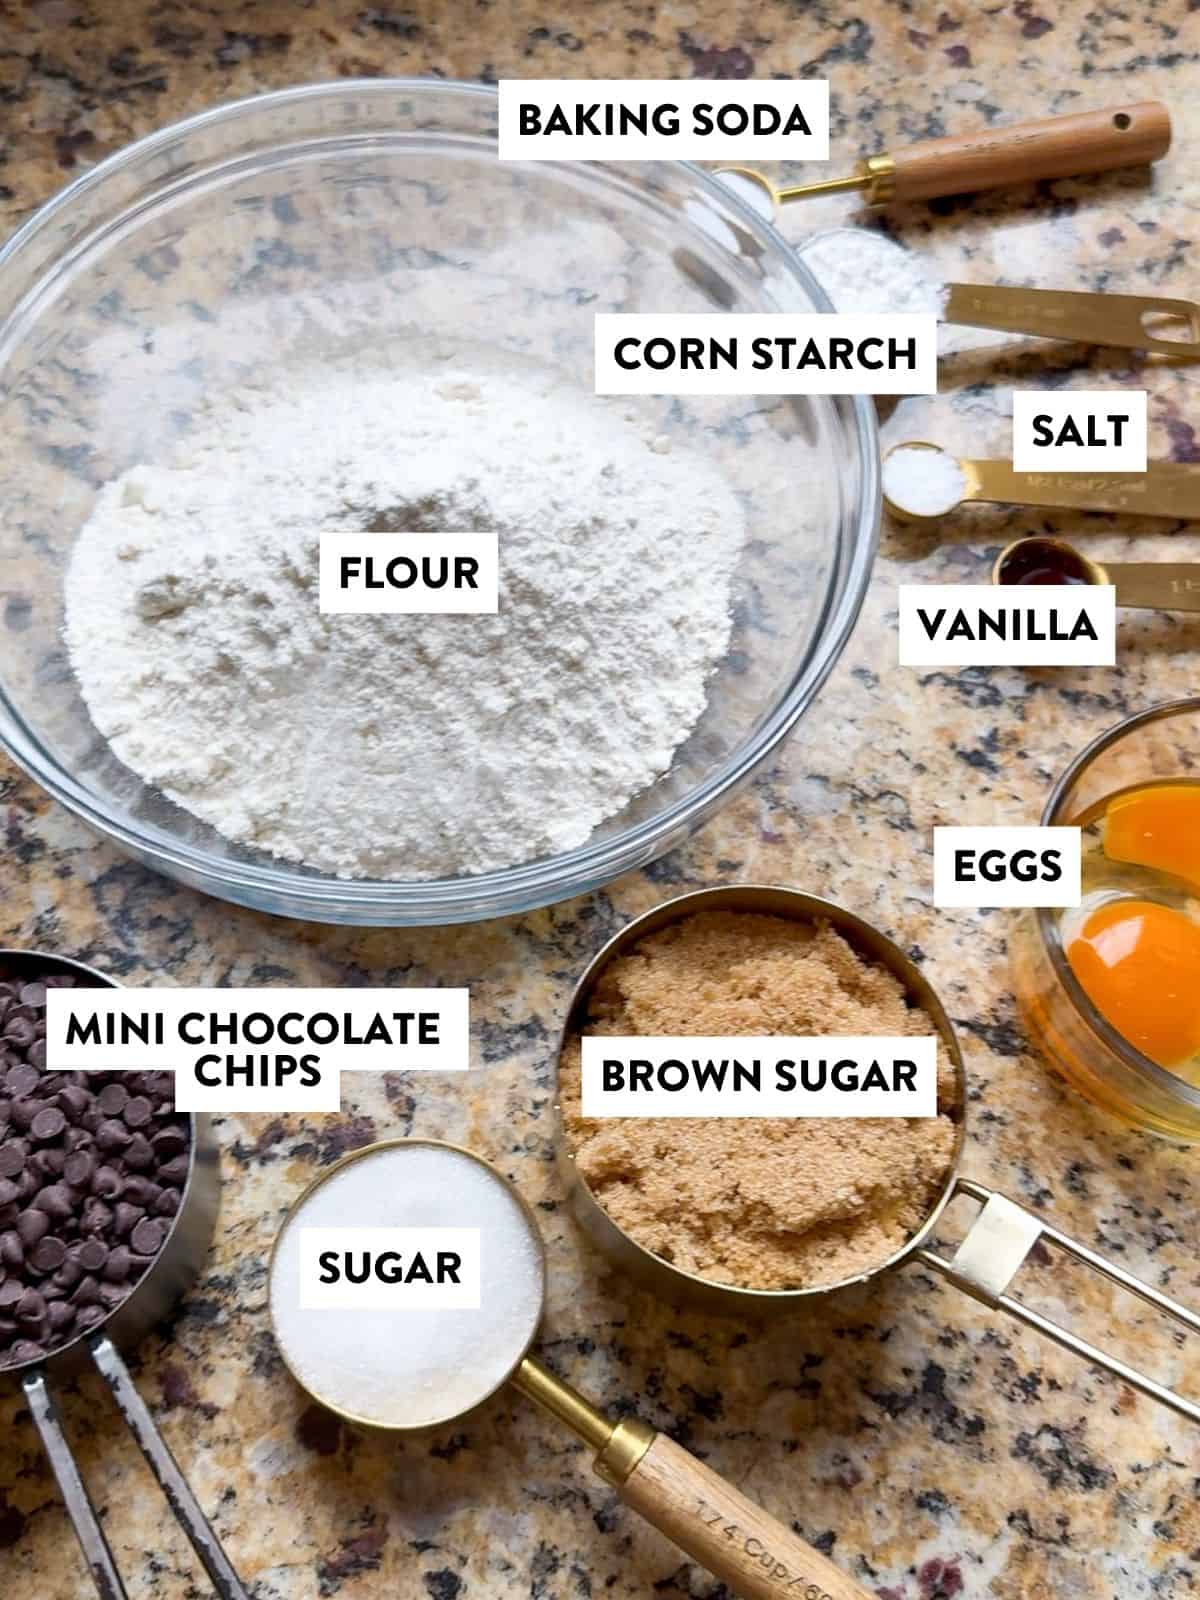
- All-purpose flour: the slightly higher amount than a standard recipe is what keeps these from spreading without any chill time. Measure by spooning into the cup and leveling, not scooping directly from the bag. That one habit makes a real difference.
- Baking soda: gives them a little lift.
- Cornstarch: this is my secret for cookies that stay soft on day three. Don’t skip it.
- Salt: makes the chocolate taste more chocolatey.
- Unsalted butter, room temperature: needs to be actually soft. Press your finger in and it should leave an indent easily. Not melted, not cold from the fridge.
- Light brown sugar + granulated sugar: the brown sugar gives these their chewy, almost caramel-y depth. The ratio matters here.
- 1 large egg + 1 egg yolk: the extra yolk adds richness and chew. Don’t skip it.
- Vanilla extract: a full teaspoon. Use the real stuff.
- Mini chocolate chips: this matters. Regular chips are too big for a small quarter-sized cookie. You want chocolate distributed through every single bite, not one giant chip taking over half the cookie. If you can’t find mini chips, finely chop regular chips or a chocolate bar.
How to Make Mini Chocolate Chip Cookies
This comes together fast. No chill time, no special equipment — just a hand mixer or stand mixer and two baking sheets.
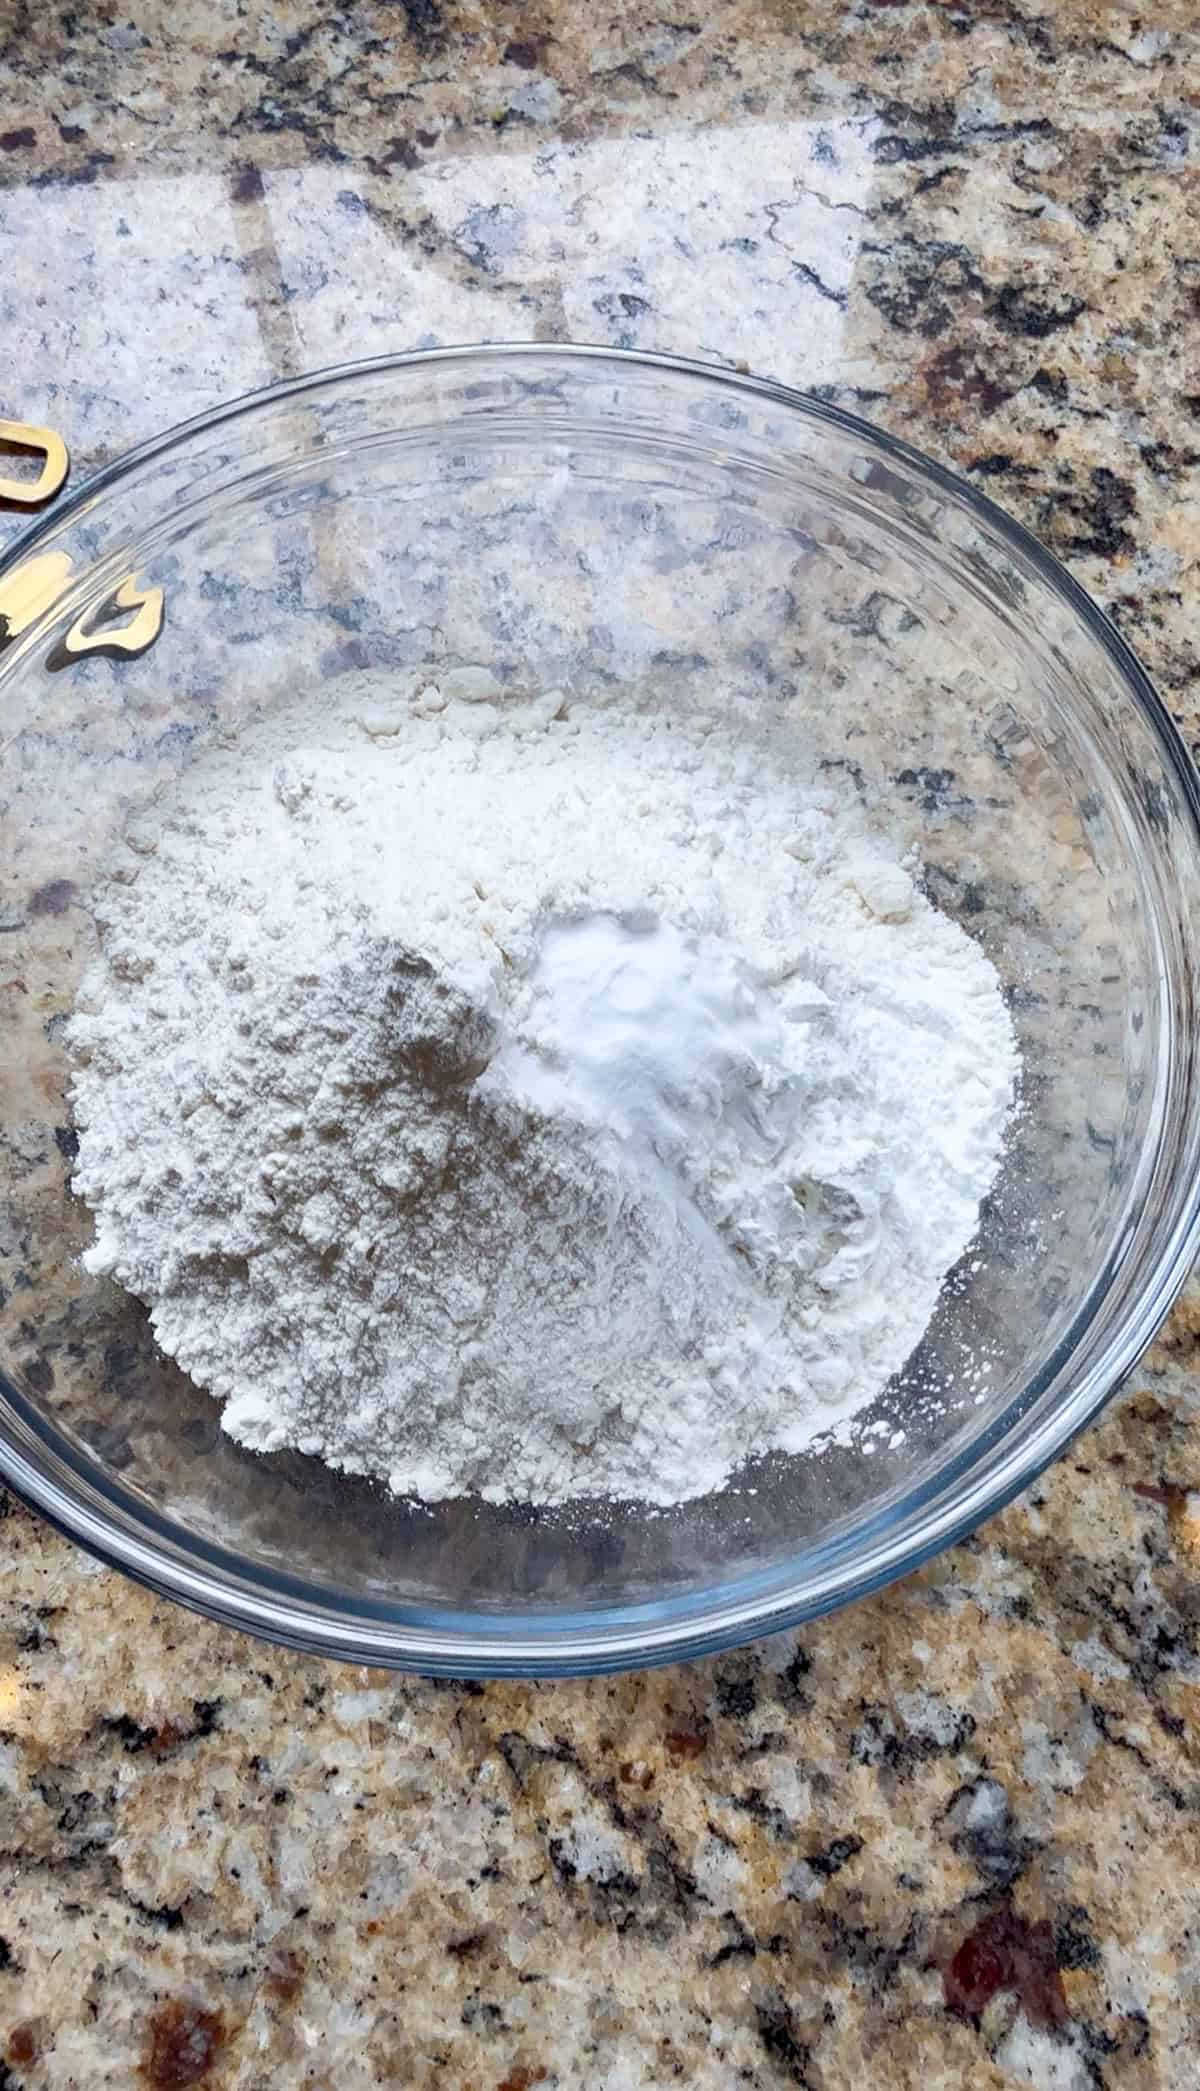
Step 1. Mix the dry ingredients: Whisk together the flour, baking soda, cornstarch, and salt in a medium bowl. Set it aside.

Step 2. Cream the butter and sugars: Beat the butter, brown sugar, and granulated sugar together for 2–3 minutes until the mixture looks light, pale, and creamy. Really cream it — this step builds the texture.
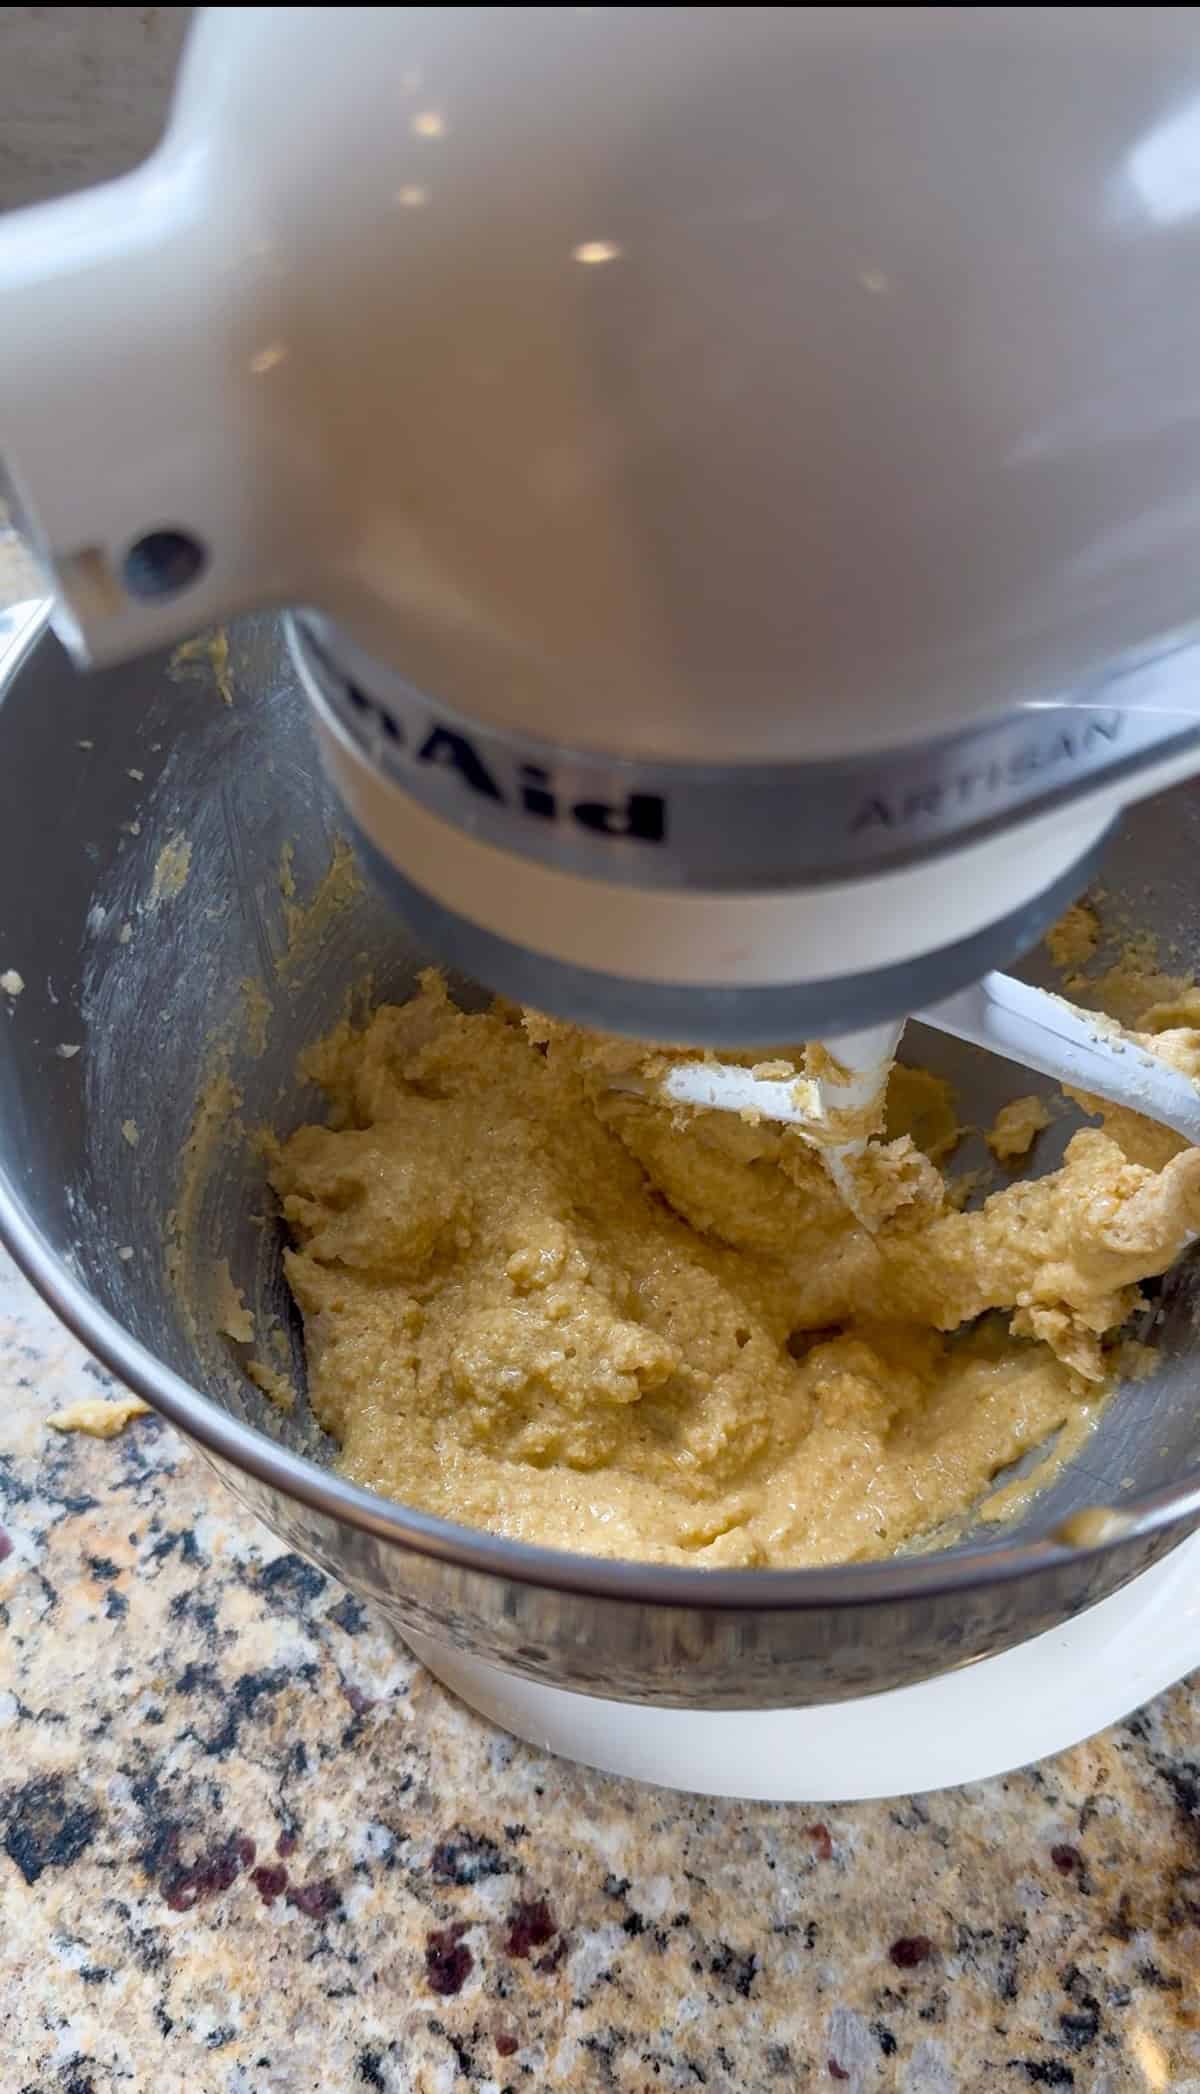
Step 3. Add the egg and vanilla: Add the egg, egg yolk, and vanilla. Beat until smooth and fluffy, scraping down the sides as needed. The mixture should look silky and a little pale.
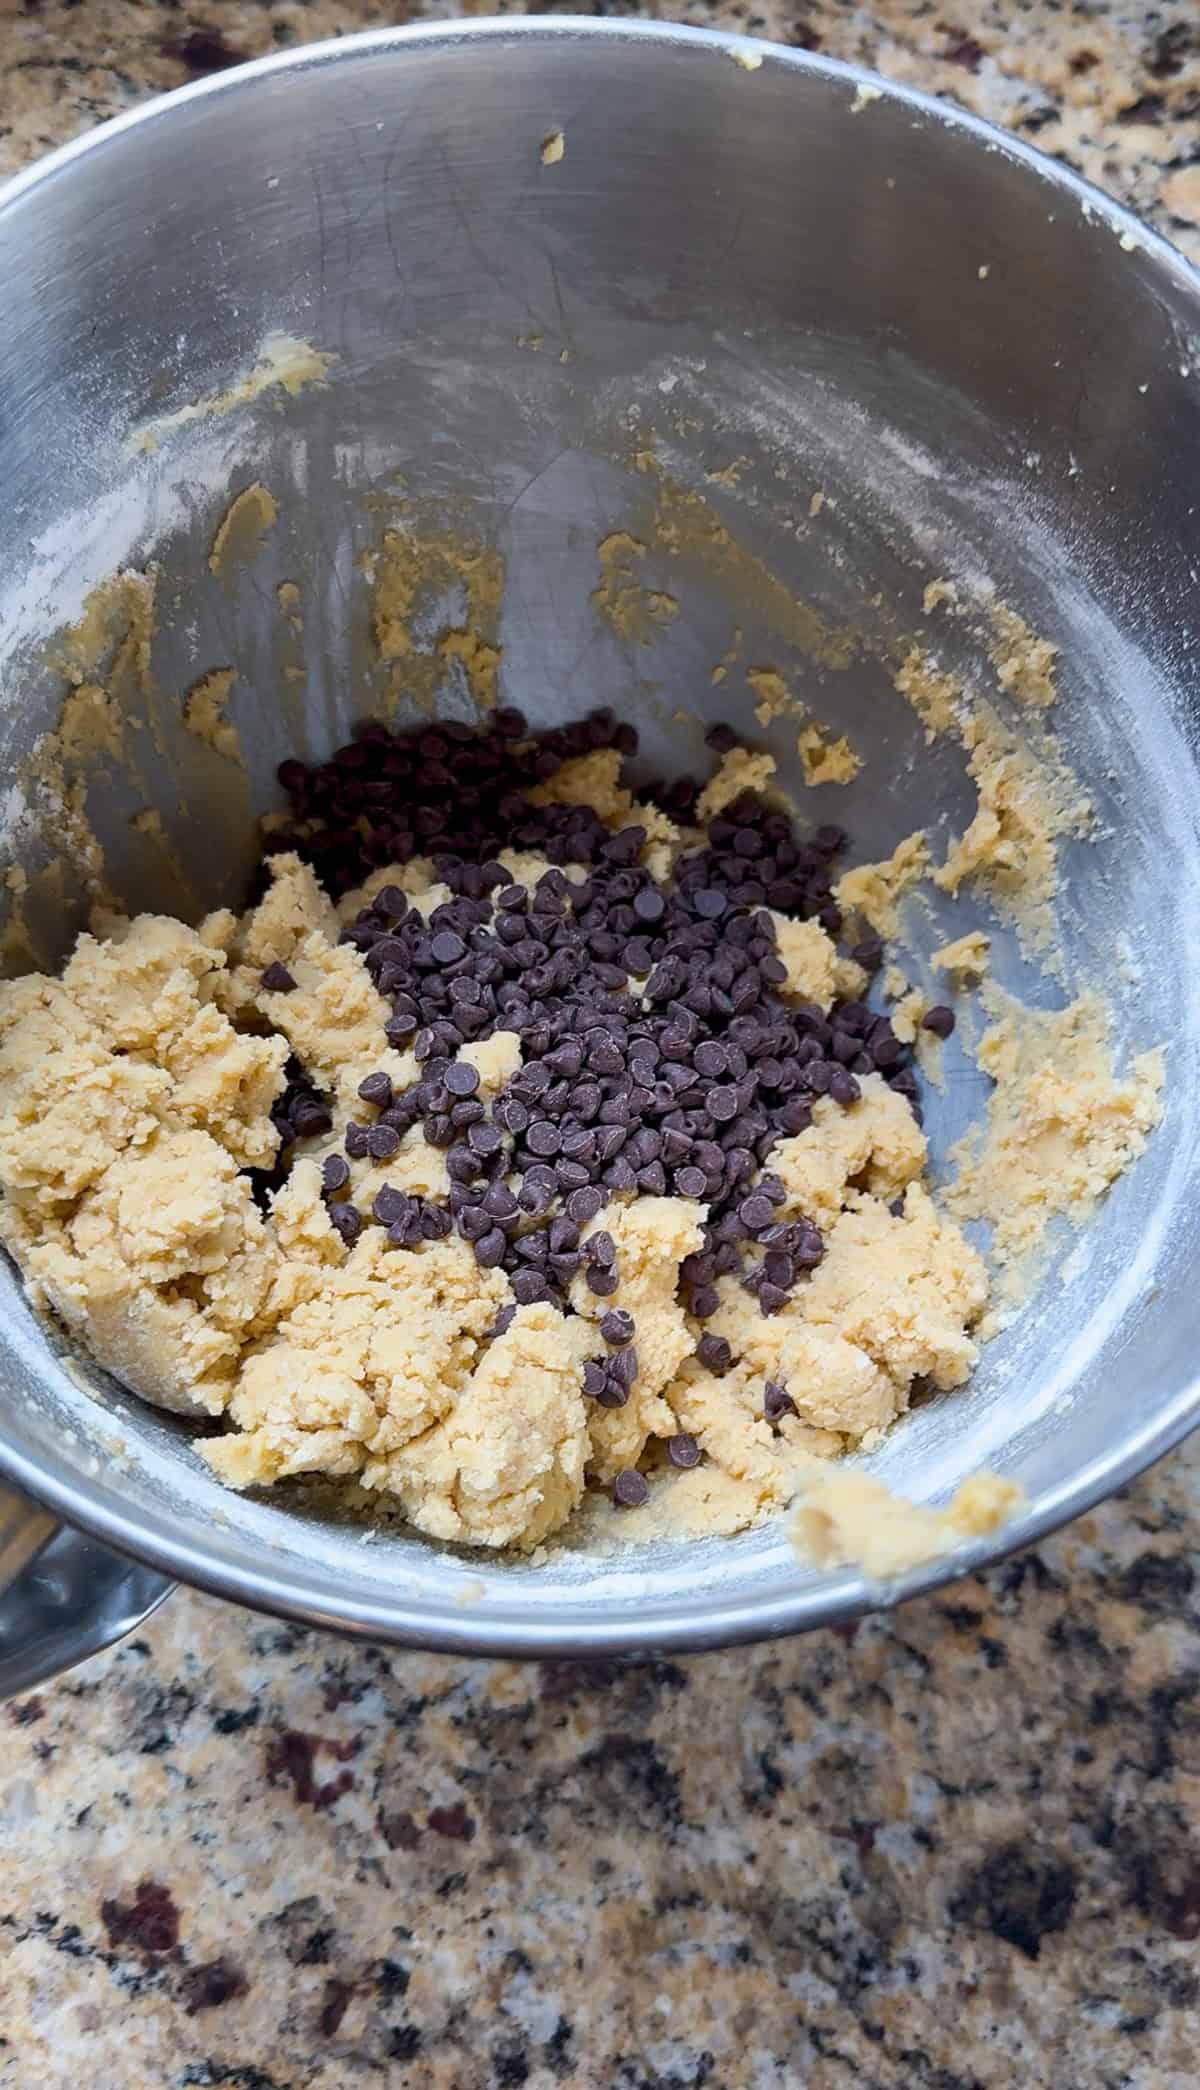
Step 4. Bring the dough together: With the mixer on low, slowly add the dry ingredients and mix until just combined. Don’t overmix — stop as soon as you don’t see dry flour. Fold in the mini chips with a rubber spatula.
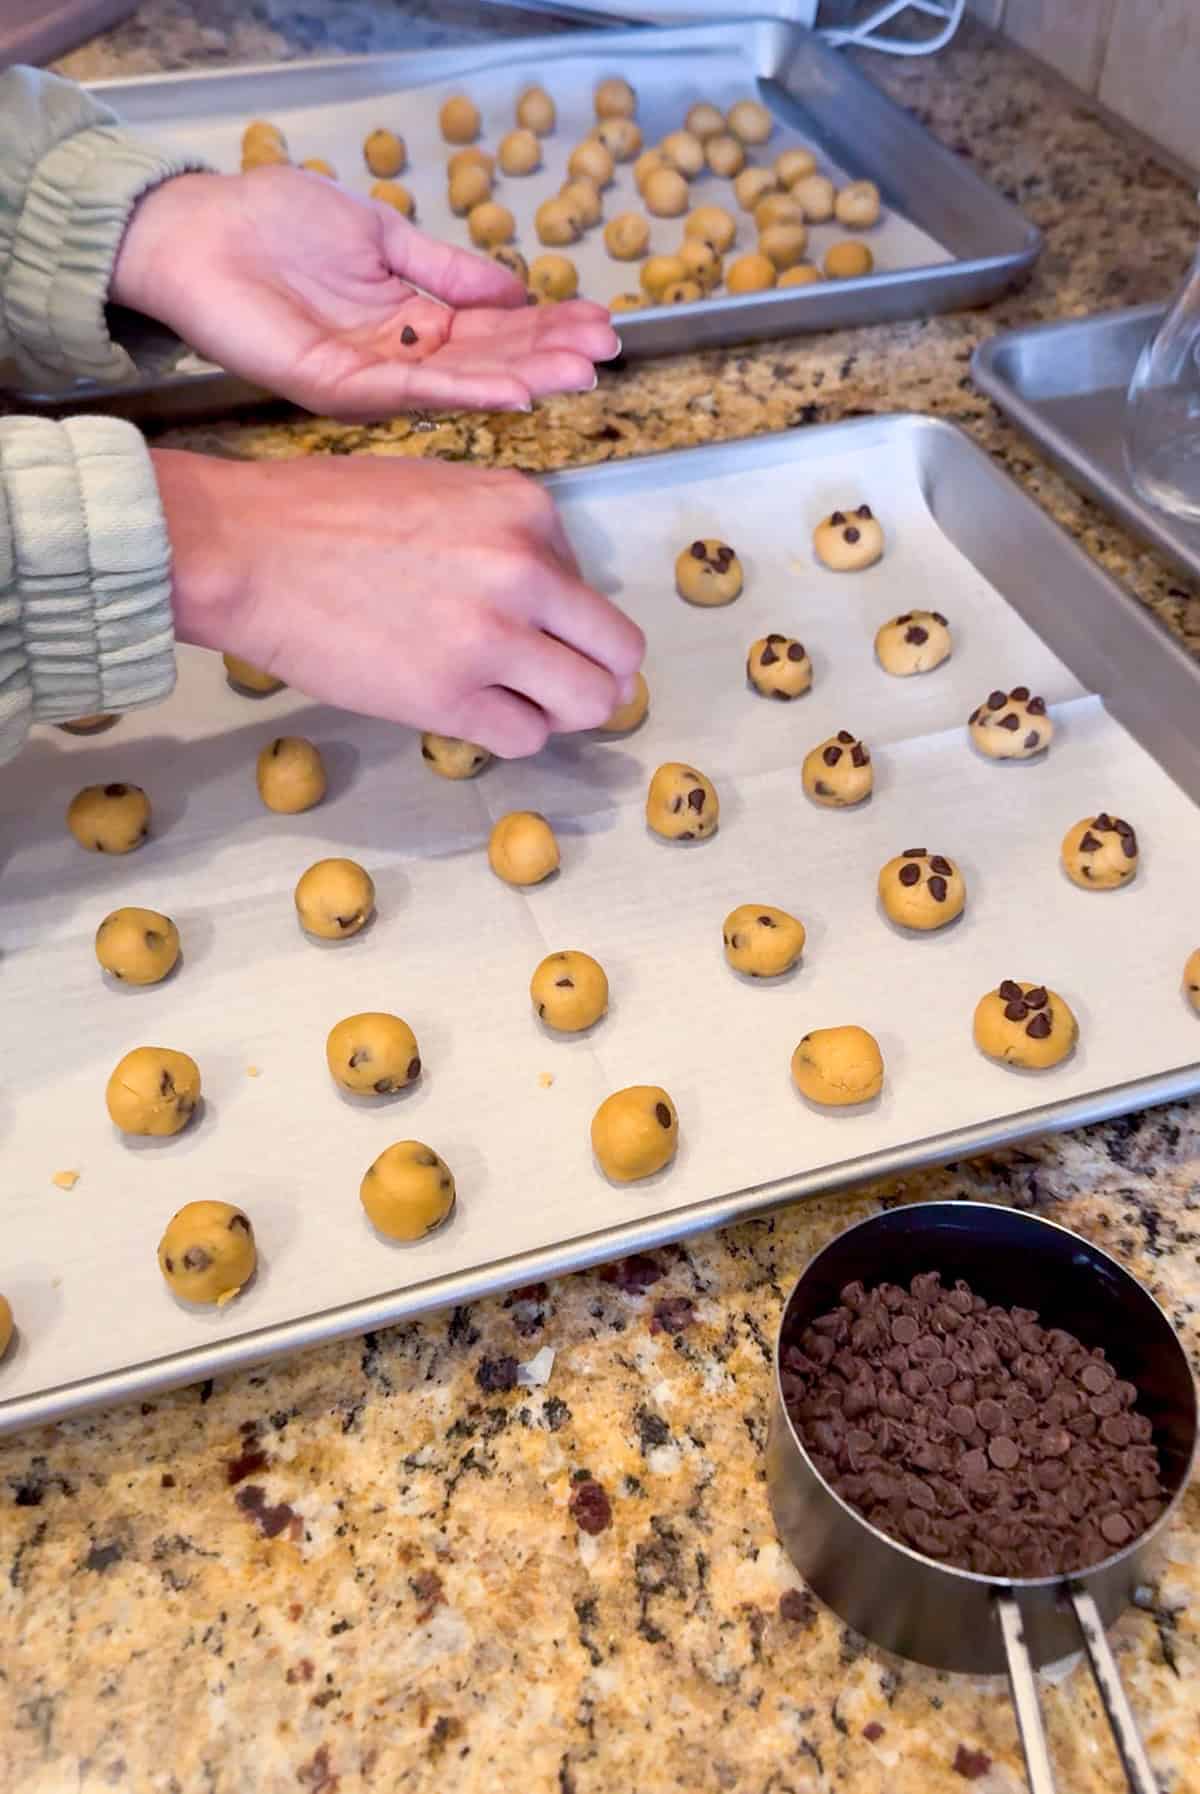
Step 5. Scoop and roll: Use about ½ to 1 teaspoon of dough per cookie — you’re aiming for about 1 inch, roughly the size of a quarter. Roll each piece into a smooth ball. This is the perfect job for little hands if your kids want to help. Small hands, small cookies. If you want that bakery look, press 2–3 extra mini chips onto the tops before they go in the oven.
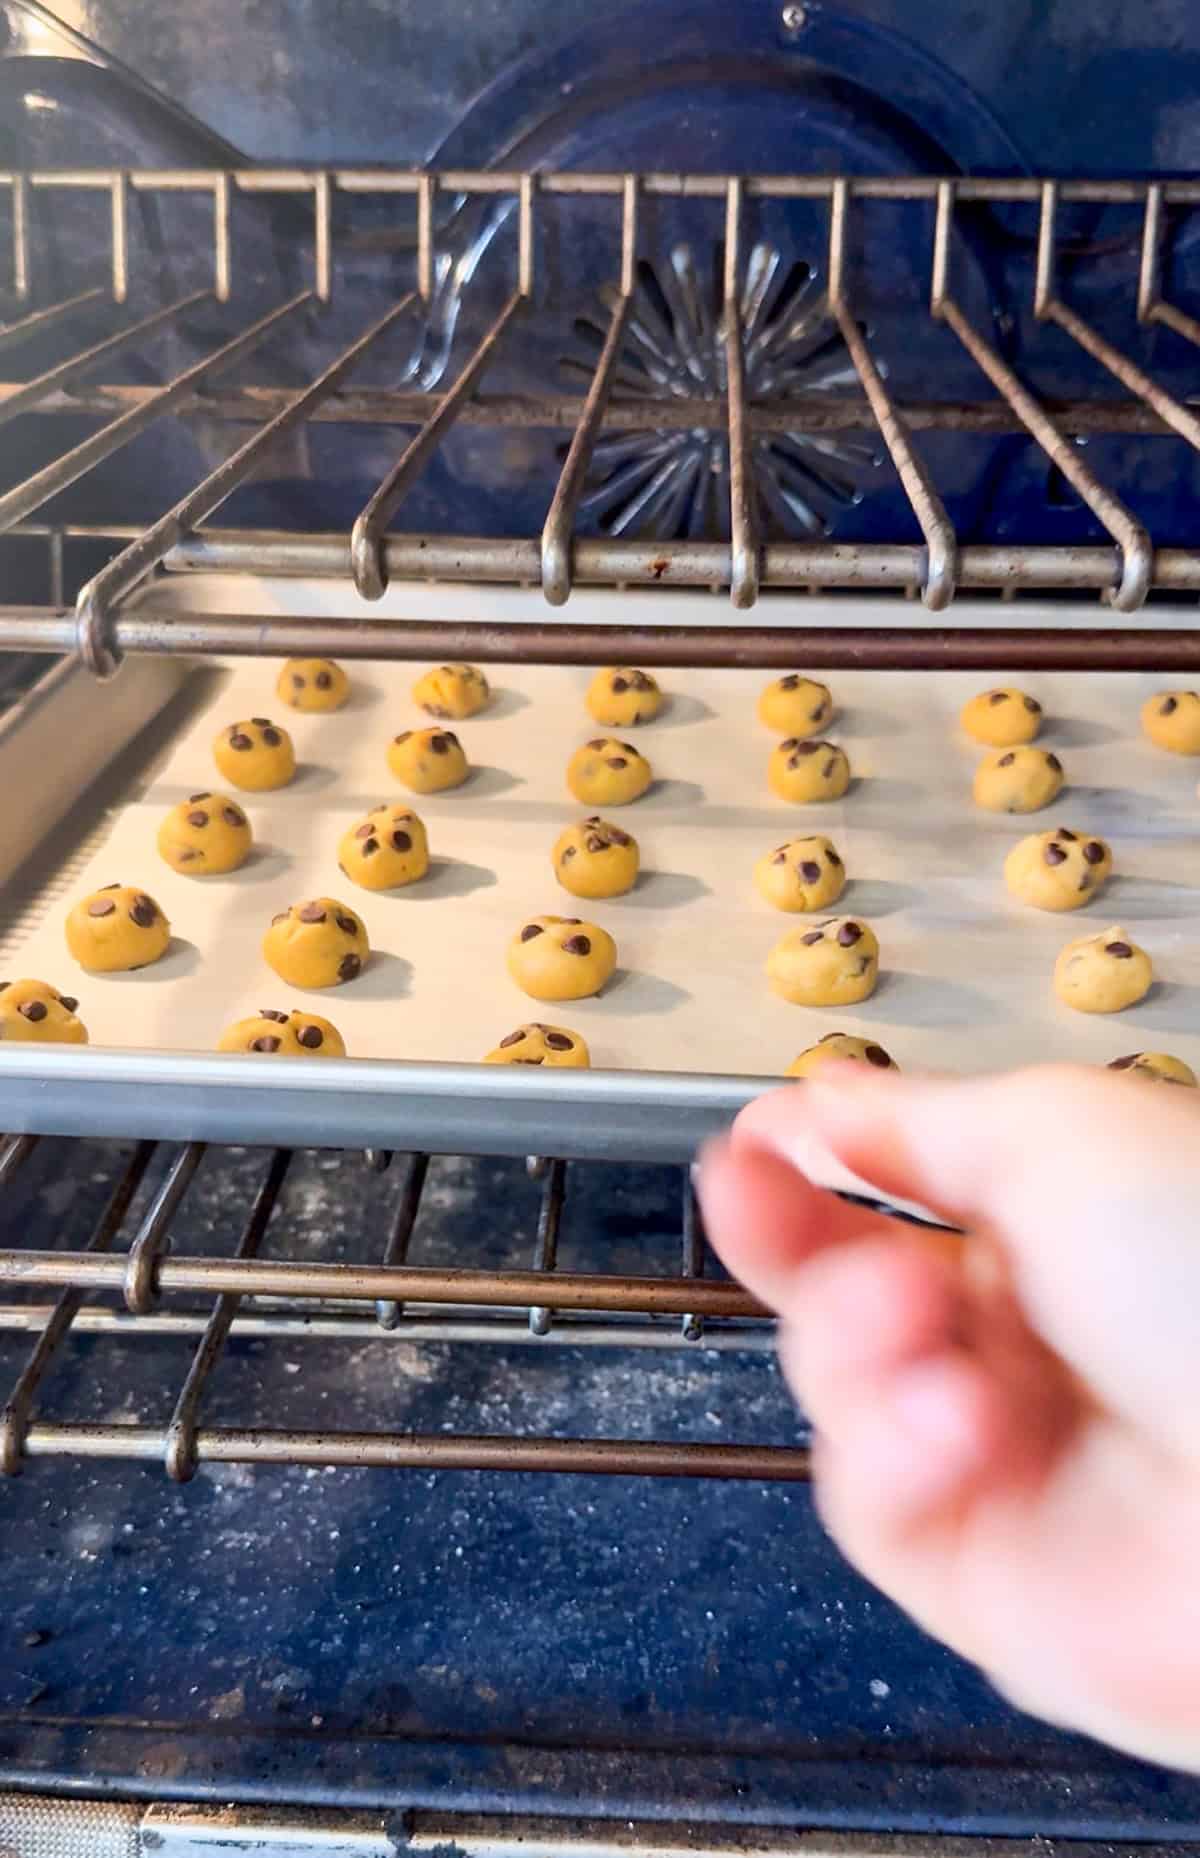
Step 6. Bake: Bake for 5–7 minutes. Here’s the thing about mini cookies: they look underdone when they’re actually done. You’re looking for edges that are just set and centers that still look soft and slightly shiny. They will firm up on the hot pan. Pull them when they look not quite ready and you will not regret it.
Step 7. Finish and cool: Optional but really good — sprinkle with a tiny pinch of flaky salt right out of the oven. Let them cool on the pan for 3–5 minutes before moving to a wire rack. Oh wow. Look at that.
Tips for the Best Mini Cookies Every Time
- Spoon and level your flour (or better yet, weigh it). Don’t scoop directly from the bag , you’ll pack in too much and end up with dry cookies. Spoon into the measuring cup and sweep the top flat with a knife. Or use a kitchen scale and the weight measurements in the recipe card.
- Use light-colored baking sheets. Dark pans will overbrown the bottoms before the centers are set. If that’s all you have, keep a close eye on the first batch and pull them 30–60 seconds early.
- Use truly room temperature butter. Most people think room temperature means soft. It should still feel firm and cool to the touch (around 60 degrees). When in doubt, keep it colder.
- Pull them early. This is the single biggest mistake with mini cookies. If the edges look fully set and golden in the oven, they’re already overdone. Look for just-set edges and a center that still looks soft. They continue baking on the hot pan after you take them out.
- Make it a kid activity. Rolling tiny dough balls is the most tedious part for an adult and the most exciting part for a five-year-old. Hand off the rolling. It goes faster than you think, and it makes the whole thing more fun.
- Want to make ahead? You can chill the dough for up to 24 hours if you want to prep ahead for a party. Or roll the dough into balls and freeze them. Bake straight from frozen at 350°F for 7–9 minutes.
How to Store and Freeze Them
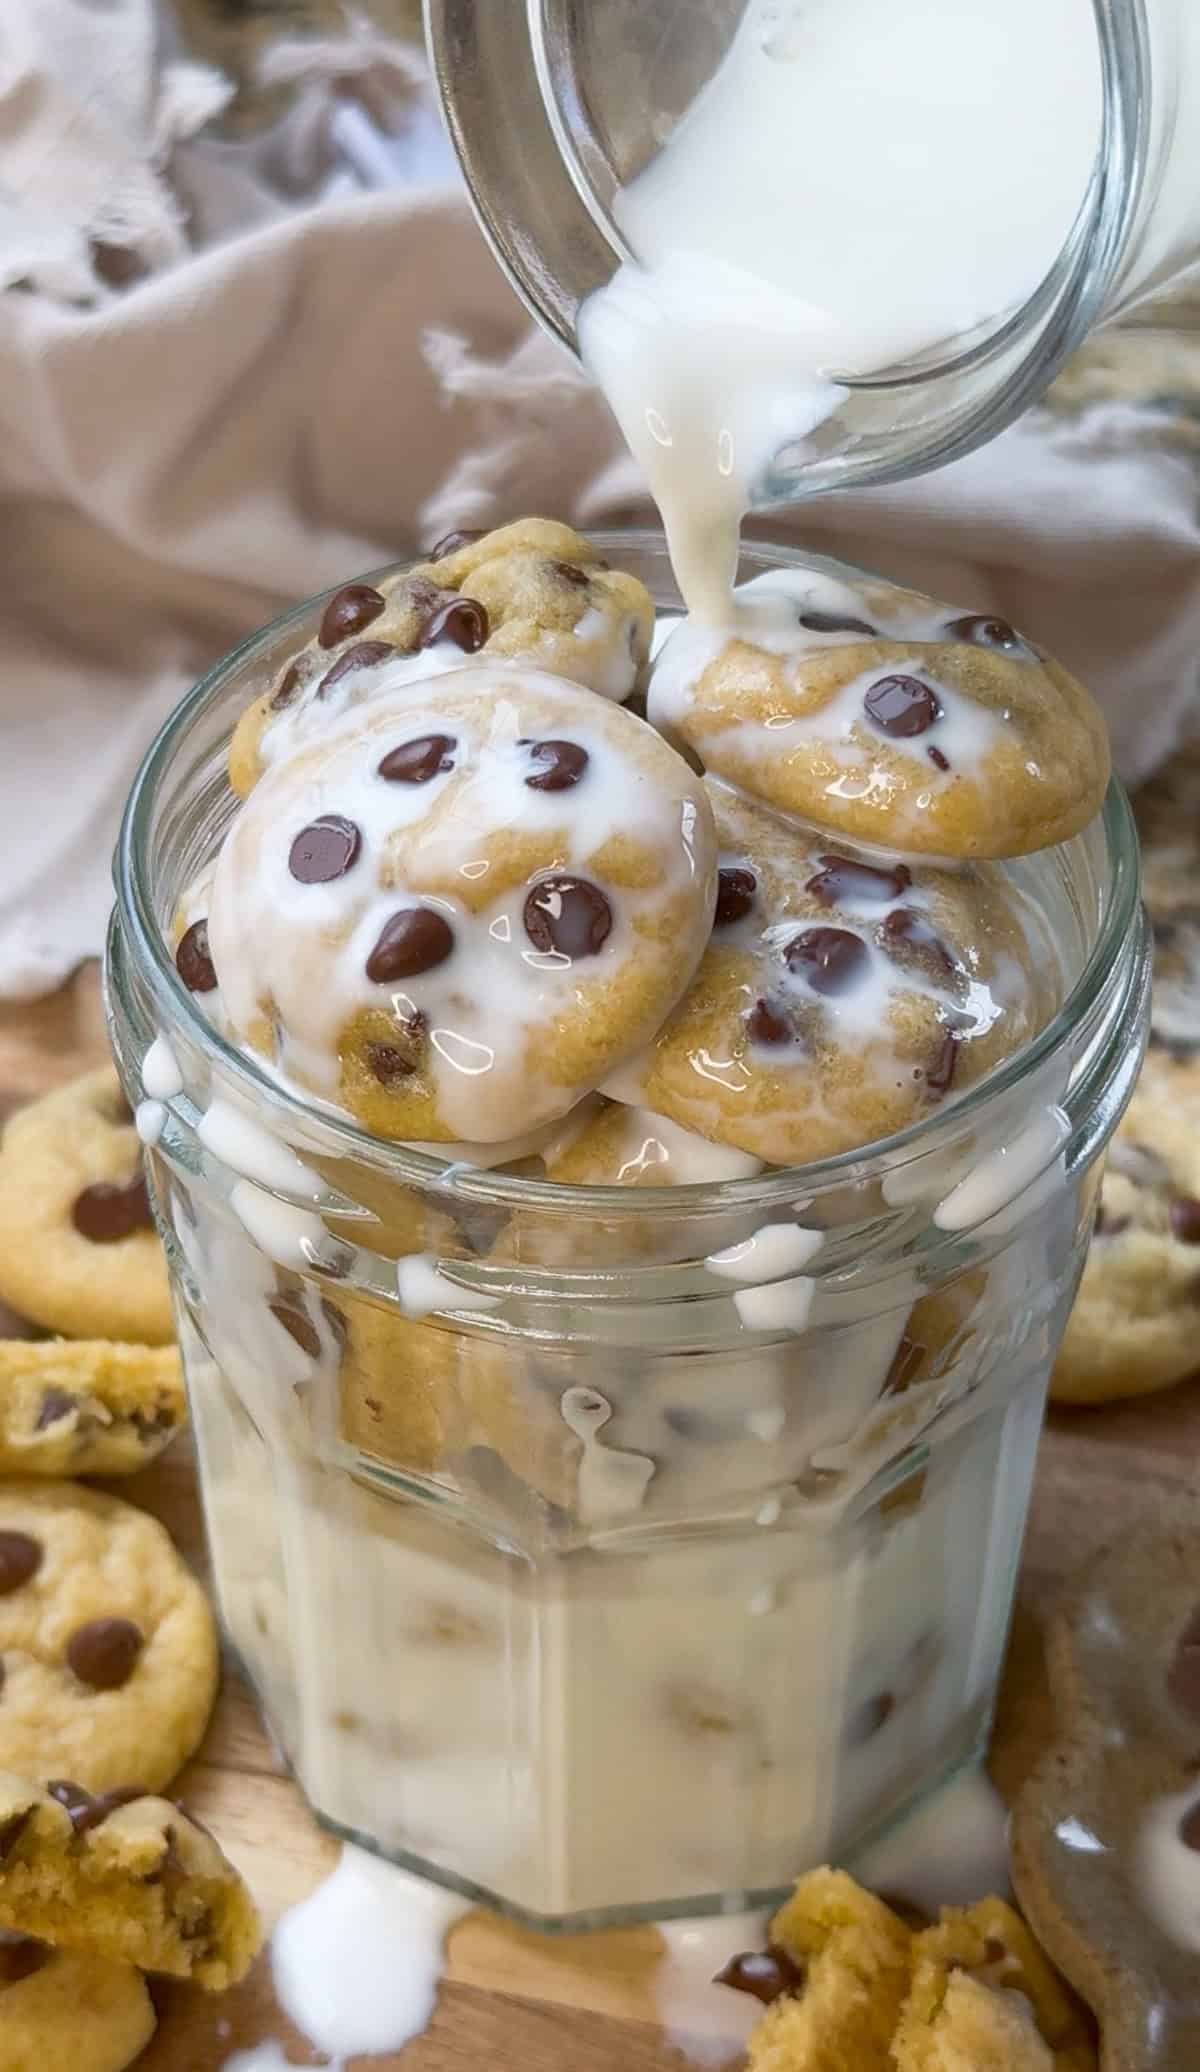
Room temperature: Store in an airtight container for up to 5 days. The cornstarch keeps them soft. Day three cookies are genuinely still good.
Freezer (baked cookies): Let them cool completely, freeze in a single layer on a sheet pan, then transfer to a freezer bag. They thaw at room temperature in about 20 minutes. Good for up to 3 months.
Freezer (dough balls): This is my favorite method for goodie bag prep. Roll the dough into balls, freeze until solid, then store in a freezer bag for up to 3 months. Bake straight from frozen at 350°F for 7–9 minutes (no thawing needed!).
For goodie bags: Let them cool completely before bagging. They hold up well and don’t crumble in transit, which is exactly what you need.
Frequently Asked Questions
About 1 inch in diameter, roughly the size of a quarter. That’s the sweet spot where they’re truly poppable but still have real texture and a soft center.
Two things work together here: a slightly higher flour ratio than a standard recipe, and using room temperature (not melted or super soft) butter. The extra flour gives the cookies structure at this small size so they hold their shape in the oven without any chill time.
Not this recipe. The flour ratio is specifically adjusted so you don’t have to chill the dough. You can go from bowl to oven in 15 minutes. If you want to make the dough ahead, you can chill it up to 24 hours, but it’s completely optional.
5–7 minutes at 350°F. They’ll look underdone when they’re done — that’s correct. Pull them when the edges are just set and the centers still look soft. They firm up on the hot pan as they cool.
You can, but I don’t recommend it for this size. Regular chips are too large for a 1-inch cookie and can make them bake unevenly. If mini chips aren’t available, finely chop regular chips or a bar of chocolate into small pieces.
Looking for more cookies to add to your rotation? My brown sugar pop tart cookies are a reader favorite along with this highly-rated edible cookie dough for when you want to keep the oven off.
And if you’re building out a holiday cookie box, these soft frosted Christmas cookies are the ones that stopped the internet.
More Cookies You’ll Love
Mini Chocolate Chip Cookies
Save this Recipe!
Ingredients
- 2 1/2 cups 300g all-purpose flour (increase slightly for less spread)
- 1 teaspoon baking soda
- 1 Tablespoon cornstarch
- 1/2 teaspoon salt
- 3/4 cup unsalted butter room temperature
- 3/4 cup light brown sugar packed
- 1/4 cup granulated sugar
- 1 large egg + 1 egg yolk room temperature
- 1 teaspoon vanilla extract
- 1 cup mini chocolate chips or finely chopped chocolate
Instructions
- Preheat oven to 350°F. Line two light-colored baking sheets with parchment paper.
- Mix dry ingredients (2 min): In a medium bowl, whisk together the flour, baking soda, cornstarch, and salt.2 1/2 cups 300g all-purpose flour (increase slightly for less spread), 1 teaspoon baking soda, 1 Tablespoon cornstarch, 1/2 teaspoon salt
- Cream butter and sugar (3 min): In a large bowl using a handheld or stand mixer fitted with a paddle attachment, beat the butter, brown sugar, and granulated sugar until light and creamy, 2-3 minutes.3/4 cup unsalted butter, 3/4 cup light brown sugar, 1/4 cup granulated sugar
- Add egg and vanilla (1–2 min): Add the egg, egg yolk, and vanilla. Beat until smooth and fluffy, another 1-2 minutes, scraping down the sides as needed.1 large egg + 1 egg yolk, 1 teaspoon vanilla extract
- Finish the dough (2 min): With the mixer on low, slowly add the dry ingredients and mix until just combined. Fold in the mini chocolate chips with a rubber spatula.1 cup mini chocolate chips
- Scoop and roll (15 min): Use 1 teaspoon to scoop out the dough and roll into balls. Place on the baking sheet about 1–2 inches apart. Press a few extra mini chocolate chips on top.
- Bake (5–7 minutes): Bake until the edges are set and the centers still look slightly soft. Finish with flaky salt if desired or press a few more mini chips into the tops. Let them cool completely on the sheet pan.
Notes
Nutrition
Nutrition information is automatically calculated, so should only be used as an approximation.
This post may contain affiliate links. Read our disclosure policy.


These were so cute! I liked the recipe, my dough turned out a tad dry so I added just a splash of milk and they were perfect. Probably a measuring error on my end! So yummy and like everyone said, so dangerous! I will be making these again, thank you Molly!
You’re welcome! Glad you enjoyed them.
These are so fun! Made them this weekend and they were very easy and delicious. I didn’t have mini chocolate chips, and I didn’t do a good job of chopping the normal ones so I ended up with quite a few more cookies than the recipe anticipated. Which was not a problem at alllll 🙂
Thanks for sharing, Ashley!!
Looks good. I love the way you put the ingredients underneath the instructions. It makes it so much easier to see instead of jumping back and forth.
Can’t wait to make them. Thank you
You’re welcome! Let me know how they turn out!
Simple to make, delicious and adorable! Thank you for the recipe!
You’re welcome!!