

You’ve probably seen coconut whipped cream as the dairy-free fix for everything from strawberry shortcake to hot cocoa.
The technique is simple but it only works if you start with the right can of coconut milk. Chill it overnight, scoop out the solid cream, and you’ve got something thick enough to pipe and fluffy enough to fold into anything. Here’s exactly how.
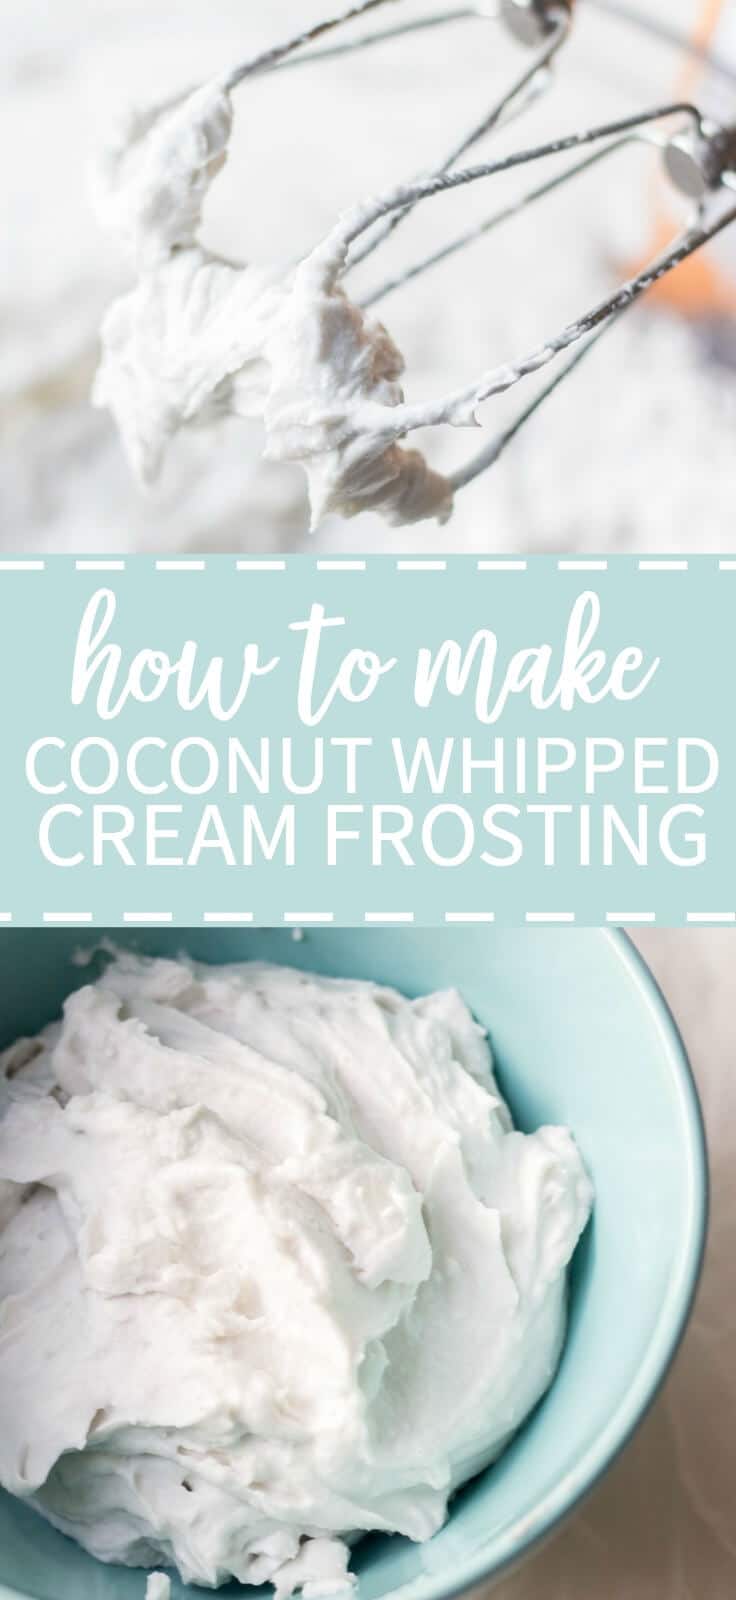
Did you know you can make delicious whipped cream from coconut milk? Whether you’re lactose intolerant, vegan or looking to adopt a healthier lifestyle, or you just want something delicious, this recipe is for you!
I know what you’re thinking. Vegan whipped cream? What kind of off the wall ingredients am I going to have to buy at Whole Foods to make this happen? I feel ya. Been there. Then, I decided to start experimenting with dairy free alternatives and turns out, they were right under my nose!
Literally. I’m in the baking aisle every other day gathering the usual suspects: chocolate chips, vanilla extract and pecans and there on the shelf is canned coconut milk. Sitting there this whole time! Why have I never focused on how to coconut whipped cream before? Because you only need 2 other ingredients to make this recipe happen.
Ingredient notes
- Coconut milk. Not to be confused with the milk you buy in the dairy aisle. You buy this canned coconut milk in the baking section. Usually buy the sweetened condensed and evaporated milk. I use the Thai Coconut brand.
- Sweetener. Depending on your taste you have a couple of options. The three I recommend using are pure maple syrup, agave or powdered sugar.
- Vanilla. This is standard, but you really can’t have a frosting recipe without it. It adds a subtle flavor and depth!
Not all cans of coconut milk perform the same. Full-fat is non-negotiable, but within that, some brands separate beautifully and others never quite get there. The ones I’ve had consistent results with are Thai Kitchen full-fat coconut milk, Aroy-D, and Whole Foods 365. Avoid lite coconut milk entirely.
And before you put a can in the fridge, shake it if it sounds very sloshy, there may not be enough cream inside. A can with more of a soft, dense shake is what you want.
On guar gum: some recipes say to avoid cans with guar gum, others say it’s fine. I’ve tested both and honestly the bigger factor is chill time and fat content. If the can is cold enough and the right brand, guar gum or not, it whips.
Don’t spend too much time label-hunting just start with one of the brands above.
How do you thicken coconut milk for whipped cream?
Start by chilling the coconut milk. Chill the coconut milk overnight (12 hours), or better yet, an entire day if you have time.
The reason you need to chill the coconut milk is because the coconut milk is made up of two things: fatty coconut cream and coconut water. When you chill the can the coconut cream and coconut water separate. This is a good thing! We will only be using the coconut cream in this recipe.
How to make coconut whipped cream
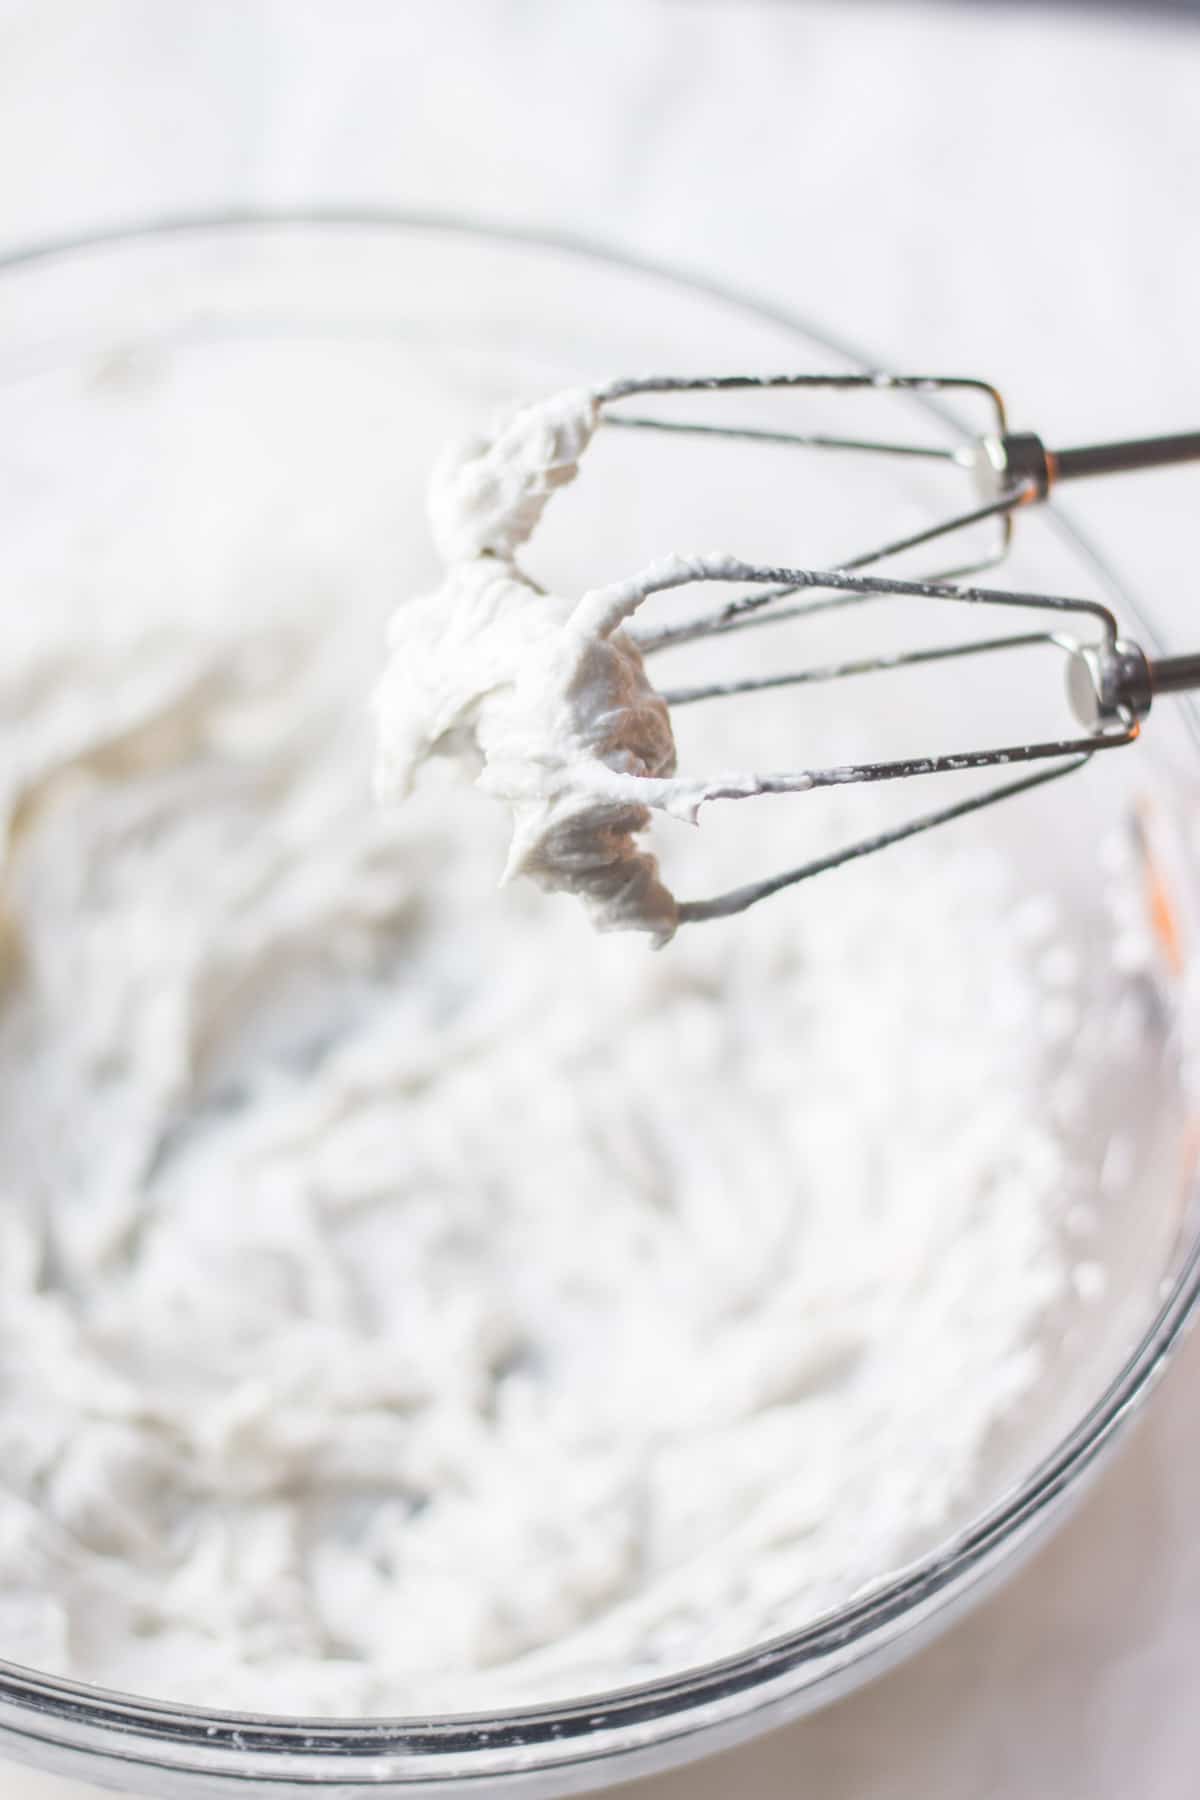
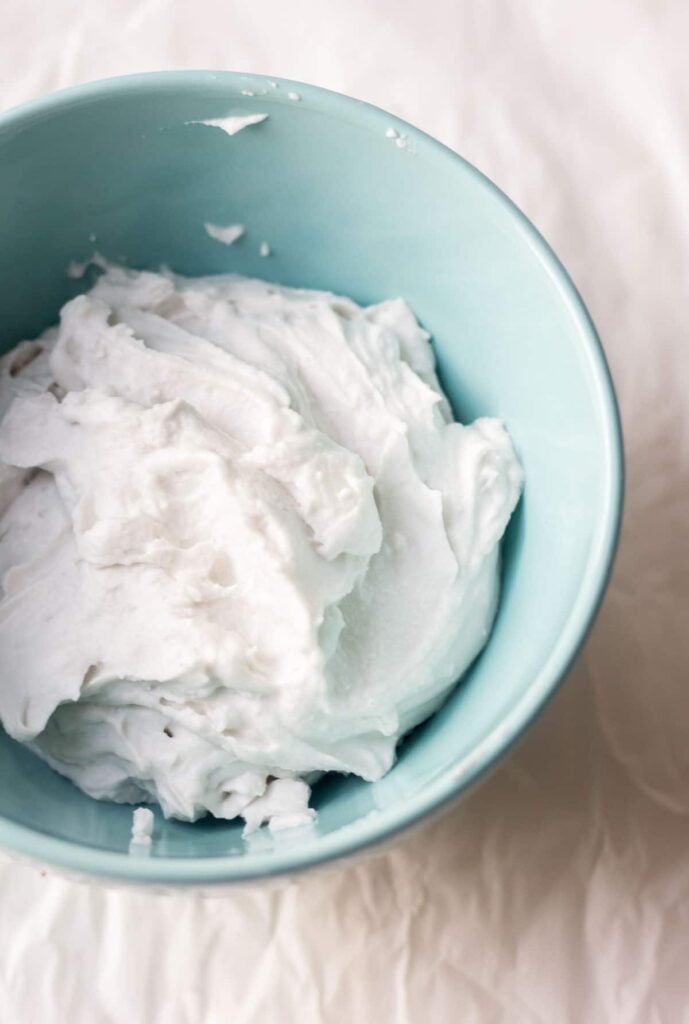
- Once the coconut milk is chilled, open the can and and scoop the coconut cream from the top and place it in the prepared bowl. Next, use a hand mixer or stand mixer fitted with the paddle attachment to whip the coconut cream on medium to high speed for at least 3 minutes, until light and fluffy.
- Next, add your favorite sweetener! My favorite options are maple syrup, agave and powdered sugar. If you’re keeping this recipe strictly paleo, I’d go with the pure maple syrup.
- The last ingredient to this step is vanilla extract! Don’t forget that, it adds lots of yummy flavor. After that, you’ve learned how to make coconut whipped cream!

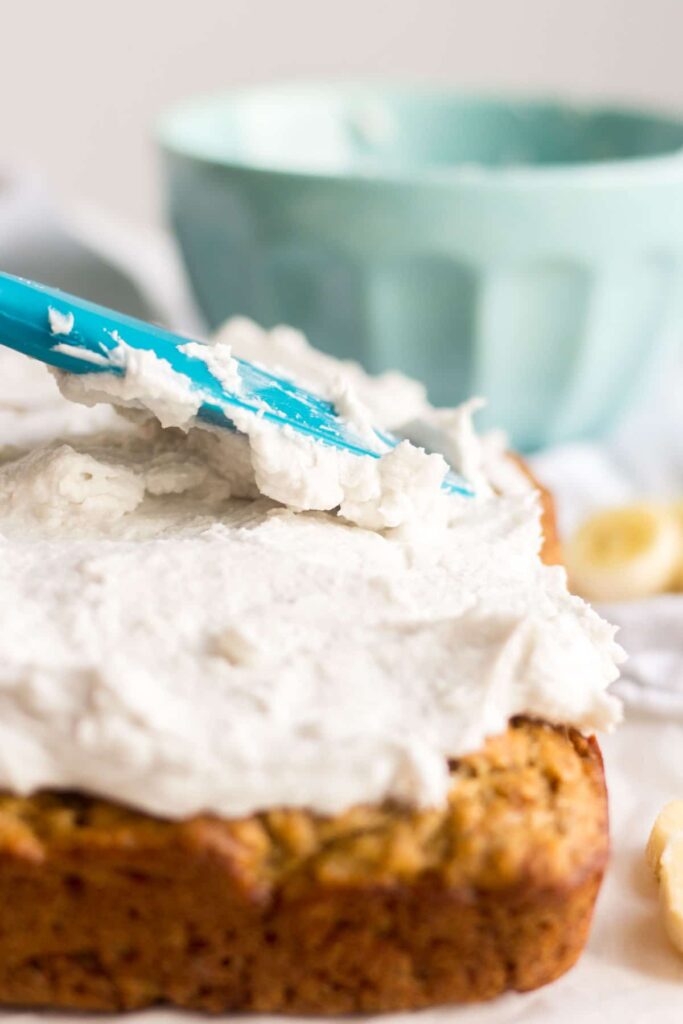
As a reminder: this coconut whipped cream is heat sensitive, very similar to regular whipped cream. If you aren’t serving it right away keep it stored in the fridge. However, make sure to pull it out of the fridge at least an hour in advance of serving as it will start to get thicker and harden the longer it’s stored.
One of the reasons I love this recipe is because it’s such a standard healthy frosting recipe that’s gluten free, vegan, paleo, sugar free and so much more! It’s such a classic.
From fresh lemon to chocolate and cinnamon, adding additional flavor is super easy. Just add your flavoring in with (or instead of) the vanilla extract and whip it up.
No matter how you do it, using this guide for how to make paleo coconut whipped cream will help you impress all yo’ friends.
What to use paleo coconut whipped cream for:
I really hope this post helped learn more about and learn how to make coconut whipped cream! It’s made a huge difference in my healthy baking and I hope it will help you make yummy treats too!
Recipe FAQs
Yes, and it actually works even better. Coconut cream has a higher fat content, so it whips up thicker with less waste. Use about 1 cup of coconut cream in place of one full can of coconut milk.
Three most common reasons: the can wasn’t chilled long enough (needs at least 24 hours), the can had a low fat content, or some watery liquid got scooped in with the cream. Chill for a full 24 hours, scoop only the solid white cream, and leave all the liquid in the can. If the cream still won’t whip, pop the bowl and beaters in the freezer for five minutes and try again.
Yes. Store covered in the fridge for up to five days. It firms up in the fridge, so give it a quick re-whip or stir before using.
Anything you’d put regular whipped cream on. It’s especially good on fresh berries, hot cocoa, paleo cobblers, warm pumpkin desserts, and honestly just eaten from the spoon.
How to Make Coconut Whipped Cream
Save this Recipe!
Ingredients
- 2 14 ounce cans full fat coconut milk (I used Thai Kitchen)
- 1/2 cup powdered sugar agave or pure maple syrup
- 1 teaspoon vanilla extract
Instructions
- Chill the can of coconut milk in the fridge for at least 12 hours, 24 hours is recommended. About 1 hour before making the coconut whipped cream, chill a mixing bowl and beaters in the freezer.
- Once chilled, open the can and scoop the solid white coconut cream into the bowl. The coconut water will have settled at the bottom. Discard it or save it for another use.
- Using an electric hand mixer or stand mixer with the paddle attachment, beat the cream on medium high speed until fluffy and smooth, approximately 3 minutes.
- Add the sweetener and vanilla and beat again until combined.
- Store the coconut whipped cream in the refrigerator until ready to use. It will be firm when chilled and will soften again at room temperature. Keep in the fridge for up to one week or in the freezer for up to one month.
Notes
Nutrition
Nutrition information is automatically calculated, so should only be used as an approximation.
Here are a couple of items I used to make today’s recipe:
Thai Kitchen Organic Coconut Milk![]() , Glass Bowl Set
, Glass Bowl Set![]() , KitchenAid 5-Speed Hand Mixer
, KitchenAid 5-Speed Hand Mixer![]()
Some of the links above are affiliate links, which pays me a small commission for my referral at no extra cost to you! Thank you for supporting What Molly Made!
This post may contain affiliate links. Read our disclosure policy.


I’ll start by saying the recipe is delicious! But the pictures associated with this post are very misleading. I followed the recipe for the 2 4-in tiers and I barely had enough batter to coat the bottom of the pans. I ended up with 2 4-in pancakes essentially. Not the fluffy, thick layers portrayed in the picture. I ended up using a jar lid to make 4 tiny tiers and now have a large, tiered cupcake (I hope my “one” sign will hold up in it since it was meant for a cake…). Also, the coconut milk would not whip and was just a liquid mess despite a chilled bowl and being in the fridge all day. In the end, it’s all going to be fine, I think of it as less cake wasted for my 1 yr old first birthday party, but just wanted others to be aware these pictures may not be to scale. Also willing to accept any feedback for where I may have went wrong!
Hi! Could I frost a smash cake with this recipe? Will the powdered sugar stabilize the frosting?
Thank you!!
Made this for a 2nd time and it’s so yummy! Thank you!
Welcome! Thanks for sharing!