Why You’ll Dream About these Overnight Steel Cut Oats

bowl of turkey teriyaki vegetables and rice on a counter and then a close up of ground turkey teriyaki rice bowl

The first time I made these steel cut overnight oats I toasted the oats just long enough to smell that nutty scent, and by morning they were so much softer than I expected.

I love that the oats continue to mellow in the fridge, making mornings effortless (and delicious). These jars let me balance protein, fiber, and fats with simple additions and toppings like fruit and nut butter.

Why you’ll love them too:

  • Starts with a toasty, nutty aroma that turns creamy overnight.
  • 1:2 liquid ratio keeps texture balanced, never mushy.
  • High‑fiber breakfast that keeps you full and energized.
  • Totally customizable and portable for busy mornings.
scooping creamy overnight steel cut oats with bananas and peanut butter out of a jar.

What’s the Difference Between Steel Cut Oats and Rolled Oats?

If you’ve only made traditional overnight oats with rolled oats like these pumpkin overnight oats or blueberry overnight oats, you may notice a big difference in texture.

  • Rolled oats (old-fashioned oats) are whole oats that have been steamed and pressed. They absorb liquid quickly and soften into a creamy (almost pudding-like) texture when soaked overnight.
  • Steel cut oats are the inner kernels of whole oats that have been cut down into 2 or 3 pieces using a steel blade (hence the name). This leaves them chewier and nuttier (never mushy). Because they’re less processed, they take longer to soak.

Steel cut oats offer several benefits because they’re high fiber, low glycemic, and naturally gluten-free.

TLDR: rolled oats = creamier; steel cut oats = chewier, nuttier, and more filling (thanks to fiber).

Ingredients You’ll Need

steel cut oats, coconut oil, salt, and water on a countertop.
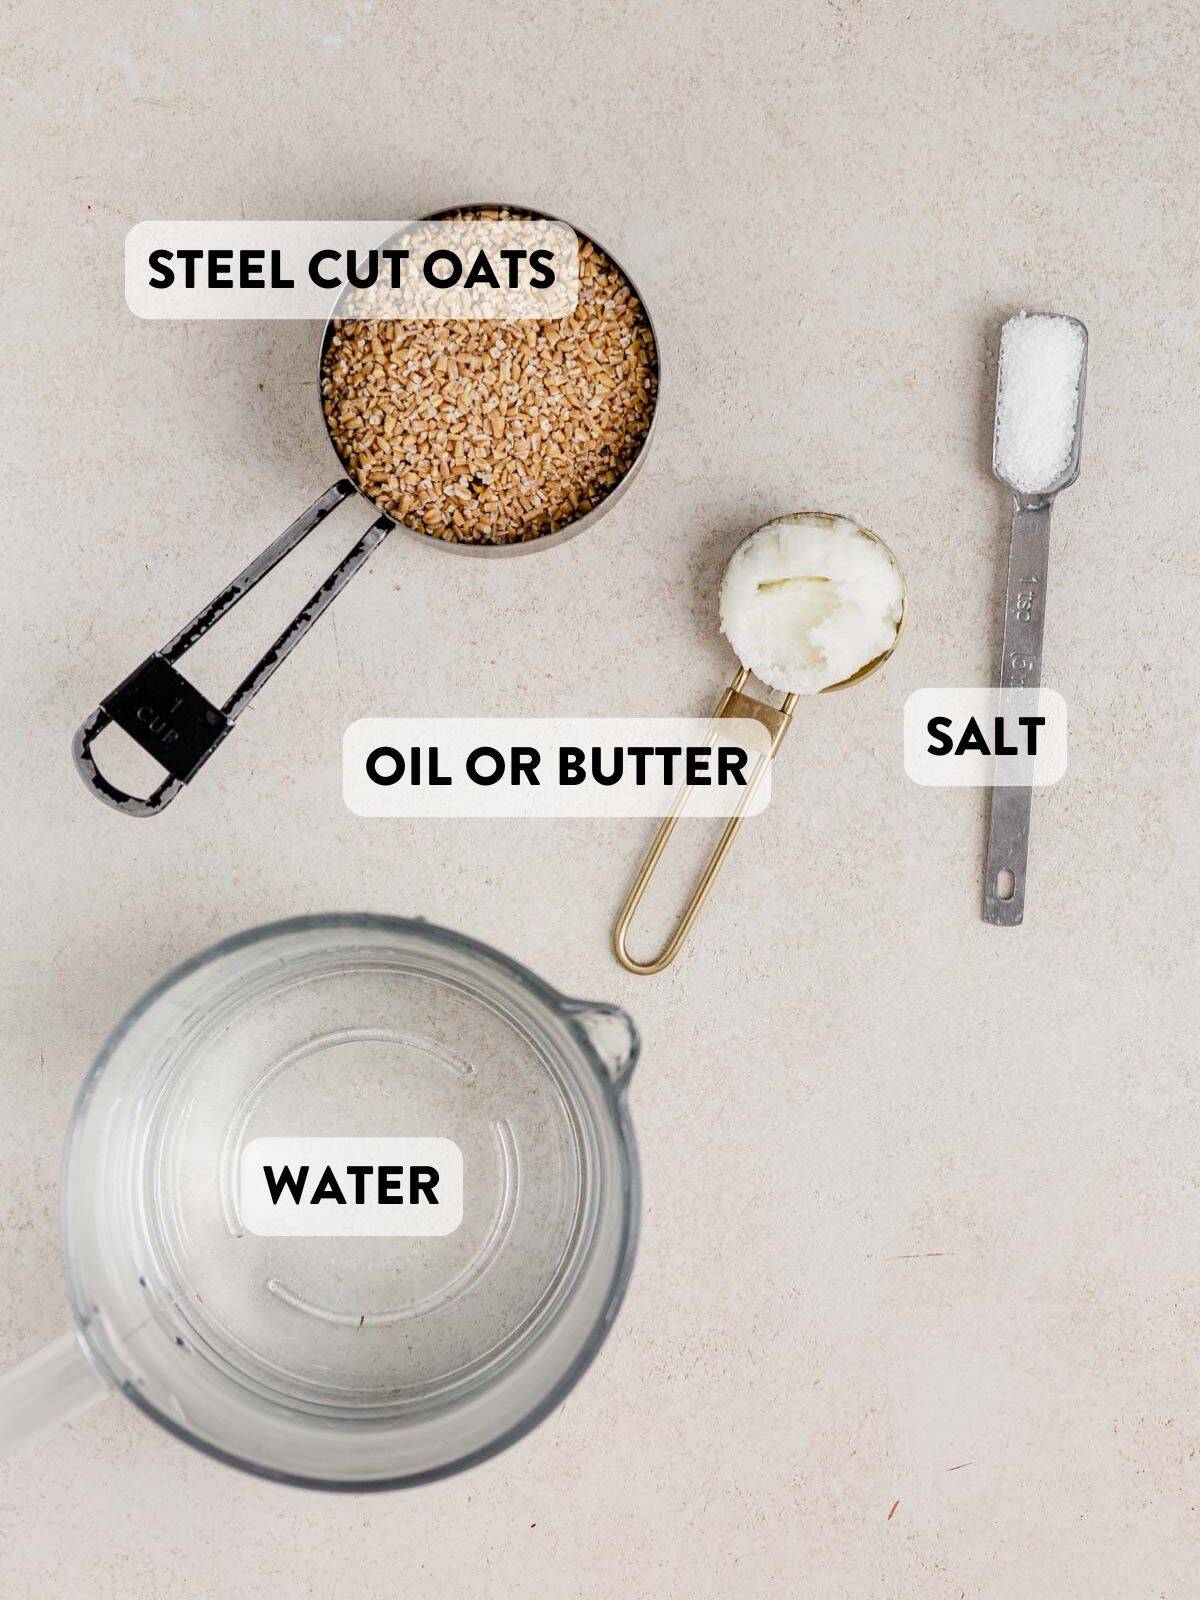
  • Butter or coconut oil: to enhance the flavor of the oats and help break down the tougher outside of the oats.
  • Steel cut oats: whole‑grain, minimally processed, chewy, and high fiber!
  • Water and/or milk: use a blend of water and milk for creamier oats.
  • Flavor boost: 1 tsp kosher salt or vanilla.
  • Mix-ins: protein powder, dried fruit, nut butter etc.
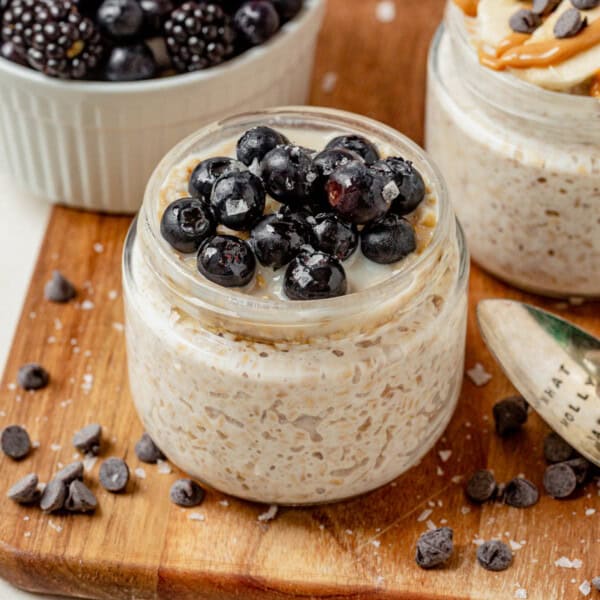
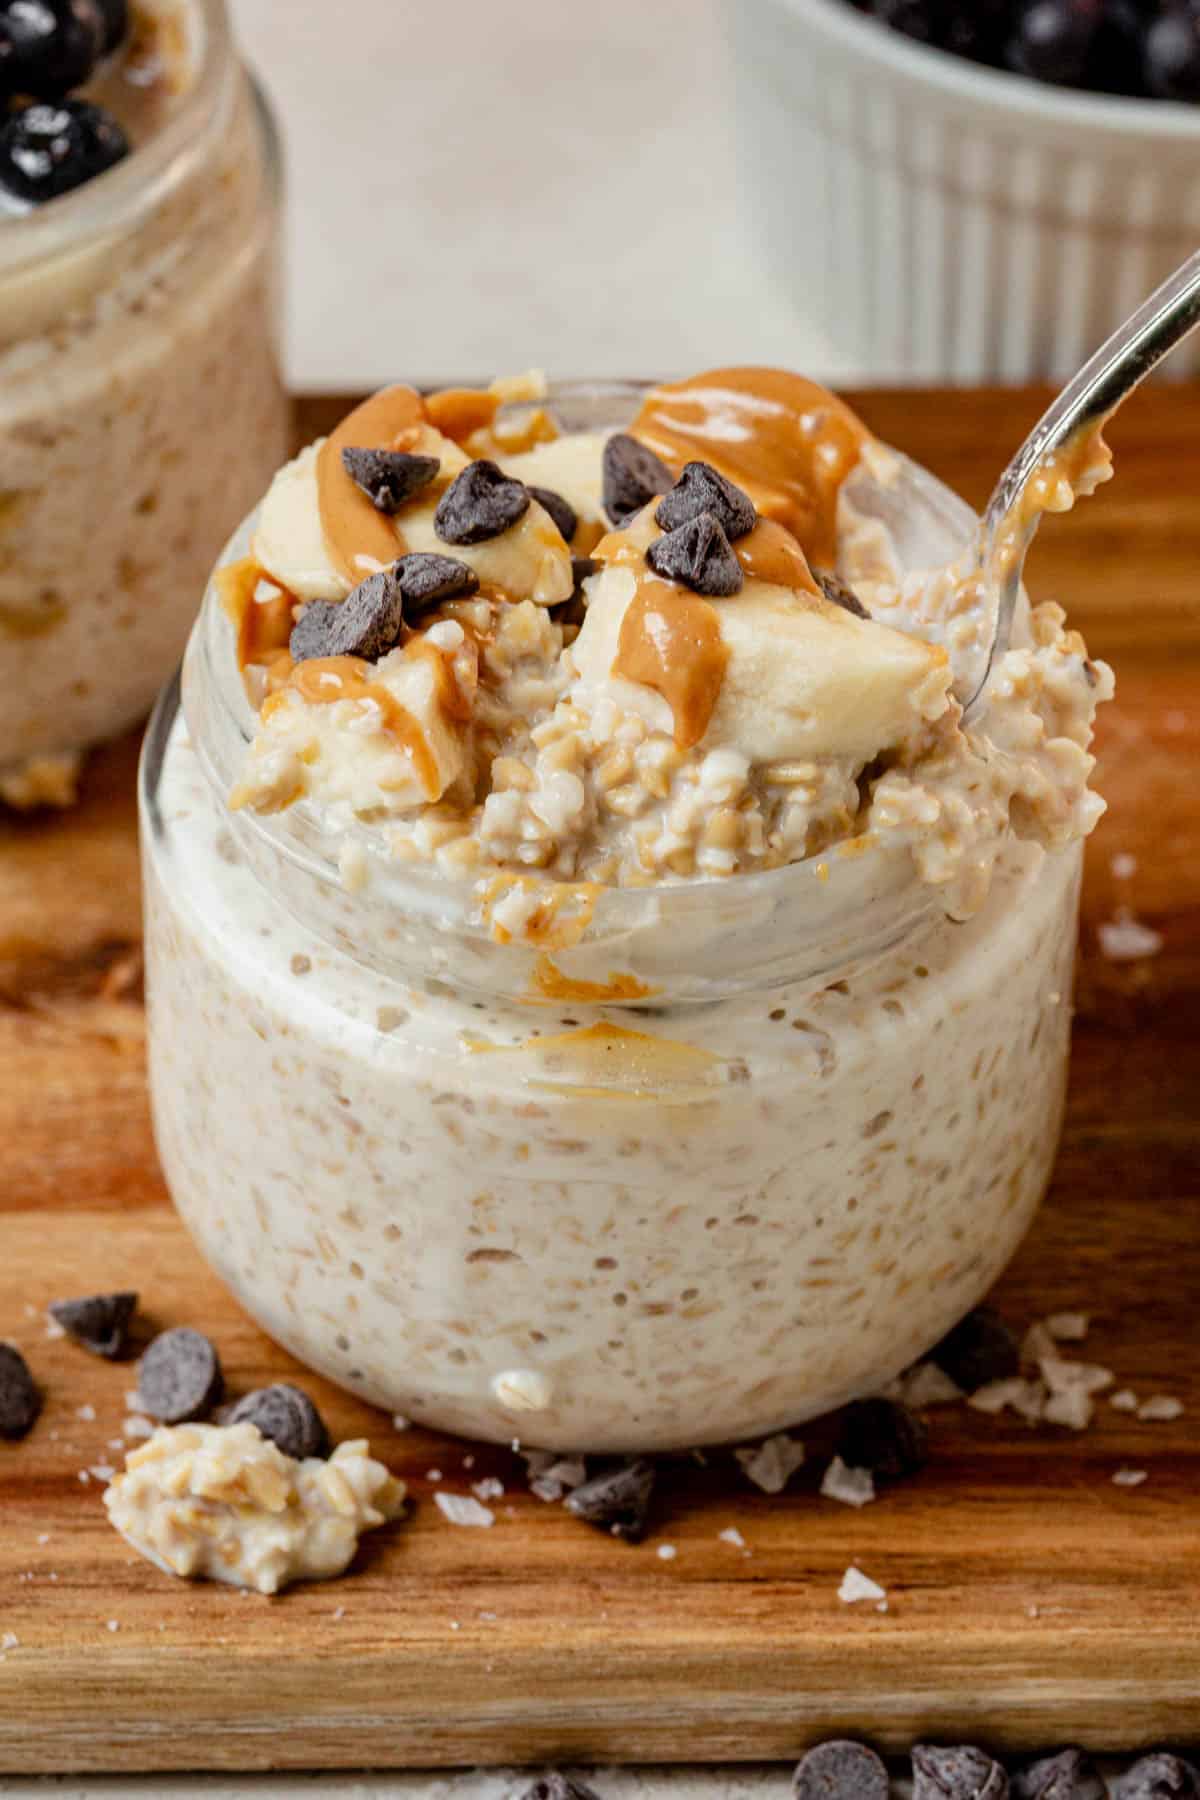
  • Optional toppings: chia or flax seeds, fresh fruit (berries, banana or apple), nut butter, cinnamon, maple syrup, or dried fruit

How to Make Creamy Make-Ahead Steel Cut Oats

toasting steel cut oats and butter in a saucepan with a wooden spoon.
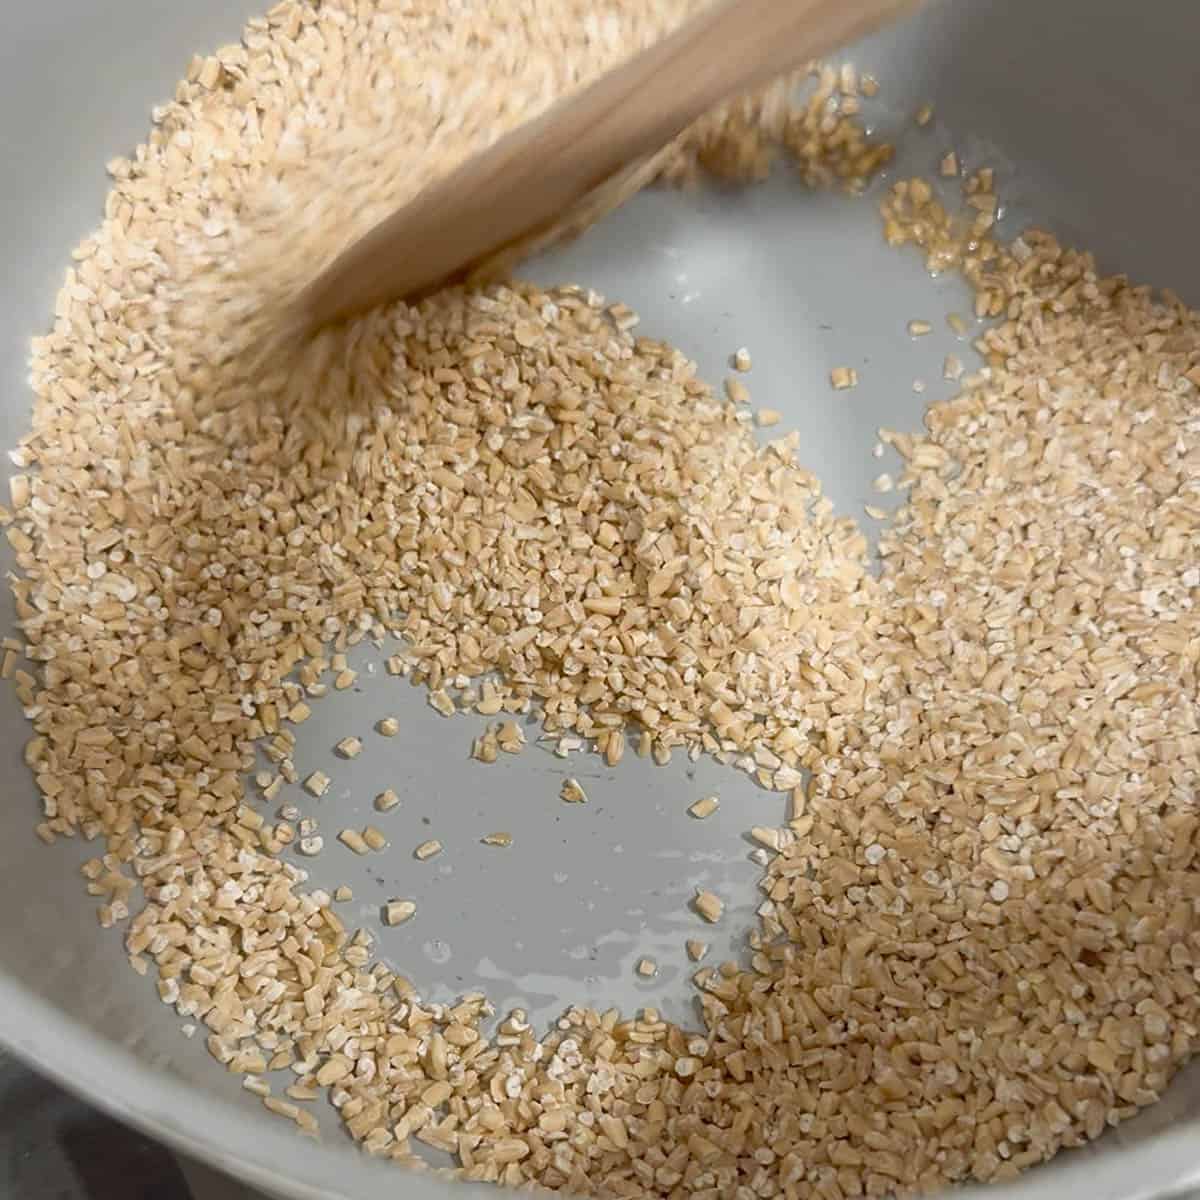
  1. Toast the oats: In a medium saucepan over medium heat, melt the butter or coconut oil. Add the steel cut oats and toast, stirring, until the aroma is toasty and nutty.
Simmering milk, water, and steel cut oats on the stove for overnight oats.
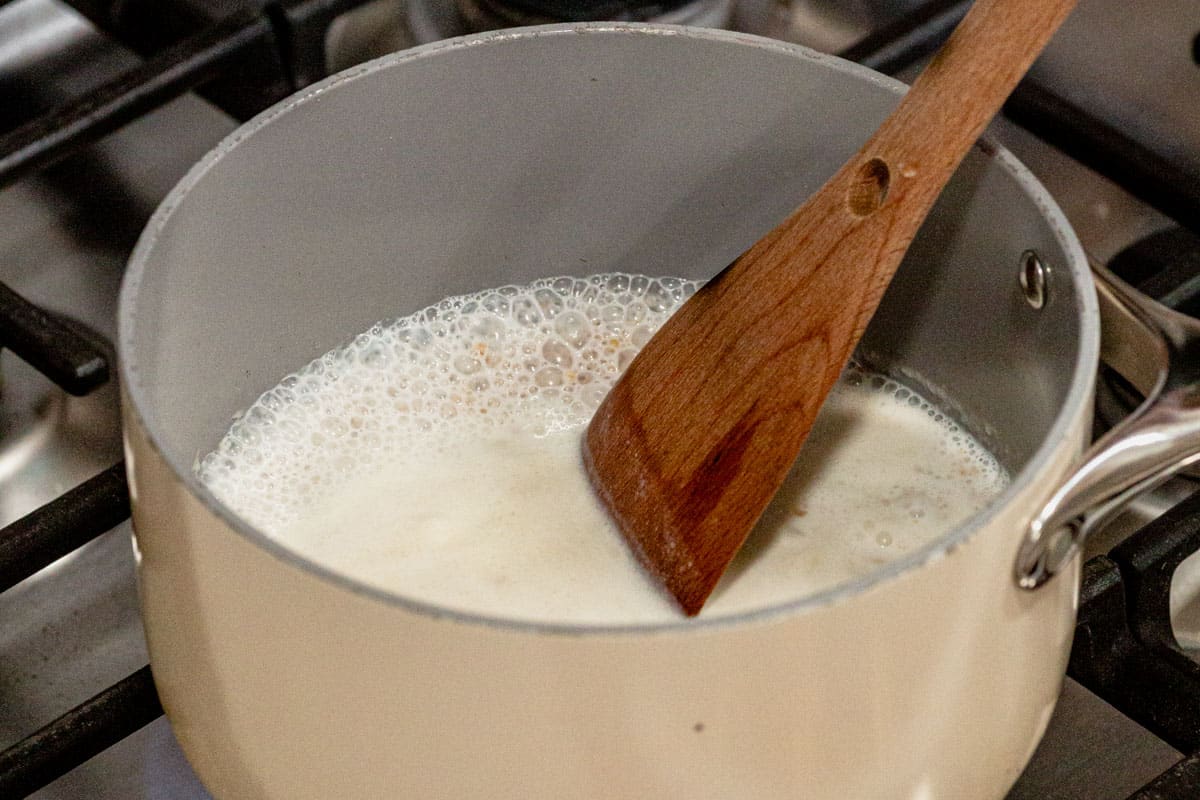
  1. Boil and simmer: Add liquid and salt, bring to a boil. Cover and simmer for 1 minute, then remove from heat to let oats start absorbing liquid. This helps to get the breakdown of the oats started for softer oats.
dividing overnight steel cut oats into glass meal prep jars.
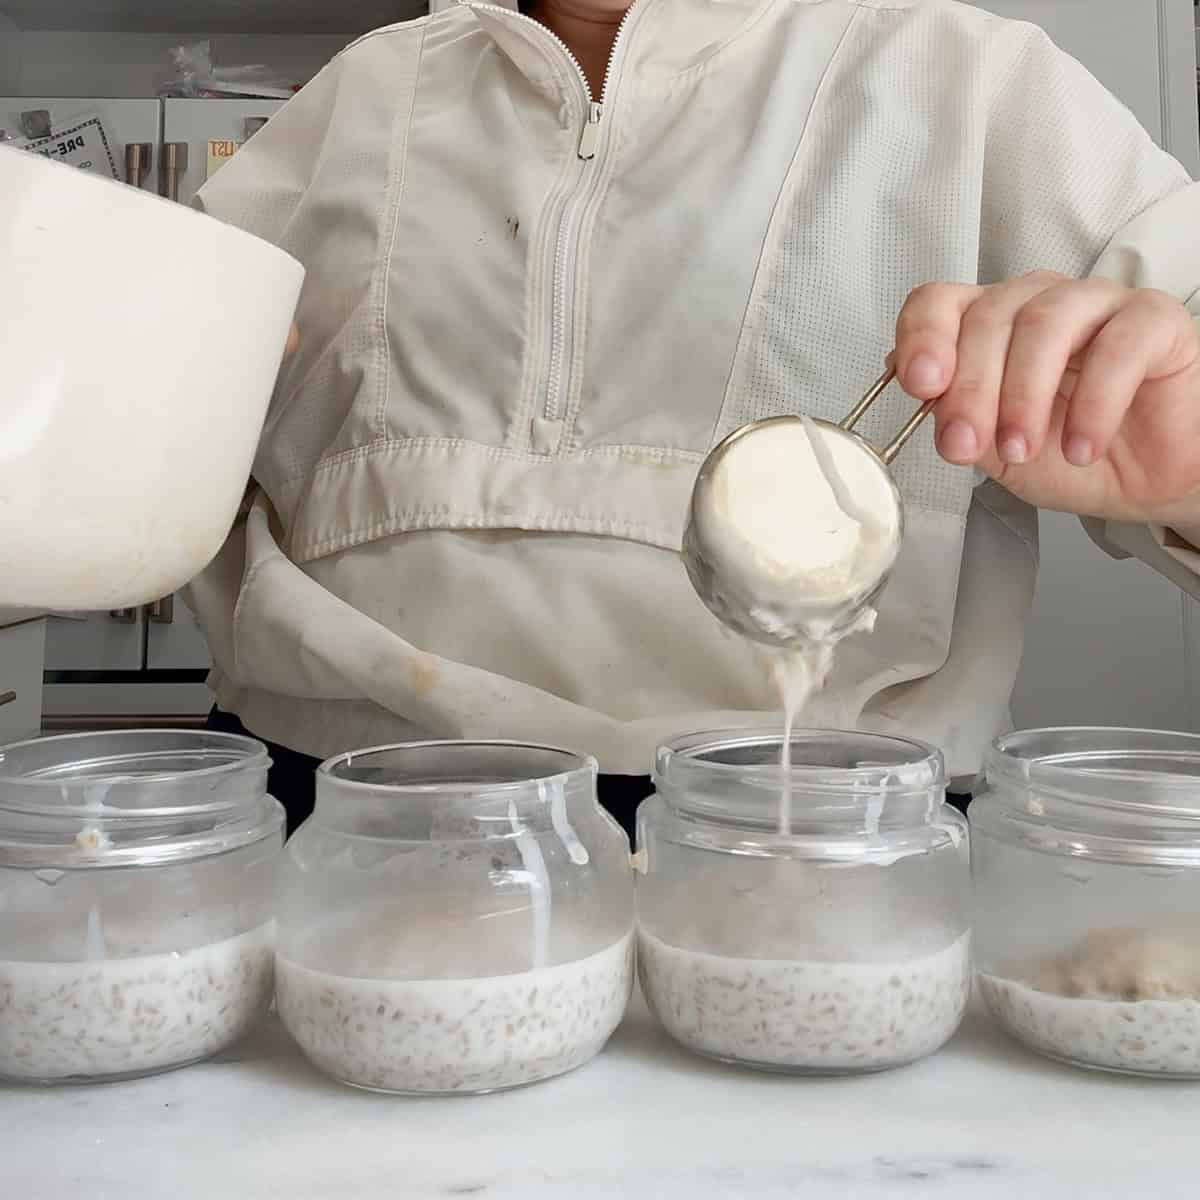
  1. Divide and chill: Spoon oats into jars (4–5), cover, and refrigerate overnight—8 to 12 hours lets oats absorb all liquid and soften fully.
Two jars of overnight steel cut oats on a serving board with fresh blueberries and honey.
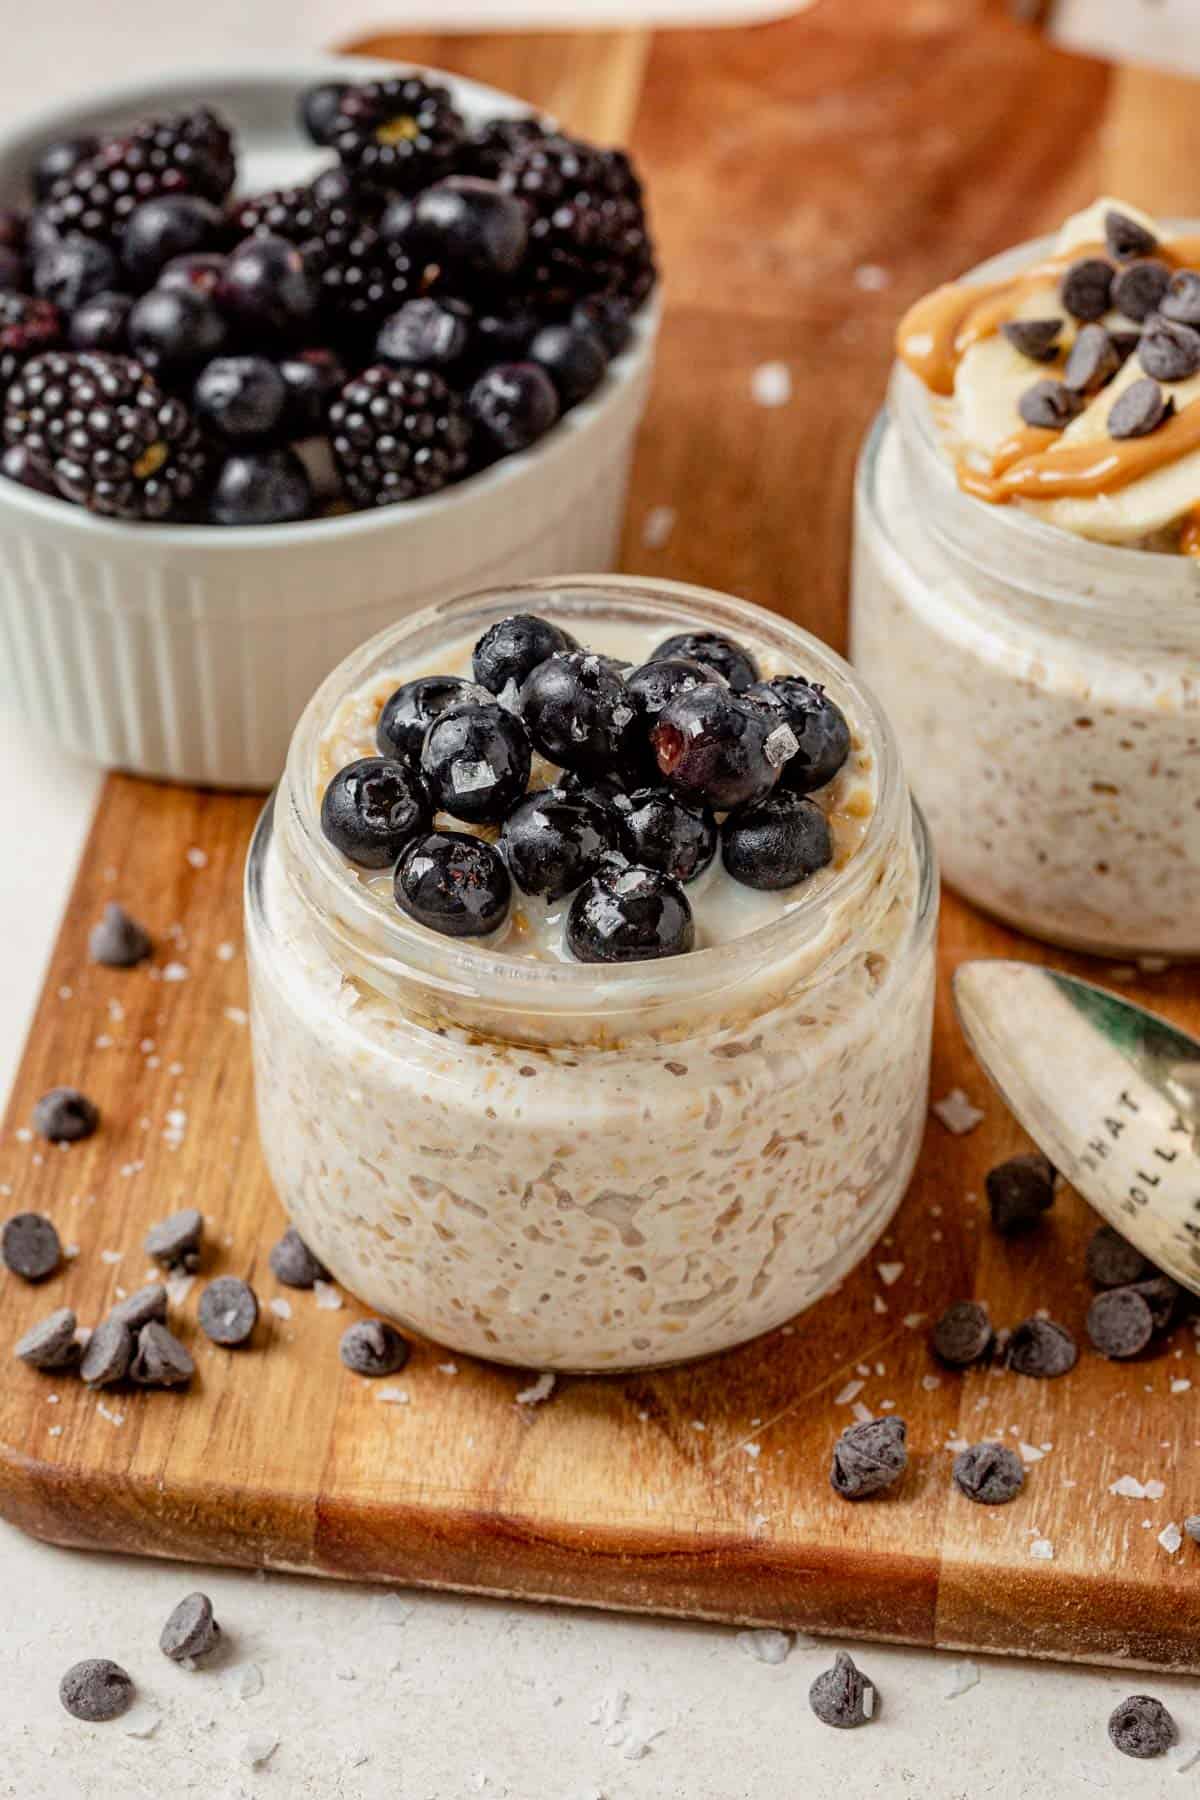
  1. Serve chilled or warm: For cold overnight steel cut oats oats, enjoy from the fridge. To warm, heat in the microwave for 1-2 minutes with a splash of milk.

Tested Tips and Tricks

  • Don’t skip toasting and simmering the oats. This enhances the nutty flavor and speeds up the softening.
  • Soak together or separately. I tried both methods and they’re nearly identical. Soaking together ensures consistency but separate jars makes them easy to grab-and-go.
  • Know what texture to expect. We’ve covered this, but it’s important to note that steel cut oats will have more chew.

Feels like Breakfast on the Beach!

bowl of turkey teriyaki vegetables and rice on a counter and then a close up of ground turkey teriyaki rice bowl
  • Thick and delicious with tons of coconut flavor
  • Takes 5 minutes to make
  • Easy to customize with your favorite toppings
  • Full of healthy fats
  • Add protein powder for a complete breakfast
  • Sweet tropical flavors

Love refreshing smoothies? Try this pitaya smoothie bowl, blueberry raspberry smoothie, or tropical kale smoothie next!

spoon dipped into a coconut smoothie bowl topped with kiwi, banana, and mango slices

Why You’ll Love This Smoothie Bowl

  • Thick enough to scoop with a spoon. Not a drink.
  • 5 minutes from freezer to bowl.
  • One blender, no extra dishes.
  • Add 25g of protein with a scoop of vanilla protein powder. Full breakfast, full morning.
  • Naturally Gluten-Free, Paleo, Dairy-Free, and Vegan. No swaps needed.
  • Pre-portion the fruit ahead so weekday mornings are zero decisions.

Ingredients You’ll Need

coconut smoothie ingredients laid out on a counter
  • Frozen banana. One whole. Banana is the texture anchor; don’t skip.
  • Frozen pineapple. ¾ cup. Pre-cut from the freezer aisle works.
  • Frozen mango. ½ cup. Same rule.
  • Full-fat coconut milk. ⅓ cup, from the can. Shake the can well before measuring or you’ll pour off only the watery part.
  • Coconut extract. Optional, ¼ teaspoon. Boosts the coconut flavor without making it taste like sunscreen. A little goes a long way.
  • Vanilla protein powder. Optional, one 25g scoop. I use Be Well by Kelly because the ingredient list is short. If you add protein powder, add an extra splash of coconut milk to keep it blendable.
  • Toppings. Whatever’s in the kitchen: shredded coconut, chia seeds, fresh fruit, granola, nut butter.

How to Make a Coconut Smoothie Bowl

Vanilla protein powder and frozen fruit in a blender
  1. Add the Frozen Fruit First. Dump all the frozen into a high-speed blender. Don’t add the liquid yet. Start dry.
coconut smoothie ingredients combined in a blender
  1. Add the Liquid Slowly. Add the coconut milk, coconut extract, and protein powder if using. Blend on low first, then high. Stop and stir or tamp down as needed. If the blender stalls, add coconut milk one tablespoon at a time until it moves. Don’t drown it.
  1. Pour and Top. Pile the toppings on, hit it with a drizzle of nut butter or honey if you want, and serve immediately. Smoothie bowls melt fast.

How to Get the Texture Right

The whole thing comes down to ratio: 2 parts frozen fruit to 1 part liquid, give or take. If your bowl is:

  • Not sweet enough (off-season fruit can taste flat): add half a frozen banana or a small drizzle of honey or maple syrup.nt
  • Too thin to scoop: add a few more chunks of frozen fruit and blend again.
  • Too thick to blend: add coconut milk one tablespoon at a time. Not all at once.
  • Stalling the blender: scrape down the sides, tamp the fruit down toward the blades, or pulse instead of run.

Coconut Smoothie Bowl Toppings

The toppings are where you make it yours. A few that work:

  • Chia seeds: crunch and fiber. Half a tablespoon goes a long way.
  • Granola: crunch. Use one with chunky clusters.
  • Shredded coconut or coconut flakes: doubles down on the coconut.
  • Nut butter: coconut almond butter, macadamia butter, or cashew butter for a tropical feel. Warm it slightly so it drizzles.
  • Extra fruit: kiwi, banana slices, mango, fresh pineapple. Sparingly, because there’s already a lot of fruit in the bowl.
  • Bee pollen, hemp hearts, or cacao nibs if you want to lean health-y.

FAQS

Why is my smoothie bowl too thin?

Too much liquid. Add more frozen fruit a handful at a time and blend until it thickens. Or remember the rule for next time: 2 parts frozen fruit to 1 part liquid, max.

Why won’t my blender blend it?

Not enough liquid, fruit not chopped small enough, or the blender isn’t powerful enough. Stop, scrape the sides, tamp the fruit toward the blades, and pulse instead of running on high.

Can I make this without protein powder?

Yes. The recipe works as-is without protein powder. If you do add protein, add an extra splash of coconut milk so it blends.

Is this smoothie bowl dairy-free and vegan?

Yes. With coconut milk and a plant-based protein powder, it’s naturally Gluten-Free, Dairy-Free, Paleo, and Vegan.

Can I prep this ahead?

Yes. Pre-portion the frozen fruit into individual zip-top bags. In the morning, dump one bag in the blender, add coconut milk and protein powder, and blend.

How do I store leftovers?

Store the smoothie base (without toppings) in an airtight container in the fridge for up to 1 day. After that, it separates and loses creaminess. Give it a stir or a quick re-blend before serving.

coconut smoothie bowl with toppings on a counter next to a peeled banana and bowl of toasted coconut
Save this Recipe!
Enter your email & I’ll send it straight to your inbox.
Please enable JavaScript in your browser to complete this form.
Tap stars to rate!
4.34 from 24 votes

Coconut Smoothie Bowl

Prep: 5 minutes
Cook: 0 minutes
Total: 5 minutes
Thick, scoopable, and the closest thing to breakfast on the beach you can pull off in five minutes. Frozen pineapple, mango, and banana blended with full-fat coconut milk and a splash of coconut extract. Add a scoop of vanilla protein powder if you want a full breakfast. The whole thing takes one blender and four ingredients you already have if you keep frozen fruit in the freezer.

Save this Recipe!

Enter your email and we’ll send it directly to you.
Please enable JavaScript in your browser to complete this form.
Servings: 1 smoothie bowl

Ingredients

  • 1 frozen banana
  • 3/4 cup frozen pineapple
  • 1/2 cup frozen mango
  • 1/3 cup full fat coconut milk shaken
  • 1/4 teaspoon coconut extract optional
  • 1 scoop (25g) vanilla protein powder optional
  • Toppings: mango, banana, granola, chia seeds, cherries, nut butter, or coconut

Instructions 

  • Add all ingredients to a highs-speed blender. Blend on high for 1-2 minutes until a smooth and thick consistency. If you don't have a high powered blender it may take a little longer or you may need to add another splash of coconut milk.
    1 frozen banana, 3/4 cup frozen pineapple, 1/2 cup frozen mango, 1/3 cup full fat coconut milk, 1/4 teaspoon coconut extract, 1 scoop (25g) vanilla protein powder
  • Pour into a bowl and top with your favorite toppings
    Toppings: mango, banana, granola, chia seeds, cherries, nut butter, or coconut
Last step! If you make this, please leave a review letting us know how it was!

Notes

 
Protein. My absolute favorite protein is Be Well By Kelly protein powder because of the quality of ingredients. It only has 3 ingredients and not added sugars. 
Tips for Thick Smoothie Bowls
  • Use frozen fruit as the base.
  • Start with less liquid and add more as needed to get the desired texture.
  • Use a high-speed blender for best results.
 

Nutrition

Serving: 1bowl | Calories: 216kcal | Carbohydrates: 55g | Protein: 2.6g | Fat: 6.1g | Cholesterol: 0mg | Sodium: 3.2mg | Fiber: 6g | Sugar: 37.9g

Nutrition information is automatically calculated, so should only be used as an approximation.

Tips for Thick Smoothie Bowls

  • Use frozen fruit as the base.
  • Start with less liquid and add more as needed.
  • Use a high-speed blender for best results.

Prep and Storage Tips

Prep ahead: Pre-portion the frozen fruit into individual zip-top bags so weekday mornings are just dump-and-blend.

Storage: Store the smoothie base in an airtight container in the fridge for up to 1 day. It separates after that.

Freezing: Store in a freezer-safe container for up to a month. Thaw in the fridge overnight, give it a stir, and pour into the bowl.

coconut smoothie bowl with all of the toppings and a spoon dipped into it

Save this Recipe!
Enter your email & I’ll send it straight to your inbox.
Please enable JavaScript in your browser to complete this form.
Tap stars to rate!
No ratings yet

Overnight Steel Cut Oats

Prep: 10 minutes
Chill Time: 8 hours
Total: 8 hours 10 minutes
This hearty batch of overnight steel cut oats starts with lightly toasted oats soaked in a 1:2 oats‑to‑liquid ratio and refrigerated for 8–12 hours. They make mornings simple, so you can wake up to a creamy, fiber‑packed breakfast all week. Enjoy them chilled or quickly warm and top any way you like! They're the perfect healthy, customizable breakfasts.

Save this Recipe!

Enter your email and we’ll send it directly to you.
Please enable JavaScript in your browser to complete this form.
Servings: 4

Ingredients

  • 1 Tablespoon unsalted butter or coconut oil
  • 1 cup steel cut oats
  • 2 cups water or equal parts water and milk for creamier oats
  • 1 teaspoon kosher salt
  • Optional toppings: chia seeds, flax seed, banana, berries, apples, nut butter, cinnamon, maple syrup, or dried fruit

Instructions 

  • Toast oats (1-2 min): Melt the butter in a medium saucepan over medium heat. Add the steel cut oats and salt, toast for 1-2 minutes, until slightly nutty.
    1 Tablespoon unsalted butter, 1 cup steel cut oats, 2 cups water, 1 teaspoon kosher salt
  • Boil and simmer (2 min): Pour in the water (or milk) and bring to a boil over high heat. Reduce to low, cover, and simmer for 1 minute then remove from the heat and cool slightly.
  • Soak (8-12 hrs): Divide into 4 jars or transfer to one big bowl. Cover and refrigerate for 8-12 hour, until the oats absorb all of the liquid and are softened and creamy. They should still have some chew to them.
  • Serve: To serve chilled, stir, add splash of milk, and top as desired. For warm oats, stir in a splash of milk and microwave for 1-2 minutes. Top and enjoy!
    Optional toppings: chia seeds, flax seed, banana, berries, apples, nut butter, cinnamon, maple syrup, or dried fruit
Last step! If you make this, please leave a review letting us know how it was!

Notes

High-Protein Overnight Steel Cut Oats: I highly recommend adding 2-3 scoops of protein to this mix to balance out the macronutrients to keep you full! I love this vanilla protein powder or this flavorless protein powder. Add an extra 2 Tbsp of milk for every scoop of protein.
Toppings to balance blood sugar: add some chia seeds and raspberries to boost the fiber even more and finish with a dollop of nut butter for healthy fats. That’s my favorite way to serve them!
Storage. Keep in the fridge in an airtight for up to 5 days.
Consistency tip. Steel cut oats have a chewier and firmer texture than typical rolled oats, so keep that in mind! For this recipe, a shorter soak = firmer and chewier texture, while a longer soak yields a creamier texture.

Nutrition

Serving: 1jar | Calories: 179kcal | Carbohydrates: 26g | Protein: 6g | Fat: 6g | Saturated Fat: 2g | Polyunsaturated Fat: 0.1g | Monounsaturated Fat: 1g | Trans Fat: 0.1g | Cholesterol: 8mg | Sodium: 610mg | Fiber: 5g | Sugar: 0.003g | Vitamin A: 87IU | Calcium: 25mg | Iron: 2mg

Nutrition information is automatically calculated, so should only be used as an approximation.

FAQs

Why toast and simmer the oats?

Toasting enhances the nutty flavor and simmering accelerates the softening processes (recommended because steel cut oats are firmer and chewier than rolled oats).

Will they get slimy?

Using the right ratio of 1:2 oats to liquid makes sure they’re not slimy or mushy. Steel cut oats tend to be chewier anyway, so they’re hardly ever slimy.

Can I divide before soaking?

You can soak them in one big bowl or divide them into meal prep jars then soak. I’ve tried both and there isn’t much of a difference.

How long do they last in the fridge?

They stay fresh and delicious in an airtight container for up to 5 days. Day 1 they’ll be slightly firmer, and by day 5 they’re ultra-creamy.

Can I eat them cold?

Absolutely—cold oats stay creamy with a splash of milk and are perfect for grab-and-go mornings. You can zap them in the microwave with a splash of milk too if you want them warm and cozy.

This post may contain affiliate links. Read our disclosure policy.

Leave a comment

Your email address will not be published. Required fields are marked *

Recipe Rating