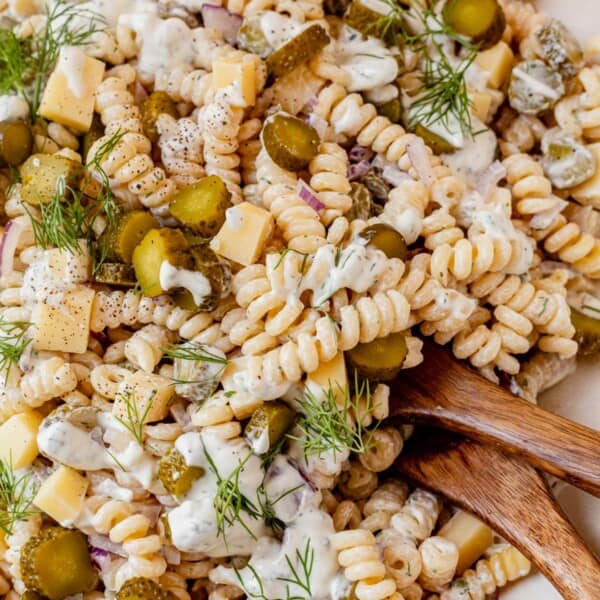
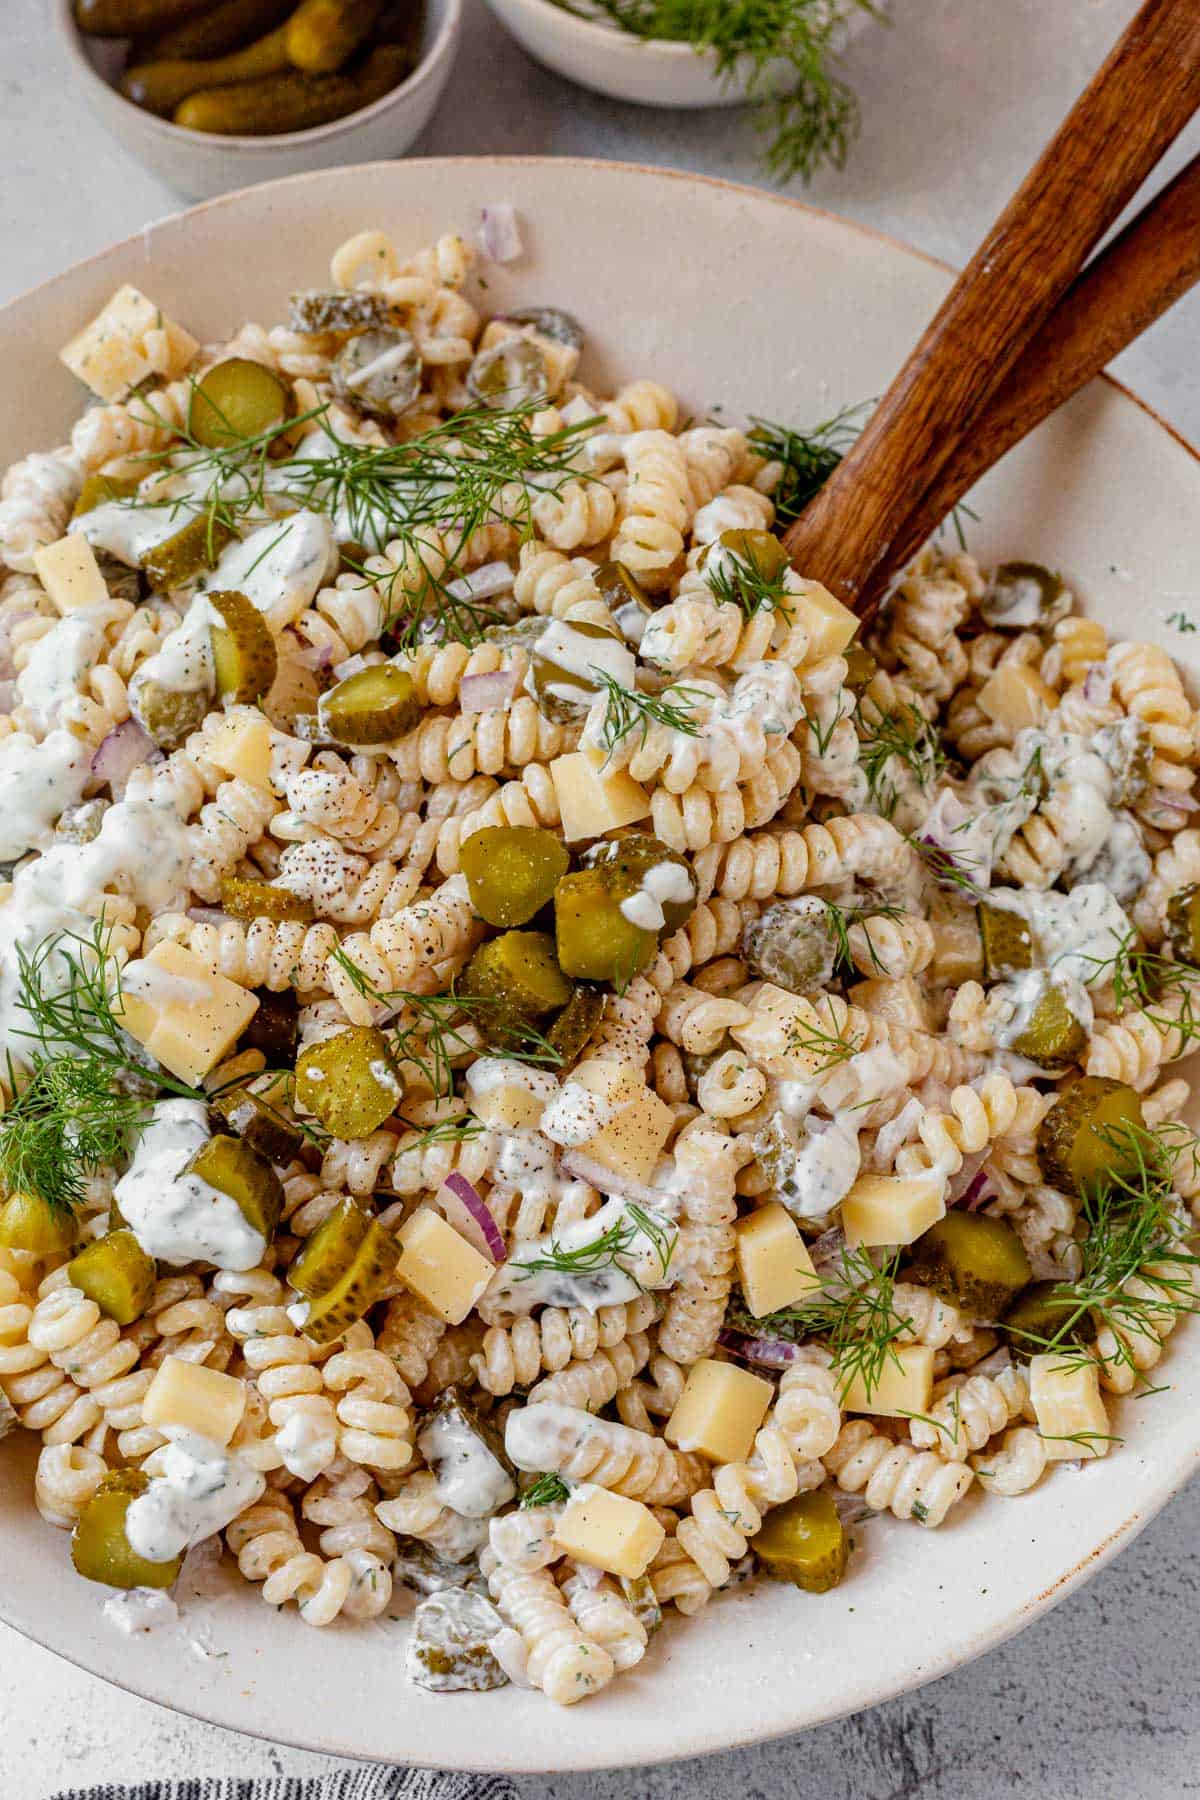
This dill pickle pasta salad will become an instant potluck side dish favorite! You only need 4 simple ingredients including tender spiral pasta, cheddar cheese, dill pickles, and red onion. Make a quick ranch dressing with pickle juice for the most delicious cookout recipe.

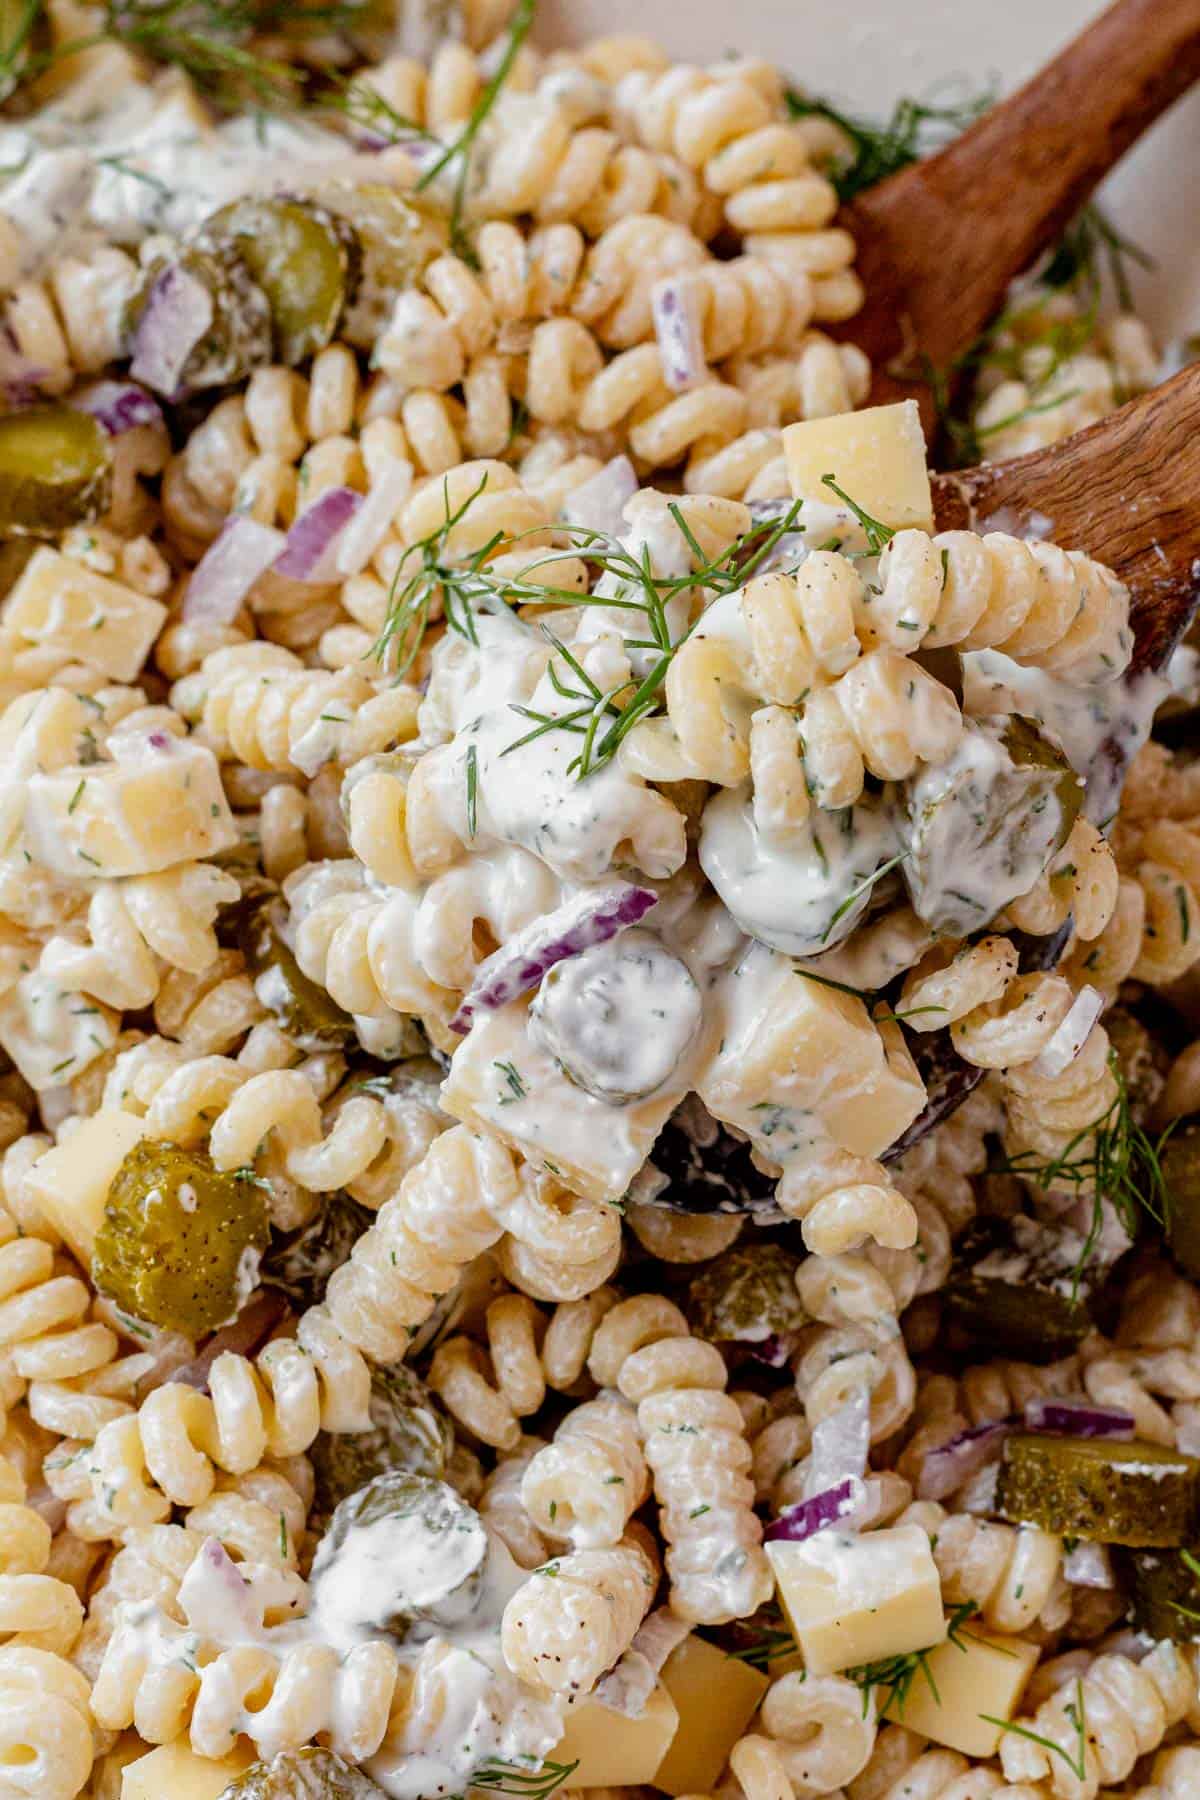
Dill pickles are the perfect addition to your BBQ side dish because they’re crunchy, flavorful, go well with ranch dressing. Combine that with sharp cheddar and red onion and you have the perfect pasta salad recipe.
We make pasta salads on repeat all summer long. Whether it’s BLT pasta salad, Mexican street corn pasta salad, or roasted vegetable pasta salad.
And this dill pickle pasta salad is up there with the all time favorites. Simple ingredients make it easy to whip up. But it isn’t lacking in flavor! Use the pickle juice to thin out the ranch dressing for double dill pickle flavor.

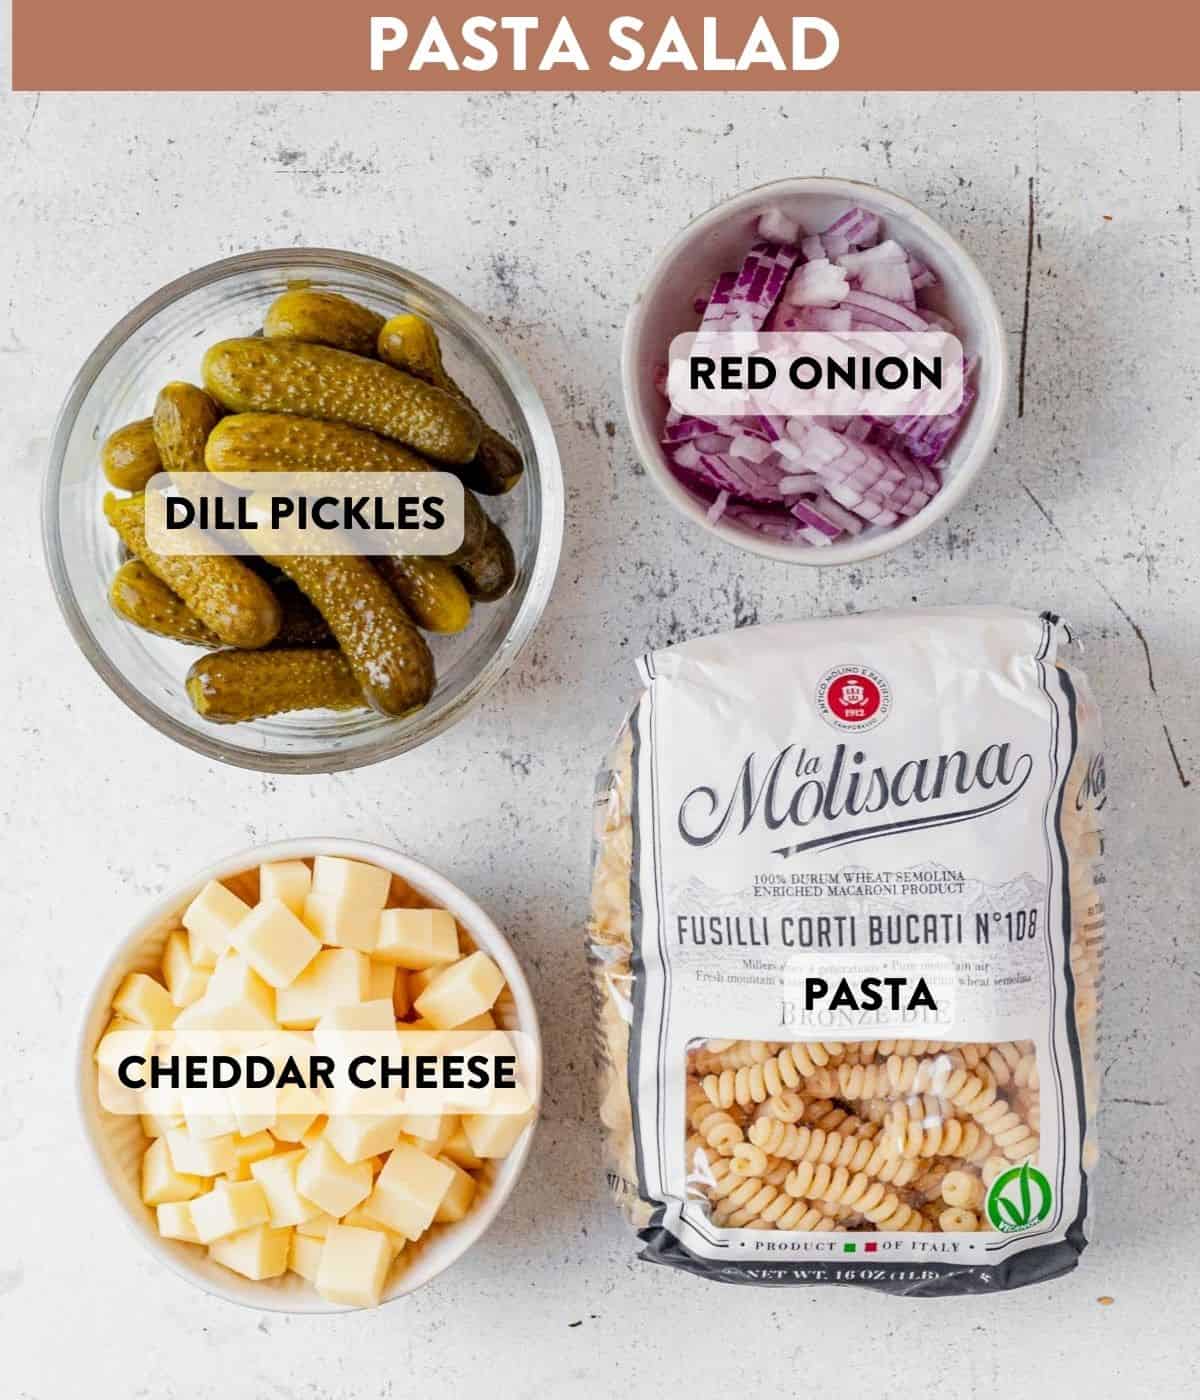
Ingredients You Need
Here are the simple recipes to make this dill pickle pasta salad recipe. Jump to the recipe card for exact measurements.
Pasta Salad
- 1 lb short cut pasta: I used fuzilli corti bucati, but any type of fusilli, rotini, bowtie, or gemelli pasta work here.
- Mini dill pickles: I love the mini dill pickles cut into small rounds. They’re the perfect bite! You can also use regular dill pickles cut into quarters.
- White cheddar cheese: the creamy sharp flavor and texture are a must!
- Red onion: I love red onion in my pasta salads and green salads!
- Fresh dill: for topping!

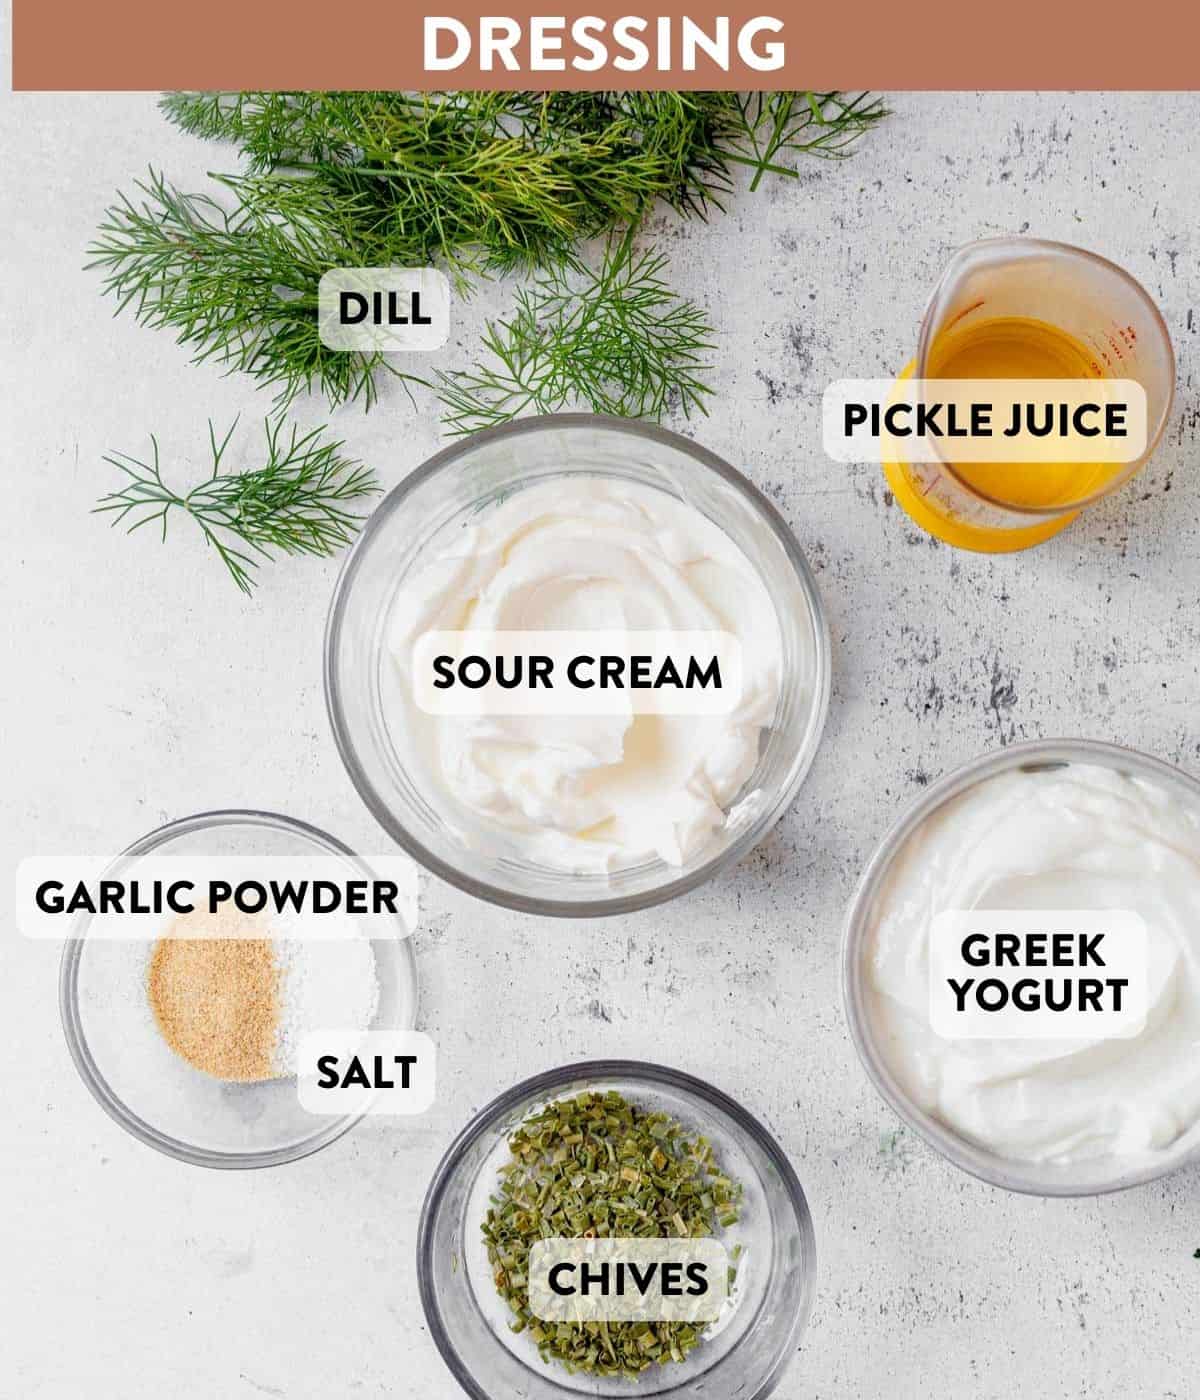
Dill Pickle Ranch Dressing
- Greek yogurt: I like the added protein and neutral taste of plain yogurt, but you could also use mayo.
- Sour cream: a tangy addition to the yogurt to balance the flavors.
- Pickle juice: for extra pickle flavor and to thin out the dressing.
- Fresh dill and chives: for the best ranch flavor.
- Seasoning: garlic powder and salt.

How to Make Dill Pickle Pasta Salad
Here are the easy steps, with photos, to make pasta salad with dill pickles. Skip to the recipe card for full instructions.
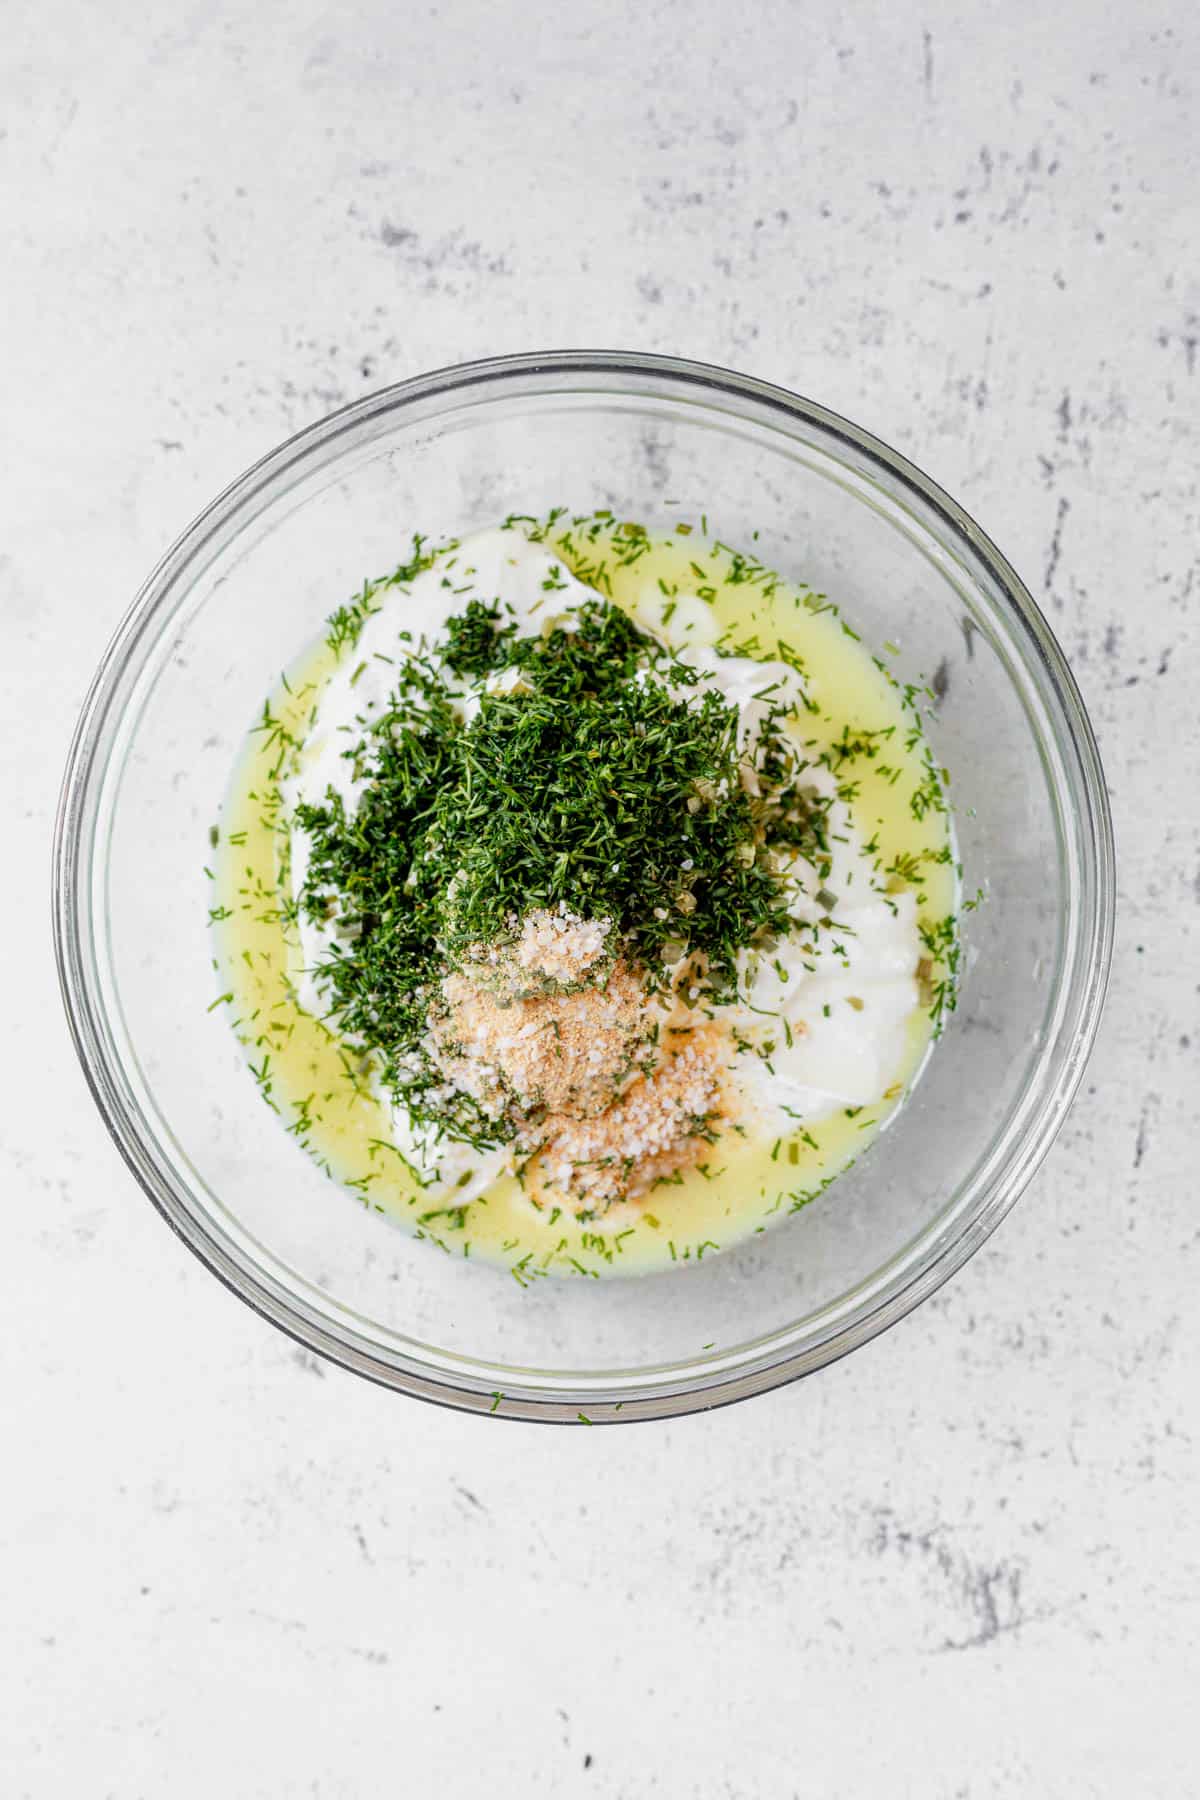
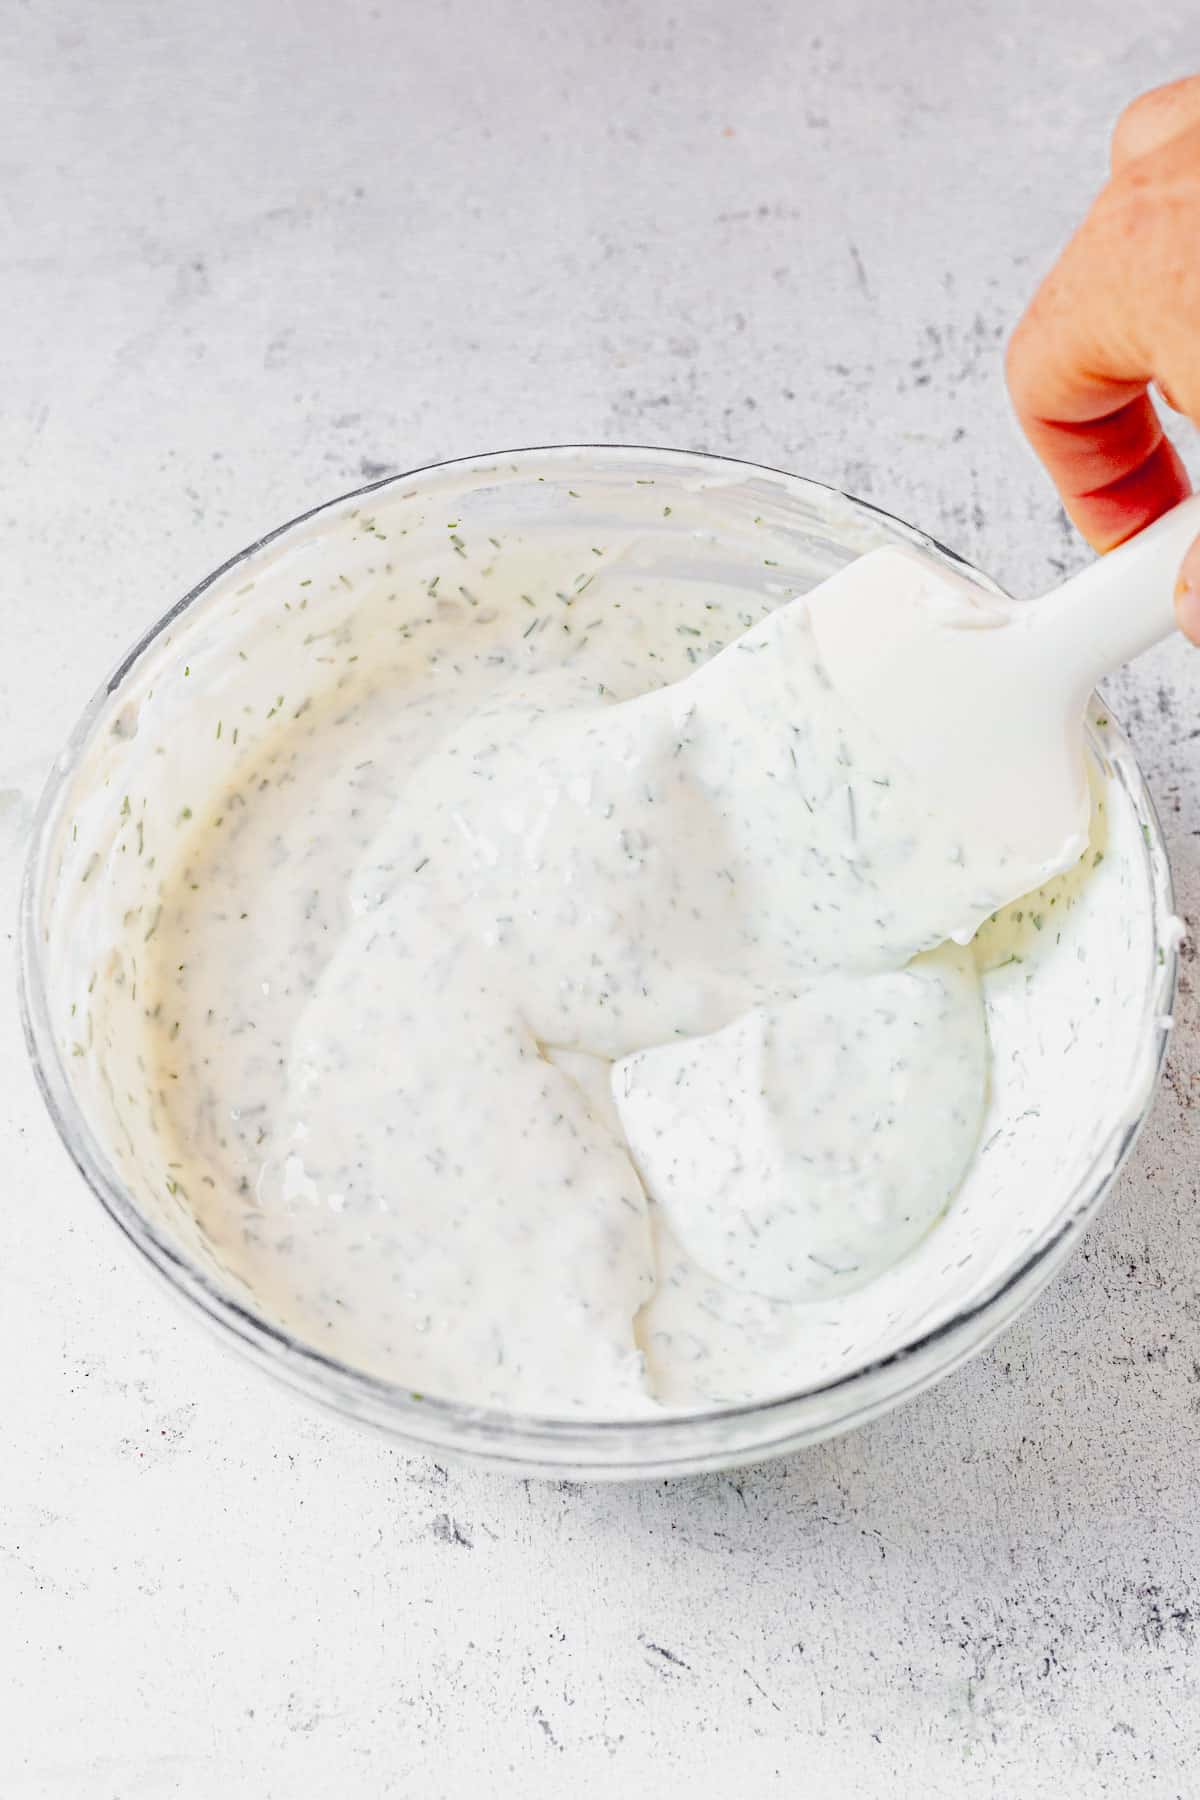
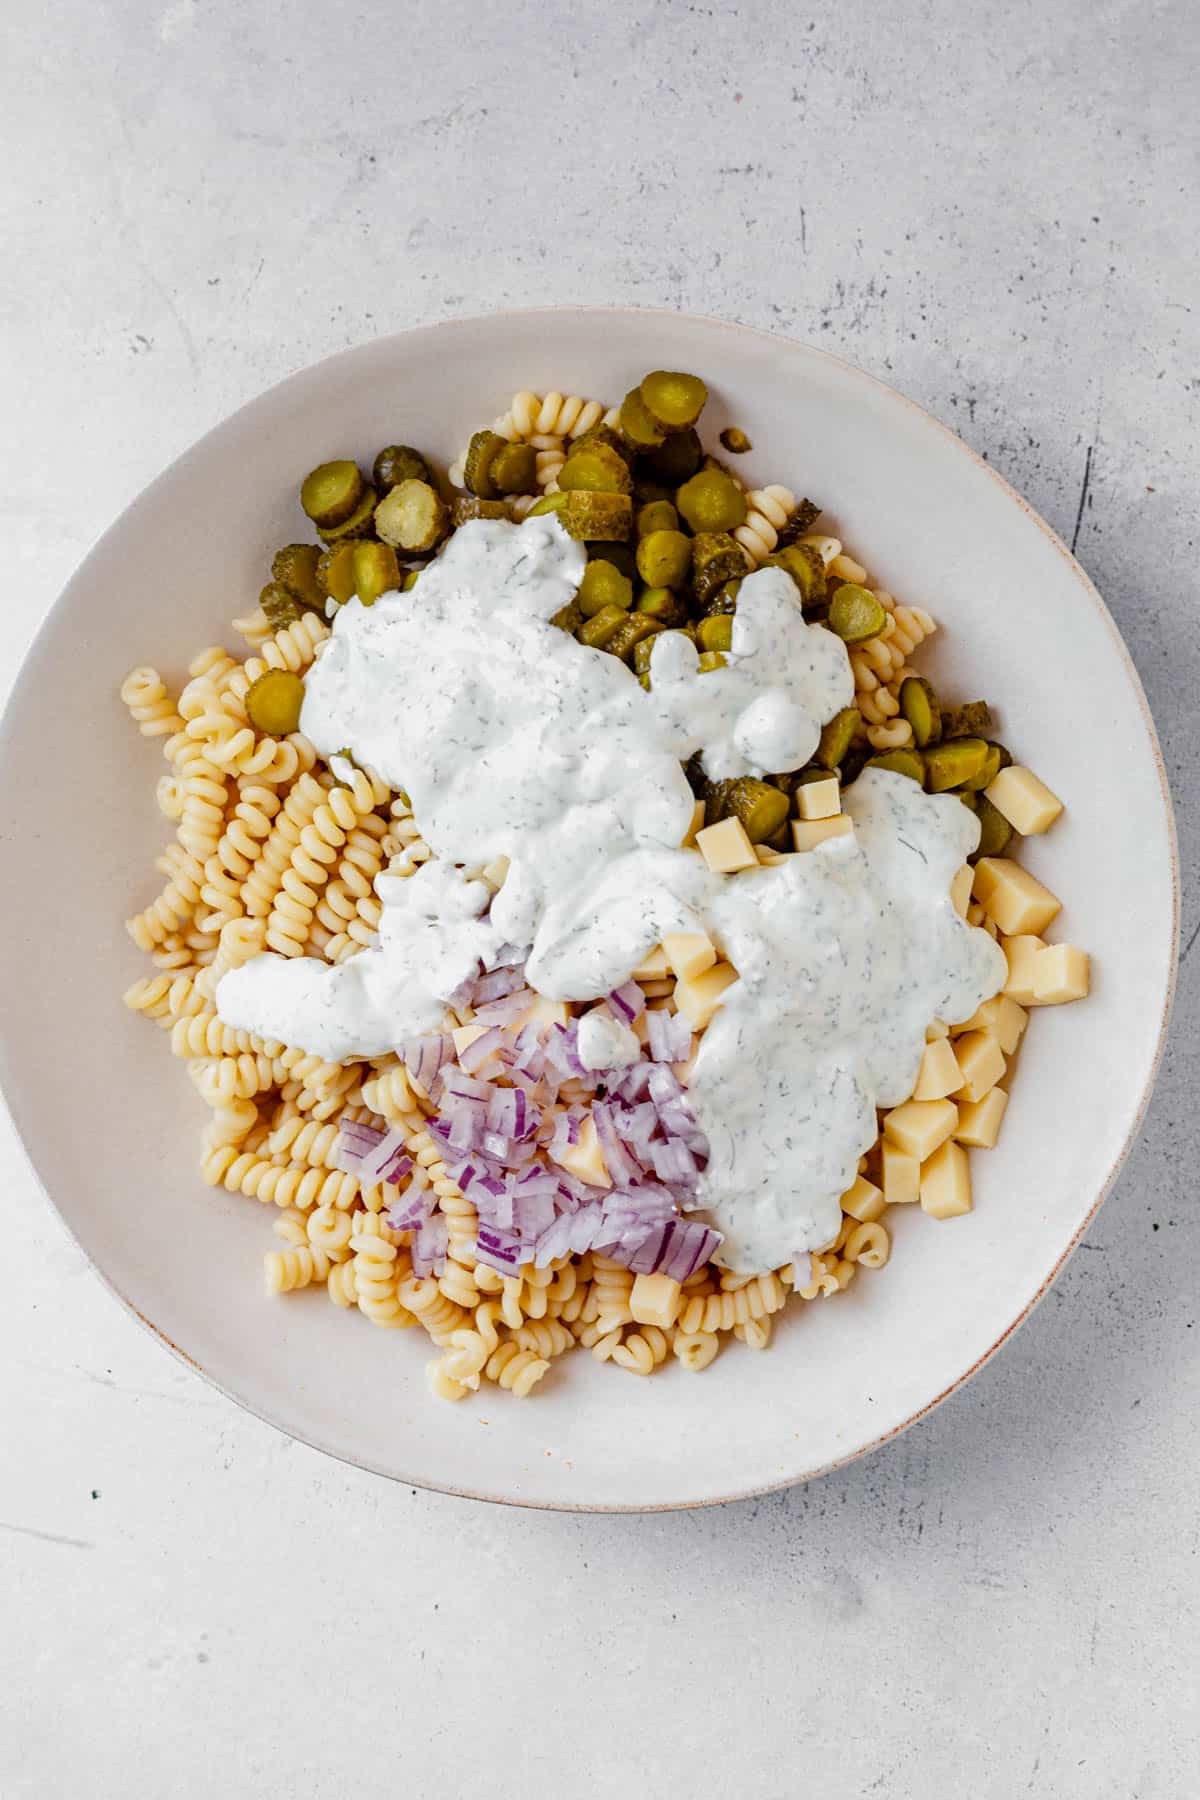
- Make dressing: add the dill pickle ranch dressing ingredients to a medium bowl.
- Mix: stir to combine and set aside.
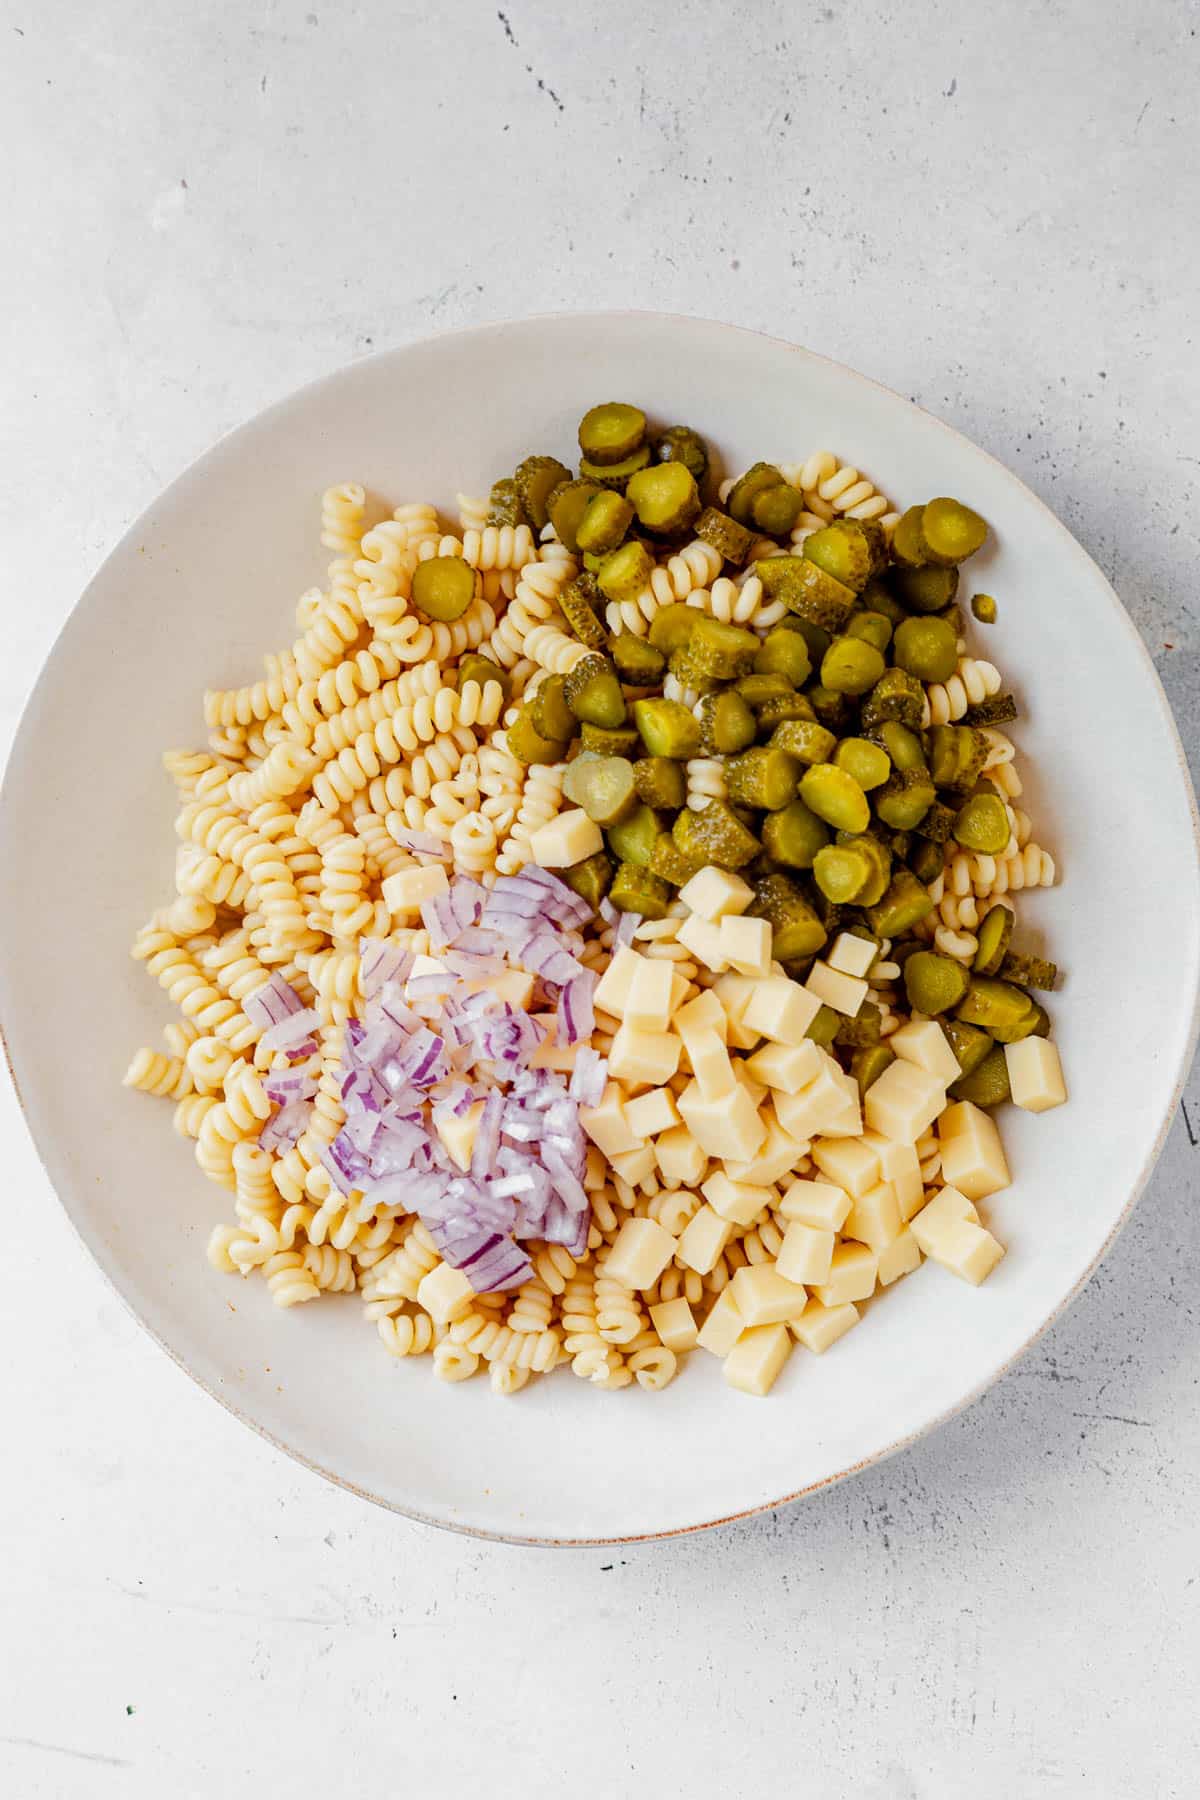
- Make the pasta salad: cook the pasta according to the package directions, drain, and rinse with cold water. Add it to a bowl with dill pickles, cheddar cheese, and red onion.
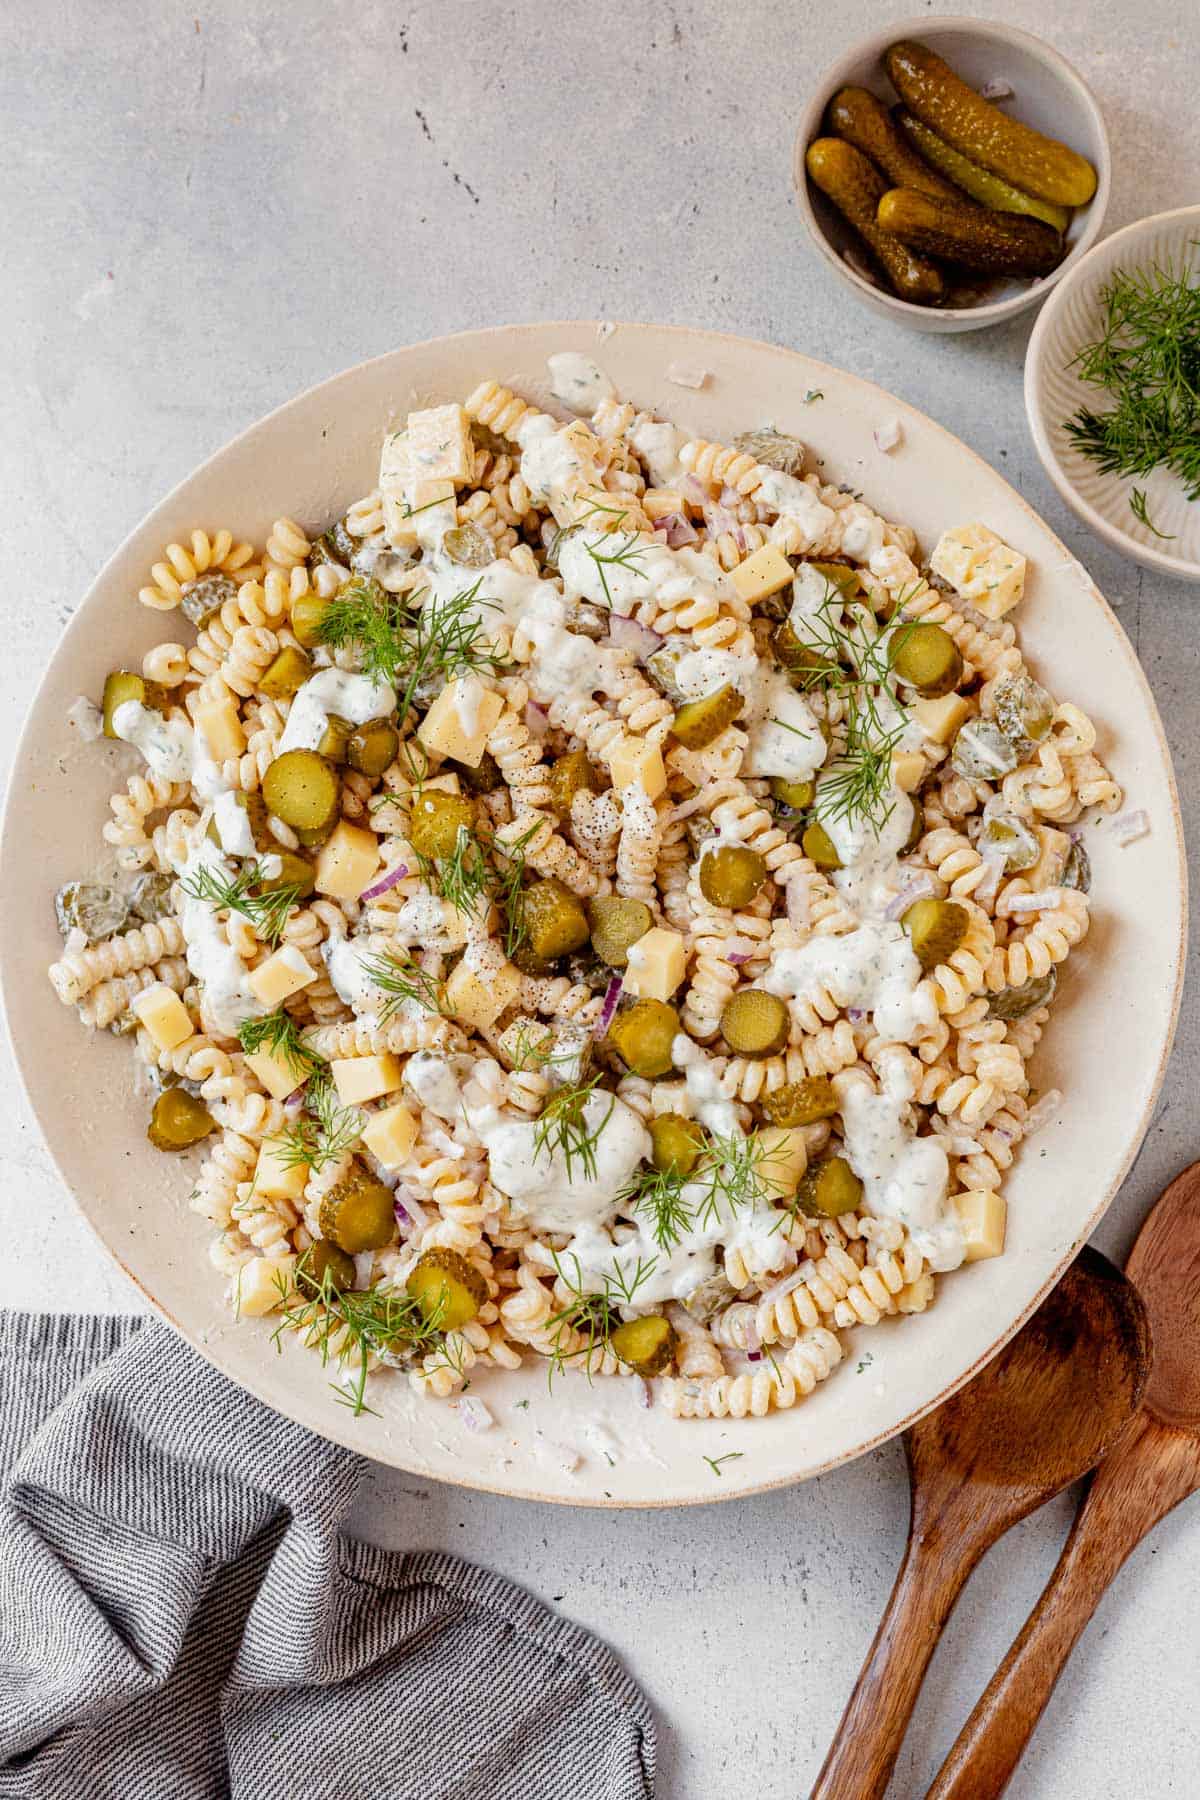
- Toss to combine: Pour the dressing on top and toss to coat. Garnish with more dill and serve. You can serve it at room temperature or chill it for up to 1 hour for cold pasta salad.
Make ahead tip! If you make this more than 1 hour in advance and/or plan to take it somewhere, leave the dressing and mix up to 1 hour before serving.


Pasta Salad Tips
- Scoop out the little garlicy bits from the pickle juice to add it to the dressing for the best flavor.
- You can use dried dill and dried chives in a pinch, but fresh is best!
- Serve it at room temperature or chill it for up to 1 hour.
- This will last for up to a day or so, but after that the pasta starts to absorb a good amount of the dressing. You may want to make a little more and toss it again before serving leftovers!
How to Store
Store leftover dill pickle pasta salad in the fridge for up to 5 days. After a day or so it will start to absorb a lot of the dressing.
You can make another half batch of dressing, or if you know you’ll have leftovers, save some of the pasta cooking water and mix it with a little of the dressing before tossing and store it for topping leftovers.

More Pasta Salad Recipes
Feels like Breakfast on the Beach!

- Thick and delicious with tons of coconut flavor
- Takes 5 minutes to make
- Easy to customize with your favorite toppings
- Full of healthy fats
- Add protein powder for a complete breakfast
- Sweet tropical flavors
Love refreshing smoothies? Try this pitaya smoothie bowl, blueberry raspberry smoothie, or tropical kale smoothie next!

Why You’ll Love This Smoothie Bowl
- Thick enough to scoop with a spoon. Not a drink.
- 5 minutes from freezer to bowl.
- One blender, no extra dishes.
- Add 25g of protein with a scoop of vanilla protein powder. Full breakfast, full morning.
- Naturally Gluten-Free, Paleo, Dairy-Free, and Vegan. No swaps needed.
- Pre-portion the fruit ahead so weekday mornings are zero decisions.
Ingredients You’ll Need

- Frozen banana. One whole. Banana is the texture anchor; don’t skip.
- Frozen pineapple. ¾ cup. Pre-cut from the freezer aisle works.
- Frozen mango. ½ cup. Same rule.
- Full-fat coconut milk. ⅓ cup, from the can. Shake the can well before measuring or you’ll pour off only the watery part.
- Coconut extract. Optional, ¼ teaspoon. Boosts the coconut flavor without making it taste like sunscreen. A little goes a long way.
- Vanilla protein powder. Optional, one 25g scoop. I use Be Well by Kelly because the ingredient list is short. If you add protein powder, add an extra splash of coconut milk to keep it blendable.
- Toppings. Whatever’s in the kitchen: shredded coconut, chia seeds, fresh fruit, granola, nut butter.
How to Make a Coconut Smoothie Bowl

- Add the Frozen Fruit First. Dump all the frozen into a high-speed blender. Don’t add the liquid yet. Start dry.

- Add the Liquid Slowly. Add the coconut milk, coconut extract, and protein powder if using. Blend on low first, then high. Stop and stir or tamp down as needed. If the blender stalls, add coconut milk one tablespoon at a time until it moves. Don’t drown it.

- Pour and Top. Pile the toppings on, hit it with a drizzle of nut butter or honey if you want, and serve immediately. Smoothie bowls melt fast.
Coconut Smoothie Bowl Toppings
The toppings are where you make it yours. A few that work:
- Chia seeds: crunch and fiber. Half a tablespoon goes a long way.
- Granola: crunch. Use one with chunky clusters.
- Shredded coconut or coconut flakes: doubles down on the coconut.
- Nut butter: coconut almond butter, macadamia butter, or cashew butter for a tropical feel. Warm it slightly so it drizzles.
- Extra fruit: kiwi, banana slices, mango, fresh pineapple. Sparingly, because there’s already a lot of fruit in the bowl.
- Bee pollen, hemp hearts, or cacao nibs if you want to lean health-y.
Prefer a more decadent smoothie? Try our cake batter protein shake, chocolate peanut butter protein smoothie, or chocolate and cherry smoothie.
FAQS
Too much liquid. Add more frozen fruit a handful at a time and blend until it thickens. Or remember the rule for next time: 2 parts frozen fruit to 1 part liquid, max.
Not enough liquid, fruit not chopped small enough, or the blender isn’t powerful enough. Stop, scrape the sides, tamp the fruit toward the blades, and pulse instead of running on high.
Yes. The recipe works as-is without protein powder. If you do add protein, add an extra splash of coconut milk so it blends.
Yes. With coconut milk and a plant-based protein powder, it’s naturally Gluten-Free, Dairy-Free, Paleo, and Vegan.
Yes. Pre-portion the frozen fruit into individual zip-top bags. In the morning, dump one bag in the blender, add coconut milk and protein powder, and blend.
Store the smoothie base (without toppings) in an airtight container in the fridge for up to 1 day. After that, it separates and loses creaminess. Give it a stir or a quick re-blend before serving.

Coconut Smoothie Bowl
Save this Recipe!
Ingredients
- 1 frozen banana
- 3/4 cup frozen pineapple
- 1/2 cup frozen mango
- 1/3 cup full fat coconut milk shaken
- 1/4 teaspoon coconut extract optional
- 1 scoop (25g) vanilla protein powder optional
- Toppings: mango, banana, granola, chia seeds, cherries, nut butter, or coconut
Instructions
- Add all ingredients to a highs-speed blender. Blend on high for 1-2 minutes until a smooth and thick consistency. If you don't have a high powered blender it may take a little longer or you may need to add another splash of coconut milk.1 frozen banana, 3/4 cup frozen pineapple, 1/2 cup frozen mango, 1/3 cup full fat coconut milk, 1/4 teaspoon coconut extract, 1 scoop (25g) vanilla protein powder
- Pour into a bowl and top with your favorite toppingsToppings: mango, banana, granola, chia seeds, cherries, nut butter, or coconut
Notes
- Use frozen fruit as the base.
- Start with less liquid and add more as needed to get the desired texture.
- Use a high-speed blender for best results.
Nutrition
Nutrition information is automatically calculated, so should only be used as an approximation.
Tips for Thick Smoothie Bowls
- Use frozen fruit as the base.
- Start with less liquid and add more as needed.
- Use a high-speed blender for best results.
Prep and Storage Tips
Prep ahead: Pre-portion the frozen fruit into individual zip-top bags so weekday mornings are just dump-and-blend.
Storage: Store the smoothie base in an airtight container in the fridge for up to 1 day. It separates after that.
Freezing: Store in a freezer-safe container for up to a month. Thaw in the fridge overnight, give it a stir, and pour into the bowl.

More Smoothie Recipes
Dill Pickle Pasta Salad
Save this Recipe!
Ingredients
Pasta Salad
- 1 lb short cut pasta such as rotini fusilli, or bowtie I used chickpea gemelli
- 2 cups mini dill pickles sliced into rounds
- 1 1/2 cups 6-8 ounces cubed white cheddar cheese
- 1 small red onion thinly sliced
- Fresh dill to taste
Ranch Dressing
- 1 cup plain Greek yogurt or mayonnaise
- 1/3 cup sour cream
- 1/4 cup pickle juice plus more to taste
- 1 Tablespoon fresh chopped dill
- 2 Tablespoons fresh chopped chives
- 1 teaspoon garlic powder
- Kosher salt to taste
Instructions
- Bring a large pot of salted water to a boil. Add the pasta and cook according to package instructions until al dente. Drain and rinse under cold water to stop the cooking process and cool the pasta.
- Mix the dressing ingredients together in a medium bowl. Add more pickle juice a Tablespoon at a time to thin it if needed.
- Add the cooked pasta, pickles, cheddar cheese, and red onion to a serving bowl. I like to reserve some of each to garnish at the end. Drizzle 3/4 of the dressing on top and toss to coat. Before serving, garnish with any remaining ingredients. Drizzle with the remaining dressing, top with fresh dill and fresh cracked black pepper.
Nutrition
Nutrition information is automatically calculated, so should only be used as an approximation.
This post may contain affiliate links. Read our disclosure policy.


